O que você precisa
-
-
Remove the faceplate by carefully prying around the edge.
-
Loosen the clips on the edge, then pull the faceplate off. Be aware that there is double stick tape holding it in place(indicated by the red arrow).
-
-
-
-
Remove the four PH000 Phillips screws outlined in red.
-
Gently remove the board. As you lift the board, the computer chip (outlined in orange) will separate from the motherboard.
There is a step missing in between your step 5 and step 6! There is no description of how to remove the small sister board partly buried under the lens assembly! There's an inaccessible screw on the small board but the board is shown already removed in Step 6. How did you do that?
It doesn't need to be removed. Remove the two screws under the lense in the front, then continue on. The whole motherboard will come out in one piece.
-
-
-
Remove the single screw.
This is very poor picture quality.
How to replace the ribbon strip in step 4?
This was NOT the last screw for the Hero 4 Black that I have. Refer to the picture in step 3. Both screws in the lower right (on either side of the E141021 marking) had to be removed. I'm pretty sure this is an oversight in the original instructions because there is no way I could separate the motherboard without removing those long screws. There was double sided sticky film over that entire section, but I gently pried the film back enough to get access to the screw heads.
-
-
-
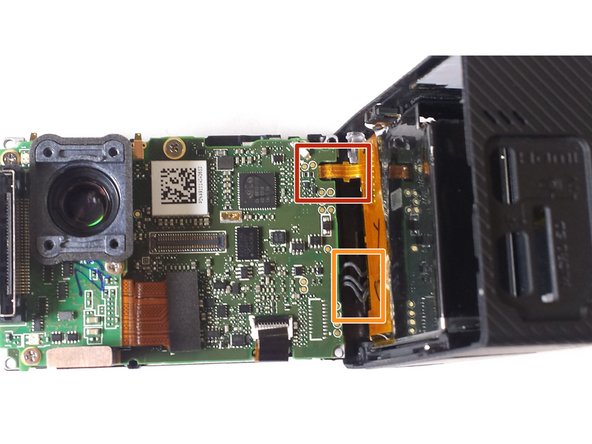
At the top of the ribbon strip, there is a black clip that needs to popped up.
There is a small piece of black tape on top of the connector. Take it off before then flip up and pull ribbon out. You can save and reuse the tape easily.
-
To reassemble your device, follow these instructions in reverse order.
To reassemble your device, follow these instructions in reverse order.
Cancelar: não concluí este guia.
14 outras pessoas executaram este guia.
5Comentários do guia
Just finished replacing the lens in the GoPro 4 Black here at work (that I dropped and broke). Other than a missing step and struggling with reconnecting the last ribbon cable during reassembly, it when well. After seeing these instructions, I was confident I could replace the lens. Thanks for posting this. It was very helpful.
How do people manage to get the last ribbon cable in place?
It's tricky. Reconnecting that small ribbon cable took me the longest of all of the steps to complete. I used the curved needle tweezers in the kit. It can be done, so keep trying.
sam -
I'm looking at the flags and it is saying that this is a archived version and I should use the update version. But I don't know how to find that.
Sorry about that! It looks like a new set of guides is in the works, but nothing has been published as yet. So for the moment, the flag is misleading, and this is the only available version of the guide.


