Ir para o conteúdo principal

Galaxy Note10 Plus Loudspeaker Replacement

O que você precisa

  1. Galaxy Note10 Plus Loudspeaker Replacement, Heat the rear cover: passo 1, imagem 1 %32
    • Completely power off your phone before you begin disassembly.

    • Prepare an iOpener and apply it to the left edge of the rear cover for one minute.

    • A hair dryer, heat gun, or hot plate may also be used, but be careful not to overheat the phone—the display and internal battery are both susceptible to heat damage.

  2. Galaxy Note10 Plus Loudspeaker Replacement, Insert an opening pick: passo 2, imagem 1 %32 Galaxy Note10 Plus Loudspeaker Replacement, Insert an opening pick: passo 2, imagem 2 %32 Galaxy Note10 Plus Loudspeaker Replacement, Insert an opening pick: passo 2, imagem 3 %32
    • Apply a suction cup to the heated edge of the rear cover, as close to the edge as possible.

    • If your rear cover is badly cracked, covering it with a layer of clear packing tape may allow the suction cup to adhere. Alternatively, very strong tape may be used instead of the suction cup. If all else fails, you can superglue the suction cup to the broken cover.

    • Pull up on the suction cup with strong, steady force to create a gap between the rear cover and the frame.

    • Depending on the age of your phone, this may be difficult. If you are having trouble, apply more heat to the edge and try again.

    • Insert the point of an opening pick into the gap.

  3. Galaxy Note10 Plus Loudspeaker Replacement, Begin to slice the adhesive: passo 3, imagem 1 %32 Galaxy Note10 Plus Loudspeaker Replacement, Begin to slice the adhesive: passo 3, imagem 2 %32 Galaxy Note10 Plus Loudspeaker Replacement, Begin to slice the adhesive: passo 3, imagem 3 %32
    • Slide the opening pick along the left edge towards the bottom left corner to slice the adhesive.

    • Don't insert the opening pick more than halfway into the phone or you risk damaging internal components.

    • Leave the pick inserted in the bottom left corner to prevent the adhesive from re-sealing.

  4. Galaxy Note10 Plus Loudspeaker Replacement, Slice around the perimeter of the phone: passo 4, imagem 1 %32 Galaxy Note10 Plus Loudspeaker Replacement, Slice around the perimeter of the phone: passo 4, imagem 2 %32 Galaxy Note10 Plus Loudspeaker Replacement, Slice around the perimeter of the phone: passo 4, imagem 3 %32
    • Repeat the previous heating and cutting procedure for the remaining three sides of the phone.

    • Leave an opening pick on each side as you continue to the next to prevent the adhesive from resealing.

    • The rear cover will begin to separate from the phone as you finish all sides of the phone.

  5. Galaxy Note10 Plus Loudspeaker Replacement, Lift off the rear cover: passo 5, imagem 1 %32 Galaxy Note10 Plus Loudspeaker Replacement, Lift off the rear cover: passo 5, imagem 2 %32
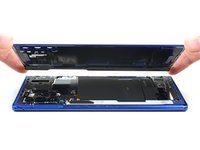
    • Lift the rear cover straight up to remove it.

    • Follow this guide to reinstall the rear cover and replace the adhesive.

    • Be sure to turn on your device and test your repair before installing new adhesive and resealing the device.

    • If you're using Tesa tape to reattach components, follow this guide.

  6. Galaxy Note10 Plus Loudspeaker Replacement, Lift up the metal cover: passo 6, imagem 1 %32
    • Use a Phillips screwdriver to remove the five 4 mm screws securing the wireless charging coil.

  7. Galaxy Note10 Plus Loudspeaker Replacement: passo 7, imagem 1 %32 Galaxy Note10 Plus Loudspeaker Replacement: passo 7, imagem 2 %32 Galaxy Note10 Plus Loudspeaker Replacement: passo 7, imagem 3 %32
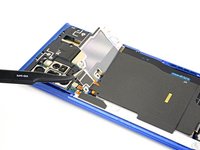
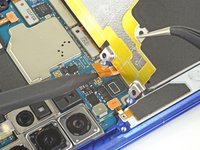
    • Use a pair of tweezers to lift up and flip back the metal shield covering the battery connector.

  8. Galaxy Note10 Plus Loudspeaker Replacement, Disconnect the battery: passo 8, imagem 1 %32 Galaxy Note10 Plus Loudspeaker Replacement, Disconnect the battery: passo 8, imagem 2 %32
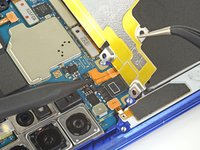
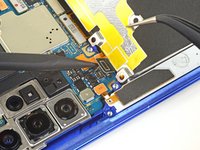
    • While holding the metal shield up and out of the way, use the pointed end of a spudger to pry up the battery connector to disconnect it.

  9. Galaxy Note10 Plus Loudspeaker Replacement, Disconnect the wireless charging coil: passo 9, imagem 1 %32 Galaxy Note10 Plus Loudspeaker Replacement, Disconnect the wireless charging coil: passo 9, imagem 2 %32
    • Use the pointed end of a spudger to disconnect the wireless charging coil connector from the motherboard.

  10. Galaxy Note10 Plus Loudspeaker Replacement, Remove the wireless charging coil: passo 10, imagem 1 %32 Galaxy Note10 Plus Loudspeaker Replacement, Remove the wireless charging coil: passo 10, imagem 2 %32 Galaxy Note10 Plus Loudspeaker Replacement, Remove the wireless charging coil: passo 10, imagem 3 %32
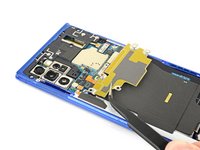
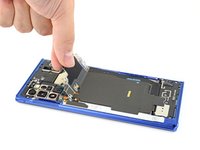
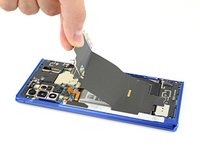
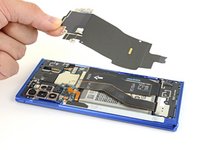
    • Tilt the metal shielding up so you can grip it with your fingers.

    • Peel the wireless charging coil up and away from the device.

    • The wireless charging coil is secured to the phone with some light adhesive.

    • Remove the wireless charging coil.

  11. Galaxy Note10 Plus Loudspeaker Replacement, Remove the loudspeaker screws: passo 11, imagem 1 %32
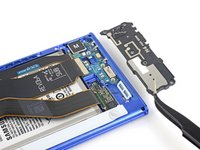
    • Use a Phillips screwdriver to remove the five 4 mm screws securing the loudspeaker.

  12. Galaxy Note10 Plus Loudspeaker Replacement, Remove the loudspeaker: passo 12, imagem 1 %32 Galaxy Note10 Plus Loudspeaker Replacement, Remove the loudspeaker: passo 12, imagem 2 %32 Galaxy Note10 Plus Loudspeaker Replacement, Remove the loudspeaker: passo 12, imagem 3 %32
    • Use a pair of tweezers to remove the loudspeaker.

Conclusão

Compare your new replacement part to the original part—you may need to transfer remaining components or remove adhesive backings from the new part before installing.

To reassemble your device, follow the above steps in reverse order.

Take your e-waste to an R2 or e-Stewards certified recycler.

Repair didn’t go as planned? Try some basic troubleshooting, or ask our Answers community for help.

3 outras pessoas executaram este guia.

Carsten Frauenheim

Membro desde: 03/10/20

113.718 Reputação

Autoria de 338 guias

Equipe

iFixit Membro de iFixit

Staff

Membros da 135

Autoria de 16.817 guias

Um comentário

Grazie per la guida, ho sostituito l'altoparlante e il cellulare è come nuovo

Roberto Di Santolo - Responder
Adicione um comentário

Exibir estatísticas:

Últimas 24 horas: 1

Últimos 7 dias: 18

Últimos 30 dias: 70

Duração total: 2,179