Introdução
If your battery is no longer charging or holding a charge you may need to replace it, in this guide you will learn exactly how to replace the battery in your tablet.
O que você precisa
-
-
-
There are two screws on the side with the micro USB power port. Remove the two 2mm x 0.5mm screws with a Phillips #0 Screwdriver head.
 Pergunte ao FixBot
-
-
-
Pry off the plastic backing with the spudger and the plastic opening tools. Anything that can provide enough leverage and not conduct electricity will also work for this purpose.
-
-
-
-
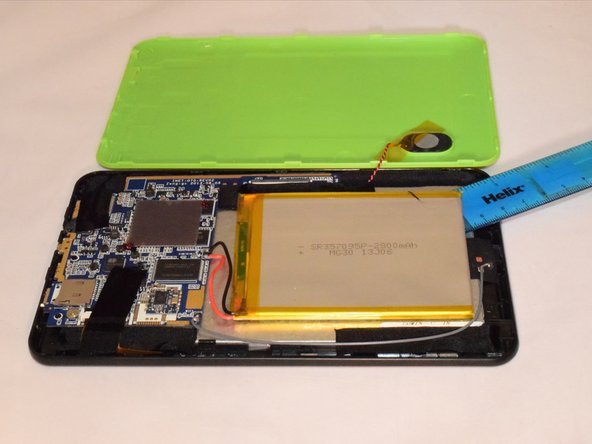
3. Once you pry off the plastic backing, you will expose the battery.
-
-
Ferramenta utilizada neste passo:Plastic Cards$2.99
-
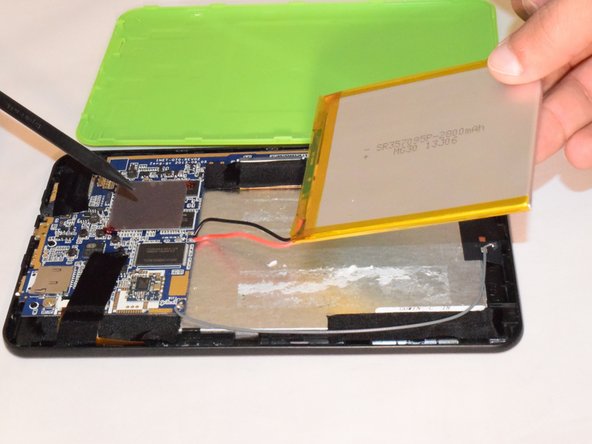
4. Remove the tape holding the battery to the plastic frame. The battery is glued to the back of the LED. Pry the battery off the LED using a plastic card.
-
-
-
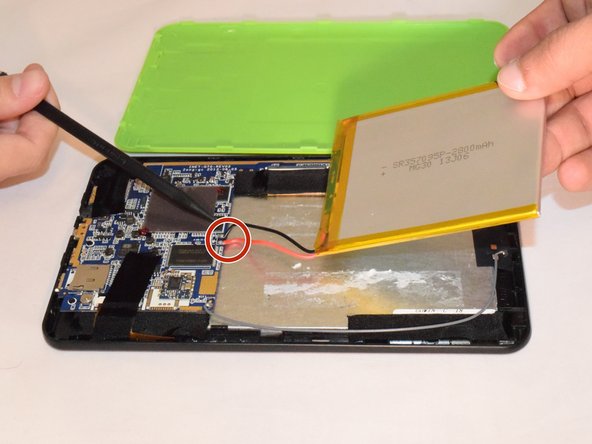
If replacing the battery, unplug the black and red wires gently from the hardware and take off the battery .
-
If not replacing it, do not disconnect the red and black wires.
-
-



To reassemble your device, follow these instructions in reverse order. Note, you need to solder the battery wires onto the motherboard.
Cancelar: não concluí este guia.
2 outras pessoas executaram este guia.

Equipe

Eastern Washington University, Team 1-1, Rowley SU 2015 Membro de Eastern Washington University, Team 1-1, Rowley SU 2015
EWU-ROWLEY-SU15S1G1
4 Membros
Autoria de 10 guias
