Introdução
To replace the battery you will need a sharp edged tool, be sure to be careful. The glue on the battery is sticky and hard to get off.
O que você precisa
-
-
With a J00 Philips head screwdriver, unscrew the two 4mm black screws located at the bottom of the device.
 Pergunte ao FixBot
-
-
-
Using a plastic opening tool, begin softly prying open device by first inserting it in between the front and back panels.
-
Continue prying the edges while moving around the device's perimeter until the back can be easily removed.
-
-
-
-
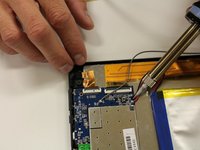
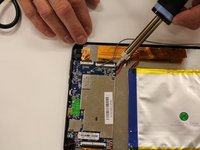
Desolder positive and negative, red and black, wires from the mother board that are connected to the battery.
-
-
-
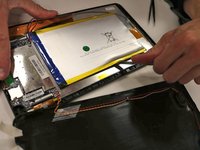
Using a metal spudger tool, wedge between battery and metal screen.
-
Follow the edge of the battery to loosen the glue.
-
-
-
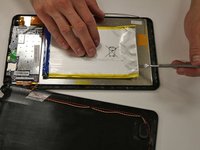
Once the glue is loosened, you should be able to pry off the battery from the screen.
-
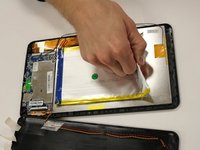
Using your hands, pull up on the battery to pull battery off.
-
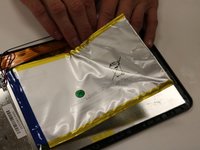
The battery will be completely disconnected and you can set the battery aside in a safe place.
-


To reassemble your device, follow these instructions in reverse order.
Cancelar: não concluí este guia.
Uma outra pessoa concluiu este guia.

Equipe

Eastern Washington University, Team 1-5, Matresse Fall 2015 Membro de Eastern Washington University, Team 1-5, Matresse Fall 2015
EWU-MATRESSE-F15S1G5
4 Membros
Autoria de 13 guias
3Comentários do guia
the replacemet has 3 wires .where go the 3 wire?
were can i buy a new bettery