Ir para o conteúdo principal
Cricut Maker 3 Belt Replacement

Cricut Maker 3 Belt Replacement

Spencer Pennington

Spencer Pennington e um outro colaborador

Última atualização em October 7, 2024

2 - 3 horas
Moderada

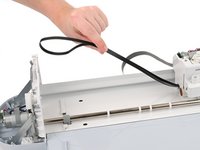
Follow this guide to replace the belt in your Cricut Maker 3.

If the tool holder in your Cricut Maker 3 is moving slowly, unreliably, or not at all, you may need to replace the belt.

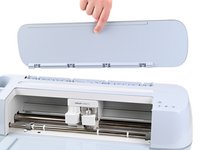
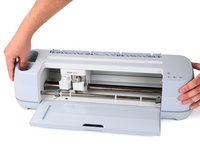
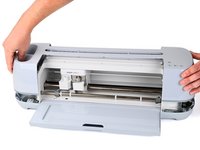
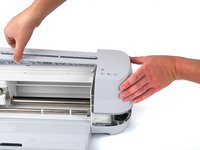
  1. Cricut Maker 3 Belt Replacement, Prepare your Cricut for disassembly: passo 1, imagem 1 %32 Cricut Maker 3 Belt Replacement, Prepare your Cricut for disassembly: passo 1, imagem 2 %32 Cricut Maker 3 Belt Replacement, Prepare your Cricut for disassembly: passo 1, imagem 3 %32
    • Be very careful not to cut yourself when working near the Cricut's small, sharp blade, located in the tool holder within the Cricut.

    • Power off the Cricut and unplug all cables.

  2. Cricut Maker 3 Belt Replacement, Remove the rubber feet: passo 2, imagem 1 %32 Cricut Maker 3 Belt Replacement, Remove the rubber feet: passo 2, imagem 2 %32 Cricut Maker 3 Belt Replacement, Remove the rubber feet: passo 2, imagem 3 %32
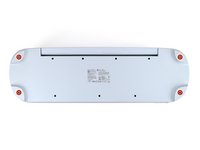
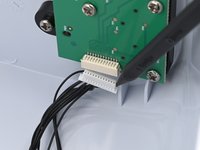
    • Flip the Cricut over so the bottom is facing up.

    • Use your finger to pry up and remove all four rubber feet from the bottom of the Cricut.

  3. Cricut Maker 3 Belt Replacement, Remove the screws from the base: passo 3, imagem 1 %32 Cricut Maker 3 Belt Replacement, Remove the screws from the base: passo 3, imagem 2 %32
    Ferramenta utilizada neste passo:
    FixMat
    $36.95
    • Use a Phillips screwdriver to remove the four 41 mm‑long screws securing the top cover to the base. There's one screw under each foot.

    • Throughout this repair, keep track of each screw and make sure it goes back exactly where it came from.

  4. Cricut Maker 3 Belt Replacement, Open the Cricut: passo 4, imagem 1 %32 Cricut Maker 3 Belt Replacement, Open the Cricut: passo 4, imagem 2 %32
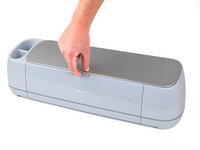
    • Flip the Cricut over so the silver lid is facing up.

    • You may replace the rubber feet before flipping your Cricut to avoid damaging the Cricut or your work surface.

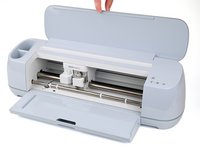
    • Open the Cricut by lifting the top silver lid. The front tray will also open.

  5. Cricut Maker 3 Belt Replacement, Remove the screws from the metal track: passo 5, imagem 1 %32 Cricut Maker 3 Belt Replacement, Remove the screws from the metal track: passo 5, imagem 2 %32 Cricut Maker 3 Belt Replacement, Remove the screws from the metal track: passo 5, imagem 3 %32
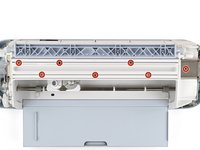
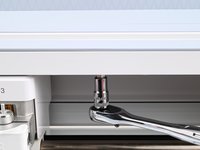
    • Inside the Cricut are seven screws securing the top cover to the metal track that guides the tool holder. You can reach these screws by putting a screwdriver bit in a ratcheting socket wrench. If you're using iFixit bits, the smaller bits work with a 4‑mm socket and the larger bits work with a 1/4‑inch socket.

    • Remove the seven 9.8 mm‑long Phillips screws securing the top cover to the metal track.

  6. Cricut Maker 3 Belt Replacement, Remove the lid hinge cover: passo 6, imagem 1 %32 Cricut Maker 3 Belt Replacement, Remove the lid hinge cover: passo 6, imagem 2 %32
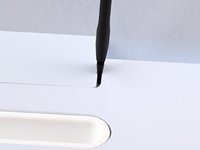
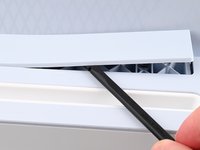
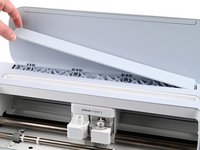
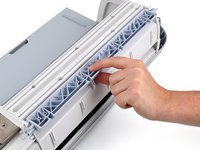
    • The lid hinge cover is located at the base of the silver lid and is held in place by five pegs which are lightly glued in place.

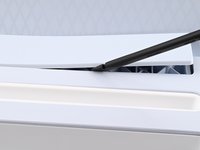
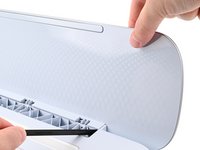
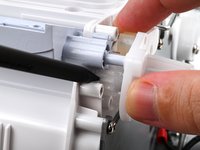
    • Insert the flat end of a spudger between the right side of the lid hinge cover and the top cover.

    • If there's not enough space to insert a spudger, push the silver lid to the left.

    • Use the spudger to pry up the cover.

    • Firmly pry near the pegs to avoid cracking the cover.

  7. Cricut Maker 3 Belt Replacement: passo 7, imagem 1 %32 Cricut Maker 3 Belt Replacement: passo 7, imagem 2 %32 Cricut Maker 3 Belt Replacement: passo 7, imagem 3 %32
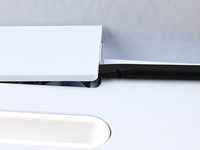
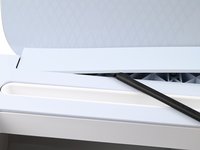
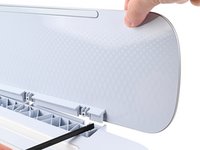
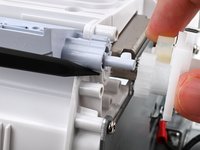
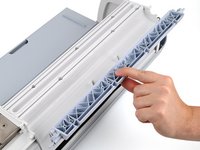
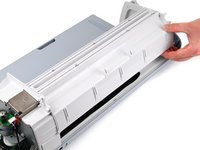
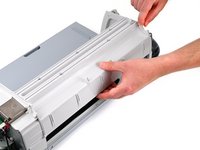
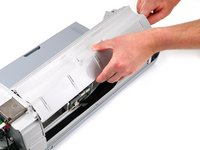
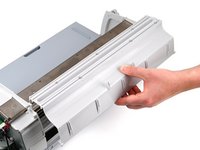
    • Use the flat end of a spudger to pry up along the long edge of the lid hinge cover until the cover is free.

  8. Cricut Maker 3 Belt Replacement: passo 8, imagem 1 %32 Cricut Maker 3 Belt Replacement: passo 8, imagem 2 %32
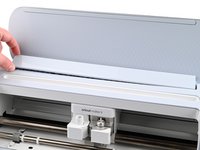
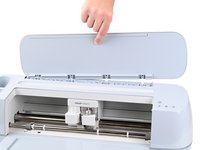
    • Lift and remove the lid hinge cover.

  9. Cricut Maker 3 Belt Replacement, Remove the lid screws: passo 9, imagem 1 %32
    • Use a Torx T8 screwdriver to remove the four 10.2 mm‑long screws securing the lid to the hinge.

  10. Cricut Maker 3 Belt Replacement, Remove the lid: passo 10, imagem 1 %32 Cricut Maker 3 Belt Replacement, Remove the lid: passo 10, imagem 2 %32
    • Use the flat end of spudger to pry the lid out of the hinge while lifting the lid.

  11. Cricut Maker 3 Belt Replacement: passo 11, imagem 1 %32 Cricut Maker 3 Belt Replacement: passo 11, imagem 2 %32
    • Lift and remove the lid

  12. Cricut Maker 3 Belt Replacement, Lift the top cover: passo 12, imagem 1 %32 Cricut Maker 3 Belt Replacement, Lift the top cover: passo 12, imagem 2 %32
    • There's still a cable connected to the inside of the top cover. Don't attempt to fully remove the top cover yet.

    • Lift the top cover up from the Cricut just until it comes free of the base.

  13. Cricut Maker 3 Belt Replacement: passo 13, imagem 1 %32 Cricut Maker 3 Belt Replacement: passo 13, imagem 2 %32 Cricut Maker 3 Belt Replacement: passo 13, imagem 3 %32
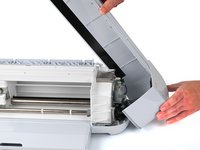
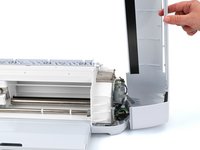
    • Rotate the top cover to the right and prop it up so the right side of the cover is resting on your work surface.

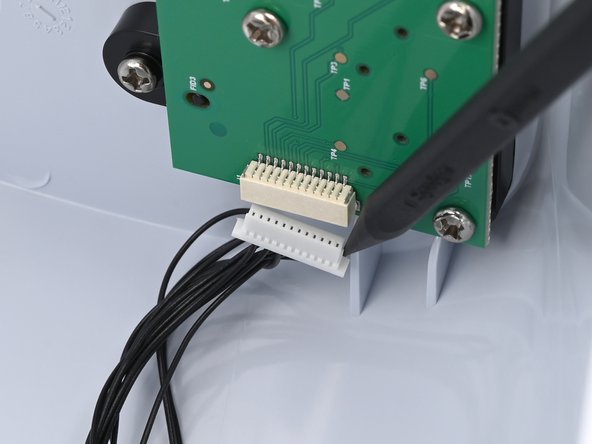
  14. Cricut Maker 3 Belt Replacement, Disconnect the button board: passo 14, imagem 1 %32 Cricut Maker 3 Belt Replacement, Disconnect the button board: passo 14, imagem 2 %32
  15. Cricut Maker 3 Belt Replacement: passo 15, imagem 1 %32 Cricut Maker 3 Belt Replacement: passo 15, imagem 2 %32
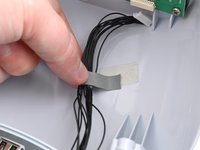
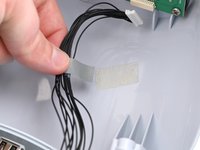
    • Peel up the tape securing the button wires to the inside of the top cover.

    • During reassembly, if this tape isn't sticking well, replace it with a piece of electrical tape to make sure these wires don't get caught in the gears.

  16. Cricut Maker 3 Belt Replacement, Remove the top cover: passo 16, imagem 1 %32
    • Lift and remove the top cover.

  17. Cricut Maker 3 Belt Replacement, Release the tension from both hinges: passo 17, imagem 1 %32 Cricut Maker 3 Belt Replacement, Release the tension from both hinges: passo 17, imagem 2 %32 Cricut Maker 3 Belt Replacement, Release the tension from both hinges: passo 17, imagem 3 %32
    • There may be a significant amount of tension in the hinge. Hold your screwdriver firmly and let the tension release slowly.

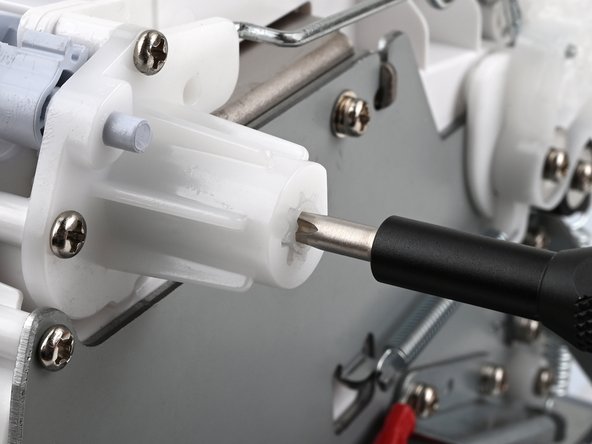
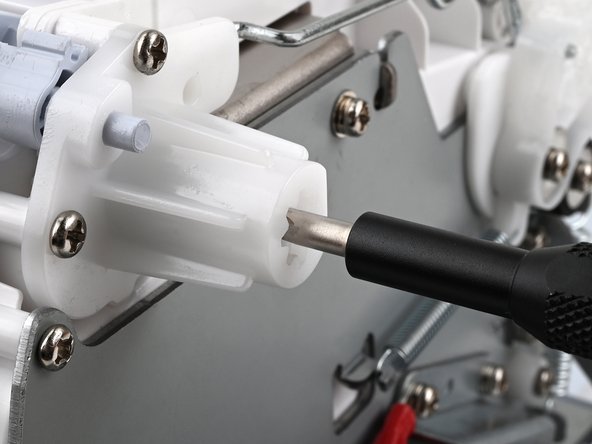
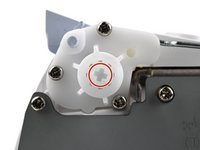
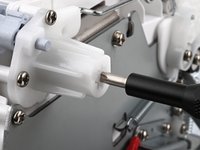
    • Use a Phillips screwdriver to release the tension in the right hinge by pressing the inner portion of the hinge until it releases, then allowing it to turn clockwise until it comes to rest.

  18. Cricut Maker 3 Belt Replacement: passo 18, imagem 1 %32 Cricut Maker 3 Belt Replacement: passo 18, imagem 2 %32 Cricut Maker 3 Belt Replacement: passo 18, imagem 3 %32
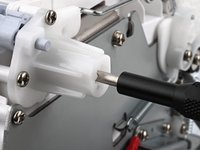
    • Use a Phillips screwdriver to release the tension in the left hinge by pressing the inner portion of the hinge until it releases, then allowing it to turn counterclockwise until it comes to rest.

    • During reassembly, use a Phillips screwdriver to tension the hinges by pressing the inner portion of each hinge inwards and turning it in the opposite direction until it is difficult to turn.

  19. Cricut Maker 3 Belt Replacement, Remove the tray release arm: passo 19, imagem 1 %32 Cricut Maker 3 Belt Replacement, Remove the tray release arm: passo 19, imagem 2 %32 Cricut Maker 3 Belt Replacement, Remove the tray release arm: passo 19, imagem 3 %32
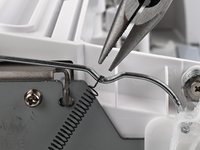
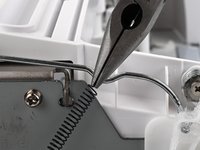
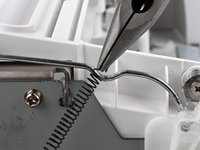
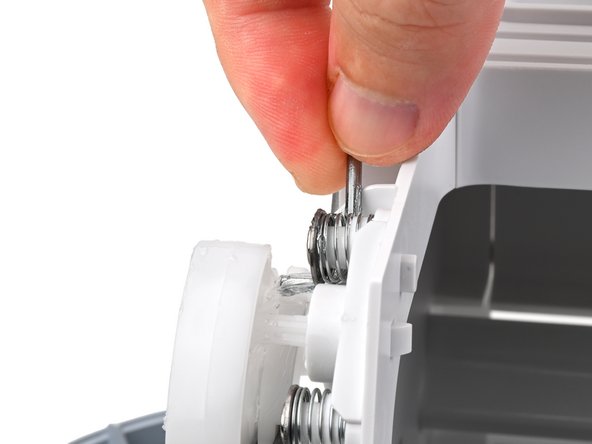
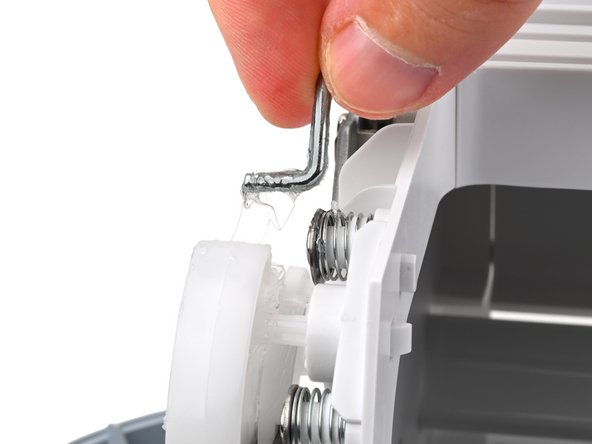
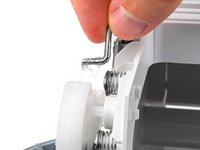
    • Only grip the spring by the hook on either end. Gripping the middle of the spring can deform it.

    • Use a pair of needle nose pliers or your fingers to lift the spring off of the tray release arm on the left end of the Cricut.

    • Some damping grease may hold this spring in place.

  20. Cricut Maker 3 Belt Replacement: passo 20, imagem 1 %32 Cricut Maker 3 Belt Replacement: passo 20, imagem 2 %32
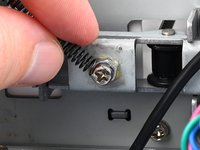
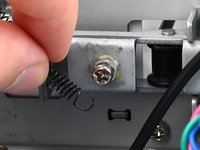
    • Remove the bottom of the spring from the tension screw and set the spring aside.

  21. Cricut Maker 3 Belt Replacement: passo 21, imagem 1 %32 Cricut Maker 3 Belt Replacement: passo 21, imagem 2 %32 Cricut Maker 3 Belt Replacement: passo 21, imagem 3 %32
    • Many of the following steps involve parts with a lot of damping grease. You may choose to wear rubber gloves to keep the grease off of your hands.

    • Remove the front end of the tray release arm from the front tray release mechanism by pulling it towards the center of the Cricut, then lifting it up.

    • During reassembly:

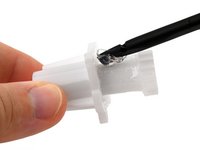
    • If a lot of damping grease was lost during disassembly, use a spudger or popsicle stick to apply new high viscosity damping grease to the tray release mechanism.

    • Use paper towels and isopropyl alcohol to clean up any excess grease. If you're cleaning grease from electronic components, make sure you use high concentration (greater than 90%) alcohol.

  22. Cricut Maker 3 Belt Replacement, Remove the right hinge: passo 22, imagem 1 %32
    • Use a Phillips screwdriver to remove the three 10.0 mm‑long screws securing the left hinge.

  23. Cricut Maker 3 Belt Replacement: passo 23, imagem 1 %32 Cricut Maker 3 Belt Replacement: passo 23, imagem 2 %32
    • While pulling the left hinge with one hand, use a spudger to push the inner gear off of its post and remove the hinge.

    • During removal, hold the release arm and its gear together with the hinge so you remove them together.

    • During reassembly, make sure the front tray release arm gear is properly aligned with the hinge gear.

  24. Cricut Maker 3 Belt Replacement, Remove the left hinge: passo 24, imagem 1 %32
    • Use a Phillips screwdriver to remove the three 10.0 mm‑long screws securing the right hinge.

  25. Cricut Maker 3 Belt Replacement: passo 25, imagem 1 %32 Cricut Maker 3 Belt Replacement: passo 25, imagem 2 %32
    • While pulling the right hinge with one hand, use a spudger to push the inner gear off of its post and remove the hinge.

  26. Cricut Maker 3 Belt Replacement, Reassembly information: passo 26, imagem 1 %32 Cricut Maker 3 Belt Replacement, Reassembly information: passo 26, imagem 2 %32 Cricut Maker 3 Belt Replacement, Reassembly information: passo 26, imagem 3 %32
    • This step only applies to the reassembly process. The hinges use damping grease to control how quickly the lid opens. If the hinges spin too freely, or if you accidentally wiped off a lot of grease, you may need to apply new damping grease.

    • Pull the inner portion of the hinge out of the housing.

    • Use a spudger or popsicle stick to apply a small amount of high viscosity damping grease to the inner portion of the hinge.

    • Push the inner portion of the hinge back into the housing.

    • Scrape off excess grease with a spudger or popsicle stick. Use paper towels and isopropyl alcohol to clean grease off of any other surfaces. If you're cleaning grease from electronic components, make sure you use high concentration (greater than 90%) alcohol.

  27. Cricut Maker 3 Belt Replacement, Remove the top lid hinge bar: passo 27, imagem 1 %32 Cricut Maker 3 Belt Replacement, Remove the top lid hinge bar: passo 27, imagem 2 %32
    • Remove the top lid hinge bar.

  28. Cricut Maker 3 Belt Replacement, Remove the back cover: passo 28, imagem 1 %32 Cricut Maker 3 Belt Replacement, Remove the back cover: passo 28, imagem 2 %32 Cricut Maker 3 Belt Replacement, Remove the back cover: passo 28, imagem 3 %32
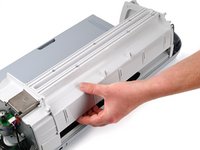
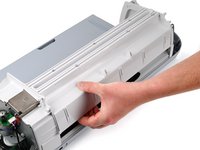
    • Free the back cover from the clips on the left and right sides by firmly pulling the cover away from the Cricut.

  29. Cricut Maker 3 Belt Replacement: passo 29, imagem 1 %32 Cricut Maker 3 Belt Replacement: passo 29, imagem 2 %32 Cricut Maker 3 Belt Replacement: passo 29, imagem 3 %32
    • Be careful not to grab the ribbon cable under the back cover when removing the back cover.

    • The plastic brackets on either side of the back cover have tabs that keep the bracket from coming out. Use one hand to pull back one of these tabs so the back cover can come off.

    • Remove the back cover by rotating the bottom edge up and pulling it away from the Cricut while holding the bracket out of the way.

  30. Cricut Maker 3 Belt Replacement, Remove the top metal track: passo 30, imagem 1 %32
    • Use a Phillips screwdriver to remove the two 10.2 mm‑long screws securing the left end of the top metal track.

    • Be careful not to lose the washer and locking washer under each screw.

    • During reassembly, make sure each screw has a washer and locking washer, with the locking washer between the washer and the head of the screw.

  31. Cricut Maker 3 Belt Replacement: passo 31, imagem 1 %32
    • The screws in this step have different threads. Keep close track of where the screws go to avoid stripping the screw wells.

    • Use a Phillips screwdriver to remove eight screws from the right side of the Cricut:

    • Two 10.2 mm‑long screws securing the right end top metal track, which include a washer and a locking washer.

    • Four 10.0 mm‑long screws securing the large white plastic bracket.

    • Two 7.9 mm‑long screws securing the large white plastic bracket, which include white plastic spacers.

    • During reassembly:

    • Check that the tool holder slides freely with the top metal track fully seated before re-installing any screws. If it doesn't, you may need to tilt the top of the tool holder forwards slightly so it's completely in the top track.

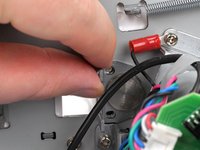
    • Reconnect the motor ground wire to the right-most screw that secures the right end of the top metal track.

  32. Cricut Maker 3 Belt Replacement: passo 32, imagem 1 %32 Cricut Maker 3 Belt Replacement: passo 32, imagem 2 %32
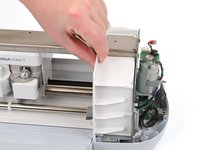
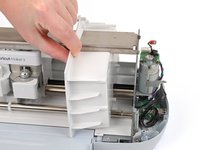
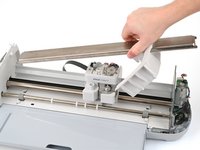
    • Slide the large white plastic bracket up and towards the center of the Cricut.

    • The top metal track will lift out of its notch on the right frame.

    • During reassembly, make sure the plastic bracket fully seats into its place and does not overlap the front tray at all.

  33. Cricut Maker 3 Belt Replacement: passo 33, imagem 1 %32 Cricut Maker 3 Belt Replacement: passo 33, imagem 2 %32 Cricut Maker 3 Belt Replacement: passo 33, imagem 3 %32
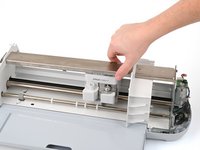
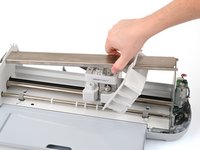
    • Lift the top metal track and slide it to the right to remove it, along with the large white plastic bracket.

    • During reassembly, ensure the large white plastic bracket is on the metal track, and the metal track is installed in the correct orientation. The oval-shaped opening should be towards the right end of the Cricut.

  34. Cricut Maker 3 Belt Replacement, Release the belt tension: passo 34, imagem 1 %32 Cricut Maker 3 Belt Replacement, Release the belt tension: passo 34, imagem 2 %32 Cricut Maker 3 Belt Replacement, Release the belt tension: passo 34, imagem 3 %32
    • Before beginning this step, note the tension on the belt. During reassembly, you'll need to tighten the belt to the same tension.

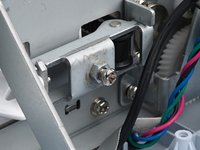
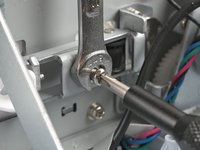
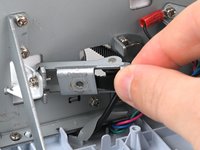
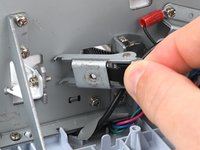
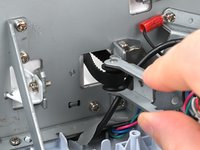
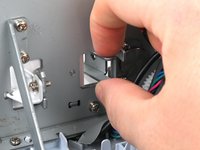
    • Use a Phillips screwdriver to remove the 18.5 mm‑long tensioning screw from the bracket towards the back of the left side of the Cricut

    • The nut may be lightly adhered to the bracket. Use a wrench to loosen the nut so it comes off with the screw.

    • During reassembly:

    • Screw the nut away from the head of the screw by a few full turns.

    • Screw the screw into the hole in the bracket until the nut makes contact with the bracket.

    • Use a 6 mm wrench to hold the nut and screw in the screw until the belt reaches the correct tension.

  35. Cricut Maker 3 Belt Replacement, Remove the belt from the right side: passo 35, imagem 1 %32 Cricut Maker 3 Belt Replacement, Remove the belt from the right side: passo 35, imagem 2 %32 Cricut Maker 3 Belt Replacement, Remove the belt from the right side: passo 35, imagem 3 %32
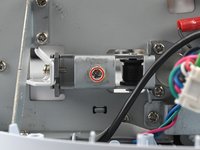
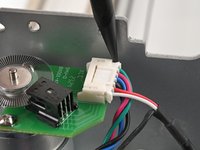
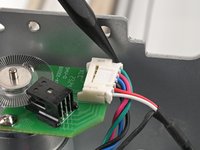
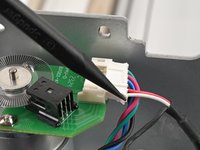
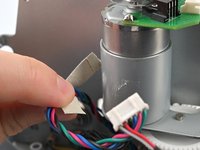
    • Use a spudger to walk the cable out of the sliding connector on top of the motor on the right side of the Cricut by pushing on one side, then the other, until it's free.

  36. Cricut Maker 3 Belt Replacement: passo 36, imagem 1 %32 Cricut Maker 3 Belt Replacement: passo 36, imagem 2 %32
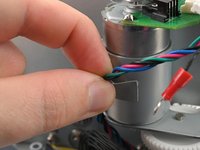
    • Peel off the tape securing the wires to the motor.

    • During reassembly, if this tape isn't sticking well, replace it with a piece of electrical tape to make sure these wires don't get caught in the gears.

  37. Cricut Maker 3 Belt Replacement: passo 37, imagem 1 %32
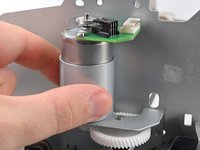
    • Use a Phillips screwdriver to remove the two 7.4 mm‑long screws securing the right motor.

  38. Cricut Maker 3 Belt Replacement: passo 38, imagem 1 %32 Cricut Maker 3 Belt Replacement: passo 38, imagem 2 %32 Cricut Maker 3 Belt Replacement: passo 38, imagem 3 %32
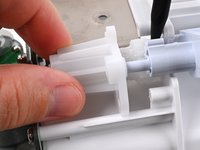
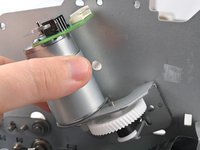
    • Rotate the motor counterclockwise one quarter turn to expose the E‑clip under the gear.

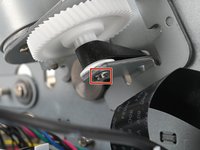
    • Use a small flathead screwdriver or other rigid prying tool to remove the E‑clip from the bottom of the right motor bracket.

  39. Cricut Maker 3 Belt Replacement: passo 39, imagem 1 %32 Cricut Maker 3 Belt Replacement: passo 39, imagem 2 %32
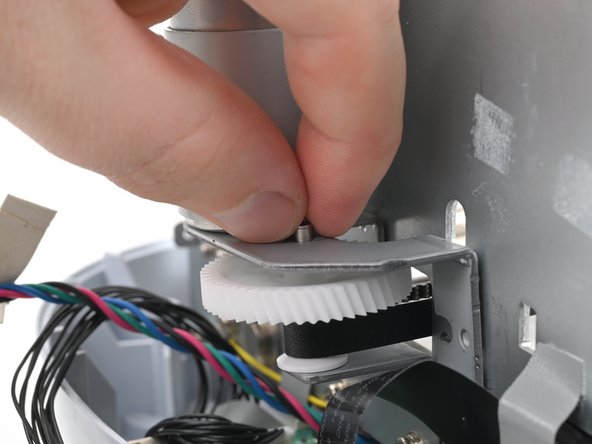
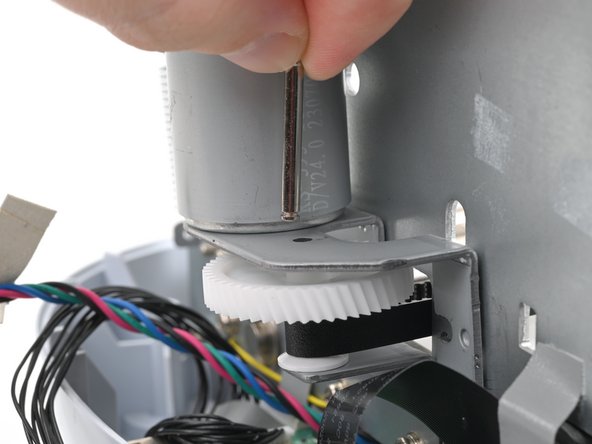
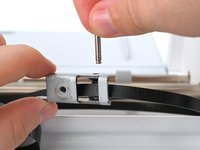
    • Lift the pin securing the gears out of the top of the right motor bracket.

  40. Cricut Maker 3 Belt Replacement: passo 40, imagem 1 %32 Cricut Maker 3 Belt Replacement: passo 40, imagem 2 %32
    • Slide the right motor bracket off of the end of the tool holder bar.

    • This both frees the right end of the metal bar and allows you to remove the belt from this end.

  41. Cricut Maker 3 Belt Replacement: passo 41, imagem 1 %32 Cricut Maker 3 Belt Replacement: passo 41, imagem 2 %32 Cricut Maker 3 Belt Replacement: passo 41, imagem 3 %32
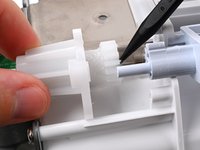
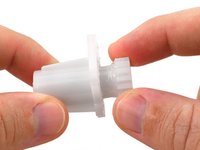
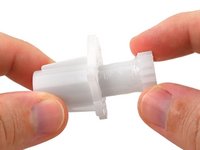
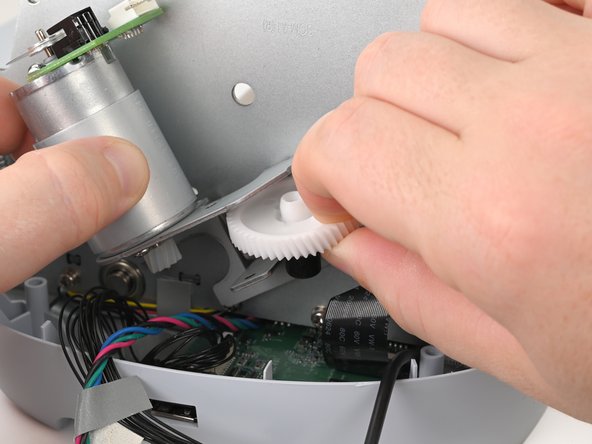
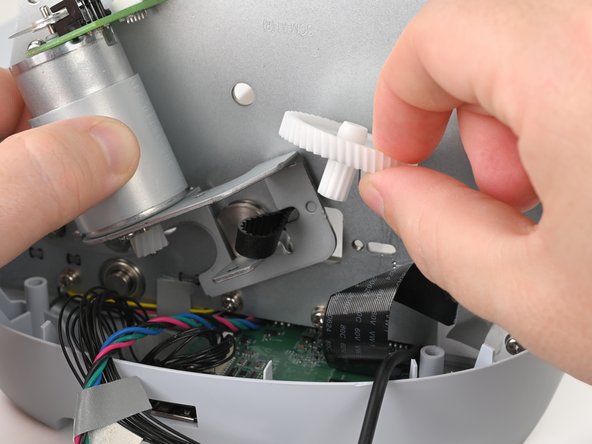
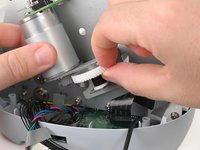
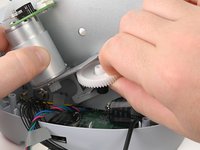
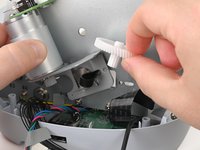
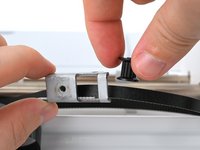
    • The gear you remove in this step has a small cap at its bottom that will fall off when you slide the gear out of the bracket. Be careful not to lose it.

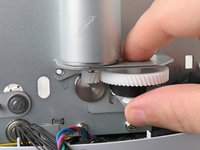
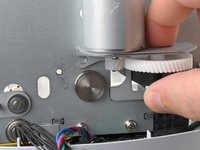
    • With one hand holding the motor, use your other hand to remove the gear from the motor bracket.

    • This part can be tricky. Adjust the motor and pull the gear at different angles until it comes free.

    • As the gear comes free of the bracket, lift the gear out of the belt.

    • During reassembly:

    • Thread the belt through the opening in the motor bracket.

    • Insert the smaller part of the gear into the belt and replace the cap on the bottom of the gear.

    • Hold the gear, belt, and cap in place as you place the gear into the motor bracket.

  42. Cricut Maker 3 Belt Replacement, Remove the belt from the left side: passo 42, imagem 1 %32 Cricut Maker 3 Belt Replacement, Remove the belt from the left side: passo 42, imagem 2 %32 Cricut Maker 3 Belt Replacement, Remove the belt from the left side: passo 42, imagem 3 %32
    • Pull the bracket on the left side of the Cricut away from the frame until the bracket comes free.

    • During reassembly, make sure to hook the left side of the bracket into place.

  43. Cricut Maker 3 Belt Replacement: passo 43, imagem 1 %32 Cricut Maker 3 Belt Replacement: passo 43, imagem 2 %32
    • Thread the entire assembly of the bracket, gear, and belt through the opening in the frame.

  44. Cricut Maker 3 Belt Replacement: passo 44, imagem 1 %32
    • Use a small flathead screwdriver or other rigid prying tool to remove the E‑clip from the bottom of the left bracket assembly.

  45. Cricut Maker 3 Belt Replacement: passo 45, imagem 1 %32 Cricut Maker 3 Belt Replacement: passo 45, imagem 2 %32 Cricut Maker 3 Belt Replacement: passo 45, imagem 3 %32
    • Lift the pin securing the gear out of the left bracket assembly bracket.

    • Remove the gear, allowing the belt to fall out of the bracket.

  46. Cricut Maker 3 Belt Replacement, Remove the tool holder bar: passo 46, imagem 1 %32
    • Use a Phillips screwdriver to remove the two 7.4 mm‑long screws securing the left tool holder bar bracket.

  47. Cricut Maker 3 Belt Replacement: passo 47, imagem 1 %32 Cricut Maker 3 Belt Replacement: passo 47, imagem 2 %32
    • Remove the left tool holder bar bracket.

  48. Cricut Maker 3 Belt Replacement: passo 48, imagem 1 %32 Cricut Maker 3 Belt Replacement: passo 48, imagem 2 %32 Cricut Maker 3 Belt Replacement: passo 48, imagem 3 %32
    • Pull the tool holder bar to the right, completely through the tool holder.

    • You can remove the bar completely from the Cricut or leave it partially removed.

    • During reassembly:

    • The tool holder bar may get stuck as it goes through the tool holder. Gently adjust the tool holder and bar until the bar easily slides through the tool holder.

    • If the tool holder bar does not align with the opening in the frame after going through the tool holder, lift the tool holder off of the rear track and re-seat it so the bar aligns with the opening.

  49. Cricut Maker 3 Belt Replacement, Remove the belt: passo 49, imagem 1 %32 Cricut Maker 3 Belt Replacement, Remove the belt: passo 49, imagem 2 %32
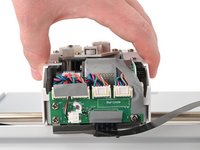
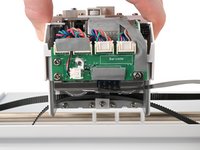
    • The tool holder is still connected to the ribbon cable. Don't stress the ribbon cable as you lift the tool holder.

    • Note the position of the tool holder on the bottom track to make sure you replace it correctly during reassembly.

    • Lift the tool holder off the bottom track until you can access the screws on the bottom of the tool holder.

    • During reassembly, make sure the tool holder rolls smoothly on the tracks before proceeding.

  50. Cricut Maker 3 Belt Replacement: passo 50, imagem 1 %32
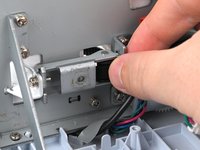
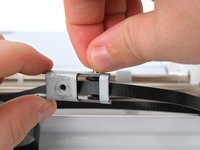
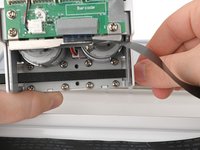
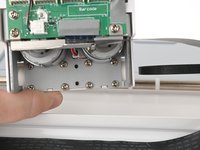
    • Use a Phillips screwdriver to remove the two 9.8 mm‑long screws securing the belt to the tool holder.

    • The bracket that secures the belt will fall off once the screws are removed.

    • During reassembly, your belt may need to be secured in a particular manner. Be sure to closely follow any manufacturer instructions.

  51. Cricut Maker 3 Belt Replacement: passo 51, imagem 1 %32 Cricut Maker 3 Belt Replacement: passo 51, imagem 2 %32 Cricut Maker 3 Belt Replacement: passo 51, imagem 3 %32
    • Thread the belt out of the tool holder and remove it.

Conclusão

To reassemble your device, follow these instructions in reverse order.

Repair didn’t go as planned? Try some basic troubleshooting, or ask our Answers community for help.

Spencer Pennington

Membro desde: 09/09/23

16.989 Reputação

Autoria de 113 guias

Equipe

iFixit Membro de iFixit

Staff

Membros da 118

Autoria de 19.449 guias

0 comentários

Adicione um comentário

Exibir estatísticas:

Últimas 24 horas: 1

Últimos 7 dias: 7

Últimos 30 dias: 19

Duração total: 230