Ir para o conteúdo principal

The Ember Mug 2 is an electronic smart mug that allows you to set an exact drinking temperature, so your coffee is never too hot, or too cold.

1 Perguntas Visualizar todos

How to change the battery in an Ember Mug

Ember’s (ember.com) original 10oz. mug is awesome! When I first got it it kept my drink hot for so long.

Now, a few years later, the battery dies after just 10–20 minutes. Unfortunately, the company does not offer a battery replacement service for the built-in rechargeable battery.

Has anyone successfully replaced the battery in an Ember mug? How did you do it? Where did you get a replacement from?

Responder a esta pergunta Também tenho esse problema

Esta é uma boa pergunta?

Pontuação 5
5 comentários

I am unable to find a B0664-LF replacement battery

por

The Ember mug cannot be serviced as there is an anti-tamper locking pin on the metal base lip. The pin could be released by drilling a 2 mm hole at a very acute angle that intercepts the pin. Then pushing the pin out of the way and rotating the bottom section 10 degrees. I have photos 1agkirk2@gmail.com

por

@alankirk50251 That is something that I was concerned about when doing my teardown; I noted that pin but couldn't be sure of its function due to the head damage to the plastic. If that's the case, they deserve some major negative points for deliberately booby trapping the base so the battery can't be replaced.

por

@alankirk50251 Can you create an answer to this question and post your pictures? I'm sure we'd all love to see what you found.

Adicionar imagens a uma pergunta já existente

por

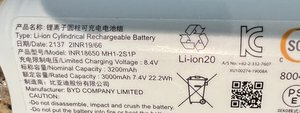
This worked great to get to the battery on the Ember Mug 2 (not the travel mug). Here are more details. I used a strip of neoprene rubber to grip the base as I twisted it clockwise (about 15 degrees - it will stop when it hits the right spot). I also used the neoprene rubber to help pull the base off the mug. The ribbon cable is attached to a connector, but I had to remove 4 Torx screws (T6) to remove the battery shield to allow the ribbon cable connector to be pulled straight up from the board. The board can be pulled straight out (you will probably need to pop off the black light-pipe cover that seems to be snapped in before you can pull the board out). The battery pack seems to be glued to the board. I haven't tried to separate it yet. The battery part number on my mug is INR18650 MH1-2S1P made by BYD. I can't find that part number online but I may be able to replace the individual cells. If I can figure out how to add pictures here , I will.

por

Adicionar um comentário

8 respostas

Pergunta mais útil

The ember coffee mug (not travel mug) has a EVE B0664-LF 7.2 volt Li-ion Battry. To replace the battery you simply* twist the mug base 15 degrees clockwise looking at the bottom and pull it away from the cup body. There is a ribbon cable that connects the base to the body that you need to remove. Once fully seperated from the body four screws secure a battery shield and once removed the circuit and battery can be removed.

  • My use of the word simply really does not apply here. You will need to make a special fitted tool perhaps that will create enough friction on the base to turn it past the clips that secure it to the body. In addition you will need to pull the base away from the body in some way being careful not to damage the ribbon cable that connects the base to the cup body.

Esta resposta foi útil?

Pontuação 11

1 comentário:

It’s a pain to turn the bottom of the mug. Once off, you will see the battery pack. It is a 2s lithium ion battery using two 18650 cells in series with a proprietary bms. If you don’t know about lithium batteries and how to connect them properly, don’t bother. You run the risk of serious injury, property damage, and possibly death. The bms will need to be soldered to the new cells. Again, if you don’t know how then you shouldn’t.

por

Adicionar um comentário

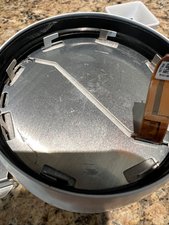
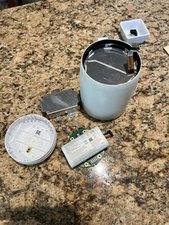
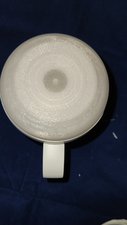
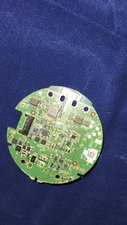
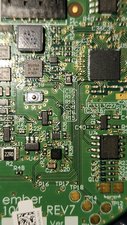
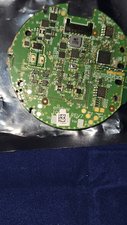
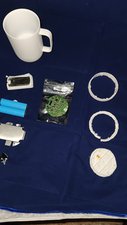
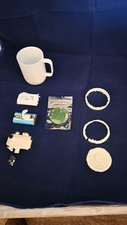
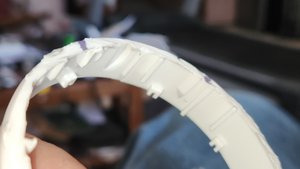
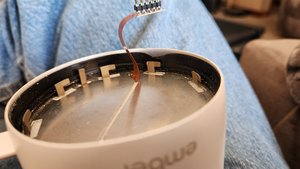
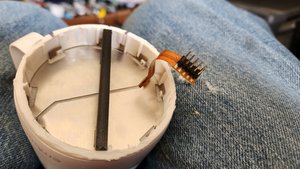
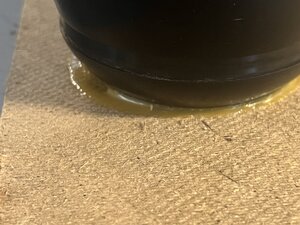
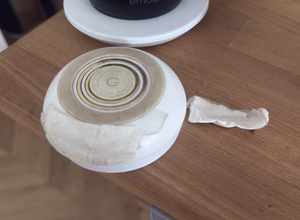
The @propellerh71814 answer worked great. I commented on his answer with some additional detail on how I got the base off the mug using his answer but wasn't able to add photos to the comment. Here are some pictures.

Block Image

Block Image

Block Image

Esta resposta foi útil?

Pontuação 3

1 comentário:

Nice work. You should make a guide for this.

por

Adicionar um comentário

Hi @rulily

Here's a video that shows how to access the battery so that it can be replaced. There doesn't seem to be a "Part 2" video that shows the actual replacement/reassembly but it seems straightforward enough once you have the replacement batteries.

Here's a supplier of the batteries. There may be others I didn't look too hard but some of the others I did find are battery manufacturers who have minimum order requirements of more than just 4. Just search for 604134 LiPO battery, as you may find some that I missed.

Esta resposta foi útil?

Pontuação 2

1 comentário:

Just as a note here, the mug that jayeff is referring to is the Travel Mug, which is a different critter than the coffee/Ember mug the OP was talking about.

por

Adicionar um comentário

I ran across a post on Reddit that seems to contradict @propellerh71814's information.

Looking to replace the battery. I took apart my Ember mug. : r/Embermug

Their photo shows a completely different battery from the one previously described.

Block Image

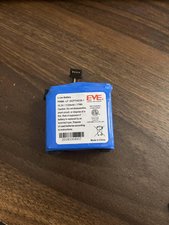
That picture shows another Eve battery, but this one is part number P0686-LF and is marked as a 15.2V battery.

Unfortunately, I had just as much luck locating one of those batteries as I did finding a B0664-LF battery; i.e., none whatsoever.

Esta resposta foi útil?

Pontuação 2

2 comentários:

which mug 'version'/year is this taken from?

por

@charliehumble The last comment on the Reddit thread says this battery is from a travel mug, but no other information. You can check the post yourself; the link is in my answer.

por

Adicionar um comentário

After about a 18 months of use, my Mug 2 stopped holding a charge at all, dying as soon as it was lifted off the base. After contacting support, the best Ember could do was offer to sell me a replacement mug for $99 dollars.

Not wanting to just buy a new mug which would likely face the same fate eventually, I figured I would at least try to repair my mug myself.

Thanks to the tips in this thread, I was able to get my Mug 2 apart using a couple of strap wrenches: one wrench wrapped around the main body of the mug and the other wrapped as best I could around the base. This allowed me to get enough friction and torque to turn the base the 15 degrees that Propeller Head mentioned. I was then able to carefully pry apart the base from the mug without damaging the ribon cable connecting the two pieces.

As others have mentioned, the 18650 batteries in the battery pack can be replaced if you have the tools and expertise/confidence to weld new batteries to the existing, proprietary BMS board.

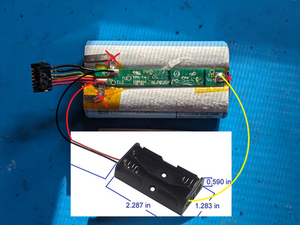
I don't have a spot welder so what I ended up doing instead was using 2 high capacity/high discharge 14500 batteries ($9) in a AA battery holder ($5) soldered to the old BMS like so:

Block Image

The BMS seems to handle the 14500 batteries just fine as long as everything is connected correctly.

With the BMS tucked between the bottom board and the battery holder (with some electrical/conformal tape to prevent any shorts), everything fits snugly underneath the shield and the mug can be reassembled using the strap wrenches.

Even with the highest capacity 14500 batteries, this mod does reduce the battery life of the mug by about 20-30% (compared to new 18650 batteries) but does allow you to (somewhat) easily replace the batteries if they ever start to degrade.

Esta resposta foi útil?

Pontuação 2

1 comentário:

I'm surprised they were able to fit 2 18650's in there plus all the electronics. Thanks for sharing!

por

Adicionar um comentário

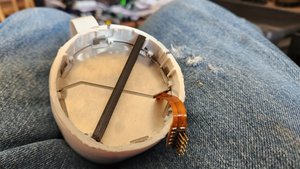
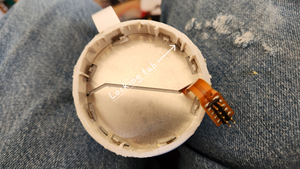
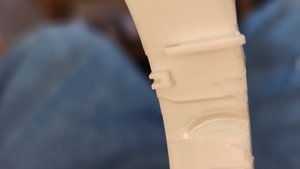
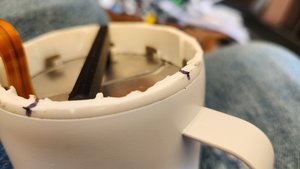
About 6 months ago I destructively disassembled a 10oz mug and took photos during the process. I created a 3D Printer STL file for the destroyed portion of the plastic base and will be happy to supply to any interested party. On the 10oz mug there is a locking tab installed to prevent brute force rotation of the plastic base. This anti-tamper tab could be disengaged by drilling a small 2mm hole at an acute 10 degree angle about 30mm clockwise from the right edge of the inverted mug handle, then pushing the tab out of the way. This tab does not appear in 14oz mug photos. I have more photos and the STL file for the mug bottom if anyone is interested. Don't know how put that file into this post.

Block Image

Block Image

Block Image

Block Image

Block Image

Block Image

Block Image

Block Image

Block Image

Block Image

Block Image

Block Image

Block Image

Block Image

Esta resposta foi útil?

Pontuação 1
Adicionar um comentário

Having this same problem and did some research into trying to replace the Ember Mug internal battery. Another Reddit post I found (https://www.reddit.com/r/JamesHoffmann/c...) states in one of the comments by the OP: "This applies to only the travel mug - the regular mug is molded closed and can't be opened without destroying it" I also found the FCC page for the Ember Mug (https://fccid.io/2AILTCM17/Internal-Phot...) that shows the Battery and other internal electronics but without a way to open the mug and replace it I'm not sure this information is useful... If the Mug ever stops working completely destroying it might be a risk I'm willing to take but for now it seems to be unrepairable.

Esta resposta foi útil?

Pontuação 0

4 comentários:

@propellerh71814's answer above indicates that the base simply twists off with a 15 degree turn; however, it appears that some sort of special fixture is probably used to provide sufficient torque to overcome the retaining clips but still grip the smooth base of the mug.

I'm thinking about lining the charging base with iPhone battery adhesive as a gripping agent; hopefully the base is sturdy enough to allow enough pressure to be applied to turn the base the required amount.

por

This applies to the Ember Travel Mug which is not the same product the OP and myself are working with.

por

I found this and was saddened. However I sent an email to Ember support and they sent me a replacement 10oz cup! Completely free of charge. They even paid the shipping. They didn't ask any questions either. Sweet. I'm currently enjoying a nice warm beverage with said cup. Yay.

por

I've had very positive experience with Ember customer service. They replaced my 1st gen 14oz mug when the ceramic started to flake off.

por

Adicionar um comentário

How do I recharge my ember mug.?

Esta resposta foi útil?

Pontuação 0

1 comentário:

Hi Kim,

Generally charging the mug is as simple as placing the mug on the charging coaster. The LED near the bottom of the mug should turn red and blink slowly to indicate it's charging. Here's the quick start guide showing how.

https://support.ember.com/hc/en-us/artic...

If that doesn't work, they also have a troubleshooting section if your mug doesn't turn on or charge.

https://support.ember.com/hc/en-us/artic...

Check out those pages and if it still isn't working, come on back and tell us what you tried and what you found and we'll then be able to help you figure out what's wrong with it.

por

Adicionar um comentário

Adicionar a sua resposta

Ru Lily será eternamente grato(a).
Exibir estatísticas:

Últimas 24 horas: 34

Últimos 7 dias: 280

Últimos 30 dias: 1,073

Duração total: 15,414