
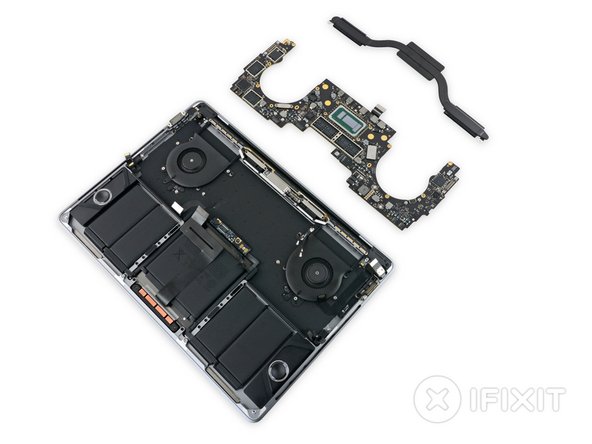
We got our hands on the refreshed Retina MacBook 2017 and the MacBook Pro 13″ Touch Bar 2017, and—to be honest—not too much hardware has changed. After the wildly remodeled iMac 4K, we were hoping for a bit more than the expected spec bump. But the notebook hardware remains largely identical to last year’s models.
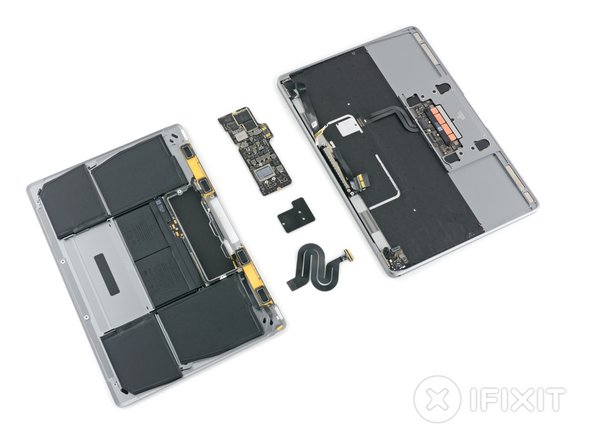
The only real change, beyond fan coloration, seems to address the lackluster keyboard action from last year’s MacBook. Users now inherit the more-responsive, second-gen butterfly key switches already found in last year’s MacBook Pro with Touch Bar.
Retina MacBook 2017 and MacBook Pro 2017 Teardown Highlights:
- The keyboard trigger looks like a more classic switch this go-around. The plastic butterfly mechanism appears to have thinned out to accommodate the new switch form factor. The keystroke and travel feel about the same to us, so perhaps the real change is reinforcement for repeated use.
- While not really a mechanical change, the control and option keys got some new ink. They now mark keyboard shortcuts rather than translating for PC users.
- The Touch Bar continues to add a second screen to damage, and we still haven’t figured out a way to remove it safely. We’ll keep trying, though.
- Both Macs scored a 1 out of 10 on our repairability scale (10 is the easiest to repair). In both units, the processor, RAM, and flash memory are still soldered to the logic board. The battery assemblies are still entirely, and very solidly, glued into the case, thus complicating replacement.
Check out our full Retina MacBook 2017 and MacBook Pro 2017 Teardowns for more analysis.


3 comentários
MacBook Pro 15” 2017 with retna bar. Keyboard replacement is not bad, I know the team has placed a 1 out of 10 for repair but its
Really not too bad. I purchased the keyboard and the 74.00 tool set which I would Highly recommend you do. Followed the video
I found on YouTube. It’s Binh Been Repaired and Reviewed. He goes into great detail on each screw size and how to. Then I got to the
Keyboard part. The rivets he uses a pliers but I used a Pencil grinder with a small double cut carbide bit. It was so easy, just touch the center of the rivet head and when you get to the right depth the head will pop off. Remove the keyboard by gently push on the Key side
Working from one end to the other and from front to back. Oh and the rivets under the ribbon cables be very carful just lift with a tool and get underneath. Also on the side and back (Hing side) You will get very close to the case frame just keep it steady and you wont touch it.
I need more room Maybe I can do a Video and share it some how?
Wayne Kellogg - Responder
Ok to continue on…. Now that you have the Keyboard out, clean all the grinding and remove all of the rivet heads, some of them get
Under the battery section. Also clean all the glue that sticks to the face of the key square’s and look for any junk sticking to the sides of the
Key square’s. Now take your pencil grinder and flatten the rivet stems left over from the first grinding. Just get them flush to the aluminum squares so the new keyboard will set down nice and flush. If you make al tiny indentation don’t worry but don’t gouge it out. Oh don’t grind the studs where the screws go you can tell the difference. Also there is ONE stud that’s bigger and not a rivet don’t grind it. Now clean Again. Put your new keyboard in. Put the screws in. Now where you ground out the rivets Put some epoxy in the holes to hold the keyboard in place. You need to get small dots. I used a 3M DP100 with Mixer tips, you can use toothpicks. Keep the application small and so it wont run into the keys on the backside.
Wayne Kellogg - Responder
Not good. Sticky Keys…. The video I found that showed the grinding was with a dremil I used a smaller bit than he had.
Wayne Kellogg - Responder