Ir para o conteúdo principal

Nexus 6 ロジックボード換装

Aviso: Você está editando um guia tipo pré-requisito. Quaisquer alterações que você faça afetarão o guia que inclui este passo.

Inglês
Japonês
Passo 2
Nexus 6 Motherboard Replacement: passo 0, imagem 1 %32 Nexus 6 Motherboard Replacement: passo 0, imagem 2 %32
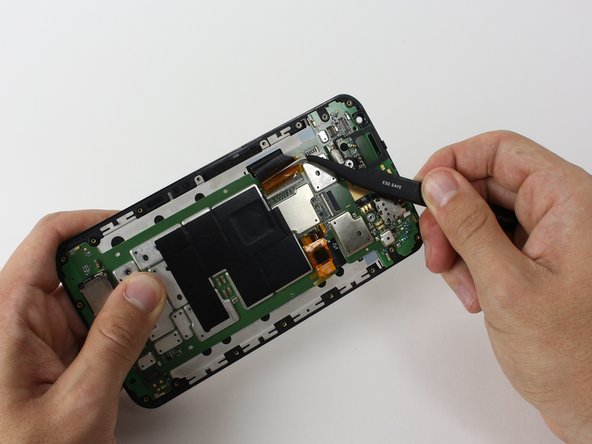
  • With a spudger, unlatch the ZIF connector of the big ribbon cable on the side of the phone. See instructions for detatching ZIF connectors here.

  • Use tweezers to release the ribbon cable completely.

  • This connector and the ribbon are attached with a piece of amber anti-static tape. Make sure to release the tape from the ribbon before to pull it out of the connector.

ヘラを使用して左側の大きなZIFコネクタの爪を起こします。ZIFコネクタの接続を外すにはこちらを参照してください。

ピンセットでフラットケーブルを完全に取り外します。

コネクタとフラットケーブルは帯電防止テープで固定されています。テープを剥がしてから、作業を行ってください

Suas contribuições são licenciadas pela licença de código aberto Creative Commons.