Ir para o conteúdo principal

拆卸步骤(第三代)​

Aviso: Você está editando um guia tipo pré-requisito. Todas as alterações que você fizer afetarão todos os 6 guias que incluem este passo.

Inglês
Chinês
Passo 6
Opening Procedure (3rd Gen), Insert an opening pick: passo 0, imagem 1 %32 Opening Procedure (3rd Gen), Insert an opening pick: passo 0, imagem 2 %32 Opening Procedure (3rd Gen), Insert an opening pick: passo 0, imagem 3 %32
Insert an opening pick
  • If your screen is badly cracked, covering it with a layer of clear packing tape may allow the suction cup to adhere. Alternatively, very strong tape may be used instead of the suction cup. If all else fails, you can superglue the suction cup to the broken screen.

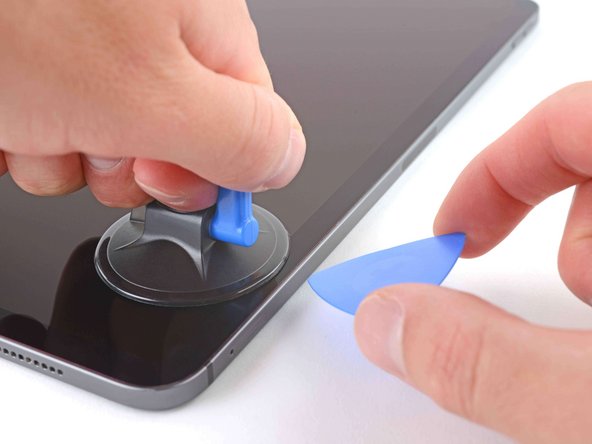
  • Apply a suction handle to the right edge of the screen, about 5 cm from the bottom edge.

  • Pull up on the suction handle with firm, constant pressure to create a gap just small enough to insert an opening pick.

  • Only create a gap small enough to insert an opening pick. Overbending the screen will damage it.

  • Insert the tip of an opening pick into the gap.

  • Don't insert the opening pick more than 5 mm or you may damage the LCD.

如果您的屏幕严重碎裂,可以在上面覆盖一层透明包装胶带,以使吸盘能够粘附。或者,可以使用非常强力的胶带代替吸盘。如果其他方法都无效,您可以用强力胶将吸盘粘在碎裂的屏幕上。

将吸盘手柄贴在屏幕的右侧边缘,距离底部边缘约5厘米。

以坚定且持续的压力向上拉起吸盘手柄,以创建一个刚好足够插入开口片的间隙。

只需创建一个足够插入开口片的小间隙。过度弯曲屏幕会损坏它。

将开口片的尖端插入间隙中。

不要将开口片插入超过5毫米,否则可能会损坏液晶显示屏。

Suas contribuições são licenciadas pela licença de código aberto Creative Commons.