Ir para o conteúdo principal

iPad Pro 11インチ 第二世代 ロジックボードの交換

Aviso: Você está editando um guia tipo pré-requisito. Quaisquer alterações que você faça afetarão o guia que inclui este passo.

Inglês
Japonês
Passo 26
iPad Pro 11" 3rd Gen Logic Board Replacement, Pry up the right edge: passo 0, imagem 1 %32 iPad Pro 11" 3rd Gen Logic Board Replacement, Pry up the right edge: passo 0, imagem 2 %32
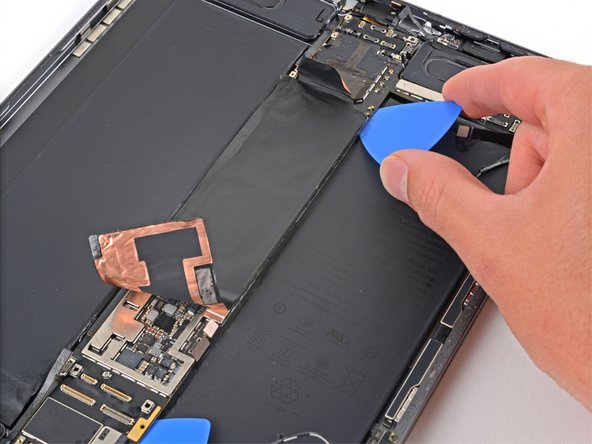
Pry up the right edge
  • Insert an opening pick under the right edge of the logic board above the left microphone and Apple Pencil charger cables.

  • Slide the opening pick under the right edge of the logic board to loosen it.

  • Pry against the frame underneath the logic board to separate the adhesive.

  • Don't forcefully lever against the battery—a punctured or bent battery may leak dangerous chemicals or cause a fire.

  • If the adhesive is still too strong to lift up the logic board, apply some additional isopropyl alcohol and wait one minute.

左のマイクとApple Pencilの充電ケーブルの上にあるロジックボードの右端の下に、オープニングピックを差し込みます。

オープニングピックをロジックボードの右端に沿って裏側を滑らせて接着を剥がして下さい。

ロジックボード下の筐体に対してこじって接着を剥がします。

バッテリーに強い力をかけないで下さい。穴があいたり凹んだりすると、危険な薬品が漏れたり炎上する危険があります。

まだ接着が強すぎでロジックボードを持ち上げられない場合は、イソプロピルアルコールを追加して1分待って下さい。

Suas contribuições são licenciadas pela licença de código aberto Creative Commons.