Ir para o conteúdo principal

iPod Touch 7e generatie Vervanging van het voorste paneel

Aviso: Você está editando um guia tipo pré-requisito. Todas as alterações que você fizer afetarão todos os 10 guias que incluem este passo.

Inglês
Holandês
Passo 5
iPod Touch 7th Generation Front Panel Replacement: passo 0, imagem 1 %32 iPod Touch 7th Generation Front Panel Replacement: passo 0, imagem 2 %32 iPod Touch 7th Generation Front Panel Replacement: passo 0, imagem 3 %32
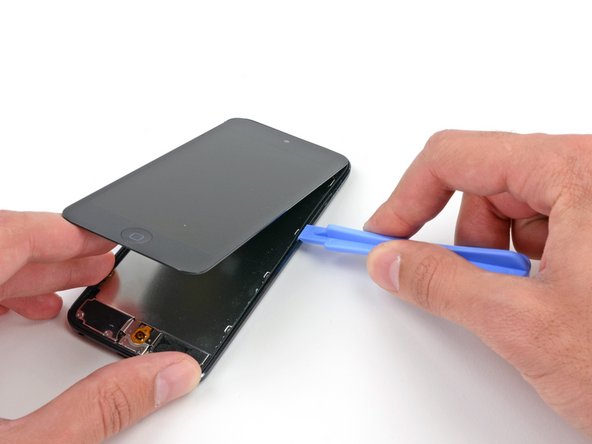
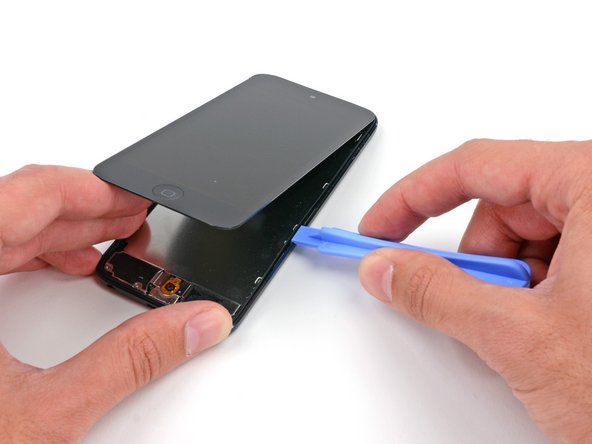
  • In the following steps, you will be loosening and freeing the plastic frame that surrounds the screen. It is connected to the rear case with several clips.

  • Starting at the top right of the device, insert a plastic opening tool into the gap between the plastic frame and the aluminum rear case.

  • Slide the tool down this crack, loosening the frame from the case.

In de volgende stappen zul je het plastic frame om het scherm heen losmaken en verwijderen. Deze is aan de achterste behuizing bevestigd door middel van een aantal klemmen.

Steek een plastic openingstool in de opening tussen het plastic frame en de aluminium achterste behuizing, beginnend rechtsboven in het toestel.

Schuif je tool langs de opening naar beneden en maak het frame uit de behuizing los terwijl je dit doet.

Suas contribuições são licenciadas pela licença de código aberto Creative Commons.