Ir para o conteúdo principal

Gaming PC CPU-koeler vervangen

Inglês
Holandês
Passo 5
Gaming PC CPU Cooler Replacement, Placing new cooler: passo 0, imagem 1 %32 Gaming PC CPU Cooler Replacement, Placing new cooler: passo 0, imagem 2 %32 Gaming PC CPU Cooler Replacement, Placing new cooler: passo 0, imagem 3 %32
Placing new cooler
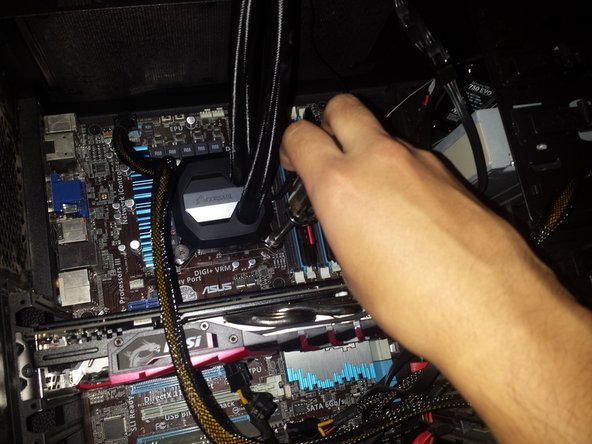
  • Place the new cooler over the cpu and align it with the four corners where the previous cooler was attached to.

  • Screw in the cooler, start at a corner and then move on to the corner diagonal from it, making an "X" shape as you screw them in.

  • It does not have to be tight, just as long as the cooler does not move, and both the cooler and CPU have proper contact with each other.

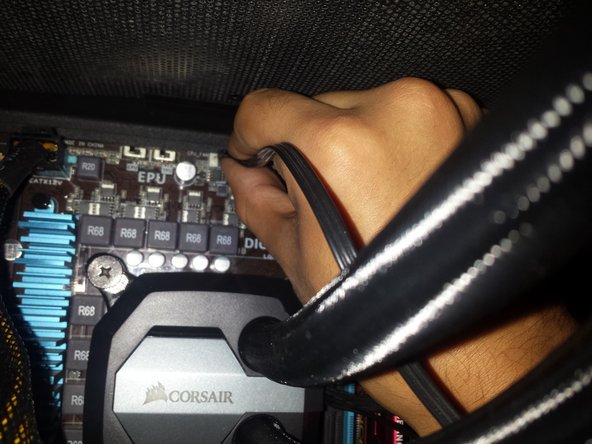
  • Plug in the power of the cooler in the same location of the previous cooler.

Plaats de nieuwe koeler over de cpu en lijn deze uit met de vier hoeken waar de vorige koeler aan was bevestigd.

Schroef de koeler erin, begin bij een hoek en ga dan diagonaal naar de hoek, maak een "X" -vorm terwijl je ze erin schroeft.

Deze schroeven hoeven niet strak vast te zitten, zolang de koeler maar niet beweegt, en zowel de koeler als de CPU elkaar raken.

Sluit de stroomkabel van de koeler aan op dezelfde locatie als de vorige koeler.

[title] Placing new cooler
[* black] Place the new cooler over the cpu and align it with the four corners where the previous cooler was attached to.
[* black] Screw in the cooler, start at a corner and then move on to the corner diagonal from it, making an "X" shape as you screw them in.
-[* icon_note] Dose not have to be tight, just as long as the cooler does not move, and both cooler and CPU are touching.
+[* icon_note] It does not have to be tight, just as long as the cooler does not move, and both the cooler and CPU have proper contact with each other.
[* icon_reminder] Plug in the power of the cooler in the same location of the previous cooler.

Suas contribuições são licenciadas pela licença de código aberto Creative Commons.