Ir para o conteúdo principal

Remplacement de l'écran LCD du Toshiba Chromebook 2

Inglês
Francês
Passo 3
Toshiba Chromebook 2 LCD Screen Replacement: passo 0, imagem 1 %32 Toshiba Chromebook 2 LCD Screen Replacement: passo 0, imagem 2 %32 Toshiba Chromebook 2 LCD Screen Replacement: passo 0, imagem 3 %32
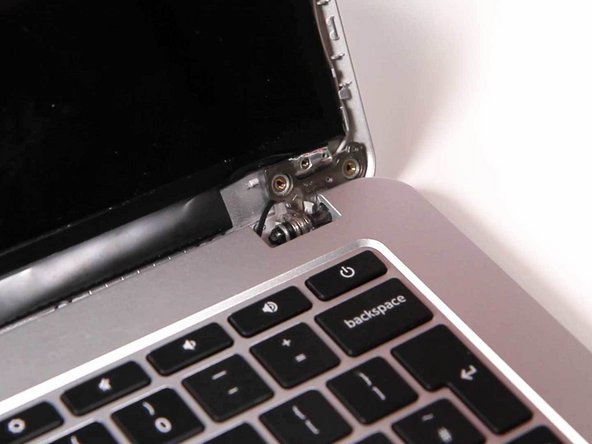
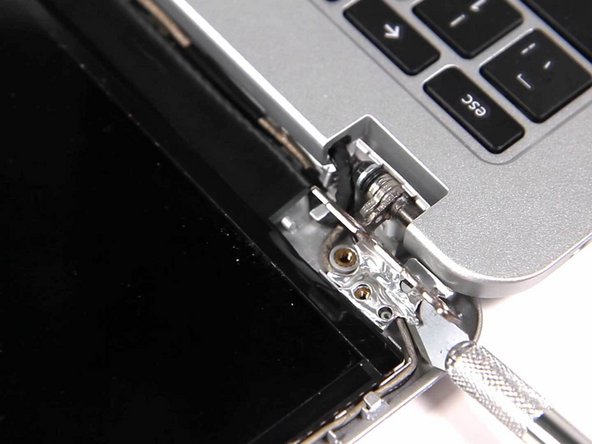
  • Remove the two screws holding the back assembly to the hinge mechanism.

  • Be careful as you're unscrewing these! Support the display assembly with your other hand.

  • Lay the loose display assembly down and then fold the metal foil tabs up and out of the way.

  • Some models' screens are held down by adhesive; if this is the case with yours, carefully pry the screen away from the back being careful not to damage any cables.

  • If your display is screwed down, there will be extra screws to remove and it should then come away freely.

Retirez les deux vis qui maintiennent l’ensemble arrière au mécanisme de charnière.

Faites attention car vous les dévissez! Soutenez l’affichage avec votre autre main.

Posez l’écran lâche, puis repliez les languettes en métal.

Les écrans de certains modèles sont maintenus par un adhésif; si tel est le cas, écartez soigneusement l’écran de l’arrière en veillant à ne pas endommager les câbles.

Si votre écran est vissé, il faudra enlever des vis supplémentaires et il devrait alors se dégager librement.

Suas contribuições são licenciadas pela licença de código aberto Creative Commons.