Ir para o conteúdo principal

Remplacement de la coque arrière de la Nintendo Switch

Aviso: Você está editando um guia tipo pré-requisito. Todas as alterações que você fizer afetarão todos os 22 guias que incluem este passo.

Inglês
Francês

Traduzindo o passo 1

Passo 1
Nintendo Switch Rear Panel Replacement, Release the Joy Con controller locking tabs: passo 0, imagem 1 %32 Nintendo Switch Rear Panel Replacement, Release the Joy Con controller locking tabs: passo 0, imagem 2 %32 Nintendo Switch Rear Panel Replacement, Release the Joy Con controller locking tabs: passo 0, imagem 3 %32
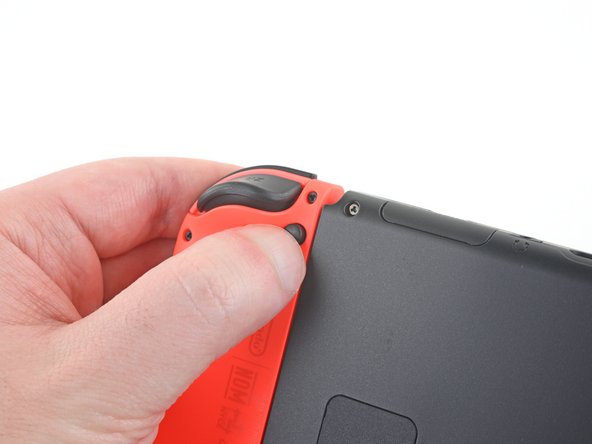
Release the Joy Con controller locking tabs
  • Before you begin this repair, make sure the device is completely powered off.

  • Press and hold down the small round button on the back of the Joy Con controller.

  • While you hold down the button, slide the controller upward.

Avant de commencer cette réparation JoyCon Switch, assurez-vous que la manette est complètement éteinte.

Appuyez sur le petit bouton rond à l'arrière de la JoyCon et maintenez-le enfoncé.

Pendant que vous maintenez le bouton enfoncé, faites glisser la Joy-Con vers le haut.

Suas contribuições são licenciadas pela licença de código aberto Creative Commons.