Ir para o conteúdo principal

iView-776TPCII Motherboard Replacement

O que você precisa

  1. iView-776TPCII Motherboard Replacement, Rear Panel: passo 1, imagem 1 %32 iView-776TPCII Motherboard Replacement, Rear Panel: passo 1, imagem 2 %32 iView-776TPCII Motherboard Replacement, Rear Panel: passo 1, imagem 3 %32
    • Before disassembling your device, make sure that the power is completely turned off.

    • Use the plastic opening tool to release the clips holding the rear panel of the device onto the front section.

    • The clips may take some pressure before releasing.

    • Continue around the entire device until all of the clips have been released.

  2. iView-776TPCII Motherboard Replacement: passo 2, imagem 1 %32 iView-776TPCII Motherboard Replacement: passo 2, imagem 2 %32
    • Use a spudger to carefully free the speaker from it's housing on the back panel.

    • Place the spudger between the speaker and the rear panel. Use a prying motion to remove the component.

    • Be careful not to apply an over amount of force. If care is not taken, the speaker could break under the pressure.

  3. iView-776TPCII Motherboard Replacement, Battery: passo 3, imagem 1 %32
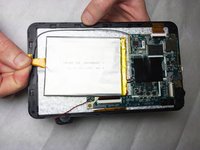
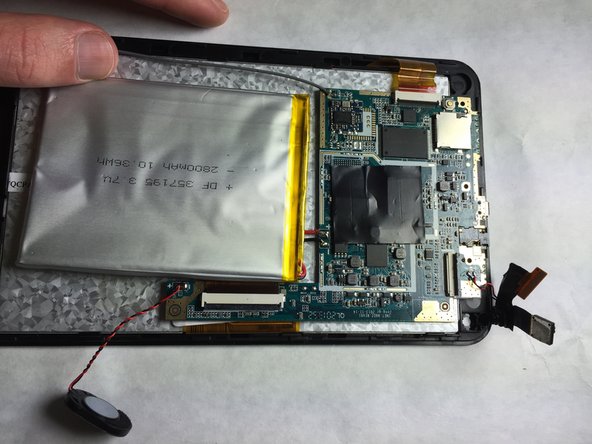
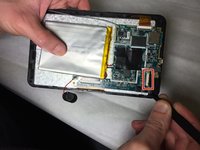
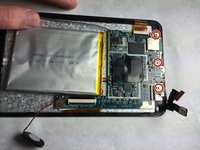
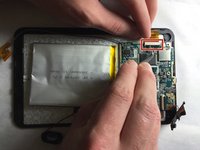
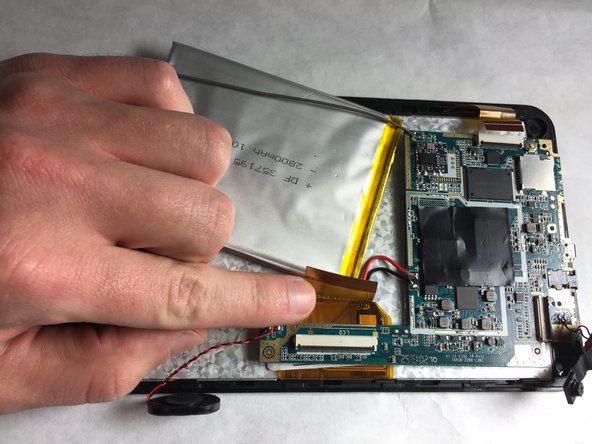
    • Insert the flat side of the standard spudger underneath the battery and use a prying action to loosen the glue holding it to the digitizer.

    • Do this all around the battery until it comes off.

    • The glue is strong, so some force may be required. However, be careful not to apply so much pressure that the battery bends or breaks.

    • At this point, do not attempt to fully remove the battery, since it is still connected to the motherboard.

  4. iView-776TPCII Motherboard Replacement: passo 4, imagem 1 %32
    • Use the Portable Soldering Iron tool to heat the leads coming from the battery to the motherboard, thereby breaking the connection.

    • For help on soldering, refer to the iFixit "How To Solder and Desolder Connections" technique guide as necessary.

    • Once heated, use tweezers to pull the wires free from their connections.

    • To ease reassembly, take note of which wire went to the positive and negative terminals.

  5. iView-776TPCII Motherboard Replacement, Wi-Fi Antenna: passo 5, imagem 1 %32 iView-776TPCII Motherboard Replacement, Wi-Fi Antenna: passo 5, imagem 2 %32
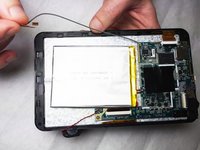
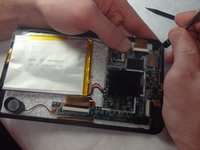
    • Detach the end of the Wi-Fi antenna from the tape on the edge of the shell.

  6. iView-776TPCII Motherboard Replacement: passo 6, imagem 1 %32
    • Use the Portable Soldering Iron tool to heat the lead coming from the Wi-Fi antenna to the logic board, thereby breaking the connection.

    • For help on soldering, refer to the iFixit "How To Solder and Desolder Connections" technique guide as necessary.

    • Once heated, use tweezers to pull the wire free from its connection.

  7. iView-776TPCII Motherboard Replacement, Camera Assembly: passo 7, imagem 1 %32 iView-776TPCII Motherboard Replacement, Camera Assembly: passo 7, imagem 2 %32
    • The camera module is located in the upper-right corner of the tablet.

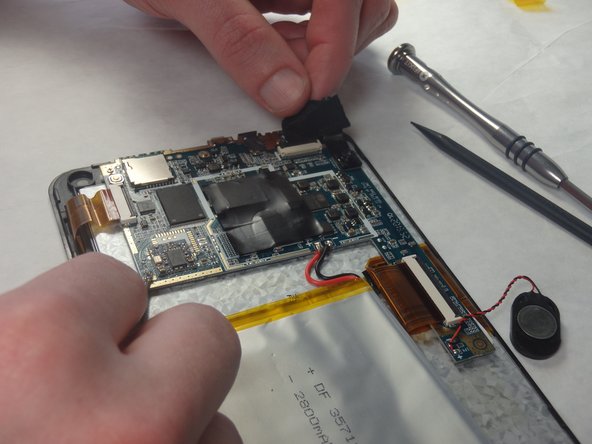
    • Loosen the edges of the black tape covering the camera using the heavy-duty spudger.

    • Use the freed edges of the tape to gently remove the camera assembly from its plastic housing.

    • The camera assembly will still be connected to the rest of the device via a ribbon cable. Take care so as not to tear this connection.

  8. iView-776TPCII Motherboard Replacement: passo 8, imagem 1 %32 iView-776TPCII Motherboard Replacement: passo 8, imagem 2 %32
    • Use tweezers to lift the cover off the top of the camera's ZIF adapter.

    • When reassembling the device, be sure to fully secure the ribbon cable from the camera back into the ZIF adapter.

    • Pull the assembly away from the motherboard with a set of tweezers to prepare for desoldering.

  9. iView-776TPCII Motherboard Replacement: passo 9, imagem 1 %32
    • Use the Portable Soldering Iron tool to heat the leads coming from the camera assembly to the motherboard, thereby breaking the connection.

    • For help on soldering, refer to the iFixit "How To Solder and Desolder Connections" technique guide as necessary.

    • Once heated, use tweezers to pull the wires free from their connections.

    • To ease reassembly, take note of which wire went to the positive and negative terminals.

  10. iView-776TPCII Motherboard Replacement, Motherboard: passo 10, imagem 1 %32 iView-776TPCII Motherboard Replacement, Motherboard: passo 10, imagem 2 %32 iView-776TPCII Motherboard Replacement, Motherboard: passo 10, imagem 3 %32
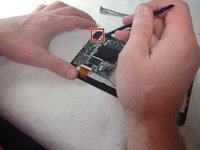
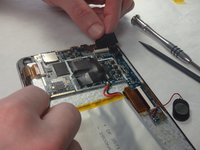
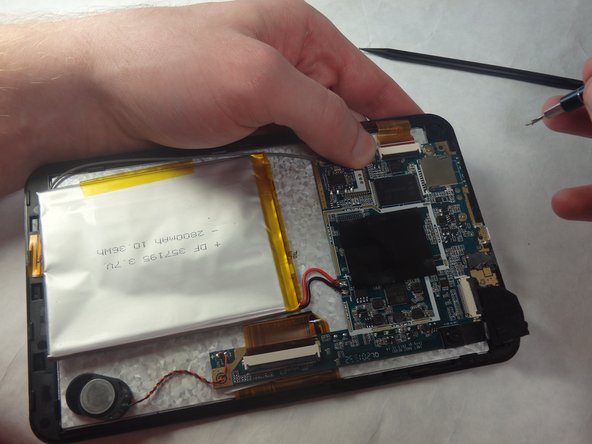
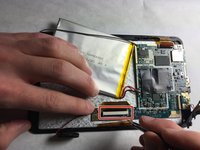
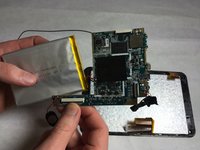
    • Remove the three 2.2mm Phillips head screws using a screwdriver to loosen the motherboard from the shell.

    • Check "Screwdriver Best Practices" as needed for help on how to properly use a screwdriver with your device.

  11. iView-776TPCII Motherboard Replacement: passo 11, imagem 1 %32 iView-776TPCII Motherboard Replacement: passo 11, imagem 2 %32
    • Use the 45 degree tweezers to lift the black section of the digitizer ZIF adapter to release the ribbon. Gently pull the ribbon cable out of its socket.

    • When reassembling the device, be sure to fully secure the ribbon cable back into the ZIF adapter.

  12. iView-776TPCII Motherboard Replacement: passo 12, imagem 1 %32 iView-776TPCII Motherboard Replacement: passo 12, imagem 2 %32 iView-776TPCII Motherboard Replacement: passo 12, imagem 3 %32
    • Use the 45 degree tweezers to lift the black section of the LCD ZIF adapter to release the ribbon. Gently pull the ribbon cable out of its socket.

    • When reassembling the device, be sure to fully secure the ribbon cable back into the ZIF adapter.

    • The motherboard is now separated from the digitizer and front panel and can be safely removed from the device.

Conclusão

To reassemble your device, follow these instructions in reverse order.

Cory Gratzer

Membro desde: 09/16/15

570 Reputação

Autoria de 5 guias

Equipe

IUPUI, Team 2-2, Baechle Fall 2015 Membro de IUPUI, Team 2-2, Baechle Fall 2015

IUPUI-BAECHLE-F15S2G2

Membros da 3

Autoria de 12 guias

0 comentários

Adicione um comentário

Exibir estatísticas:

Últimas 24 horas: 0

Últimos 7 dias: 0

Últimos 30 dias: 2

Duração total: 465