Essa tradução foi gerada por um programa e ainda não foi revisada por uma pessoa. Falas essa língua? Dá uma olhada.
Introdução
Remova o painel frontal de vidro para acessar os componentes internos do seu iPod Touch.
O que você precisa
Vídeo de Apresentação
-
-
-
A imagem à esquerda (painel frontal já removido) mostra a localização dos clipes de metal (indicados em vermelho) que se encaixam na moldura de plástico. Nos próximos passos, tente erguer o painel frontal a partir dos vãos entre esses clipes.
 Pergunte ao FixBot
-
-
-
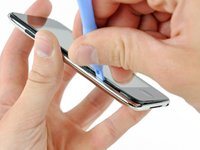
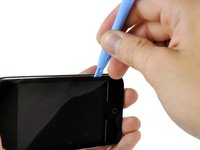
Insira cuidadosamente uma ferramenta de abertura de iPod entre o painel frontal de vidro e a borda de plástico próxima aos botões de volume.
-
Gire a ferramenta para fora do Touch para erguer o painel de vidro.
-
-
-
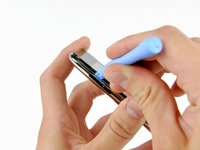
Insira a Ferramenta de abertura entre o painel frontal e a borda de plástico e force para cima em diversos pontos ao longo da borda esquerda do Touch.
-
-
-
-
Continue forçando a borda esquerda para cima até que as bordas superior e inferior comecem a sair do Touch.
-
Assim que as bordas superior e inferior tiverem se soltado um pouco do Touch, use a Ferramenta de abertura para garantir que a borda de plástico esteja desconectada dos clipes ao longo da parte interna do Touch.
-
-
-
Continue o procedimento de alavanca, concentrando-se agora em soltar a moldura de plástico dos clipes de metal internos.
-
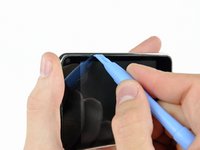
Use a alavanca ao longo da borda superior do Touch para separar ainda mais o painel frontal do resto do dispositivo.
-
-
-
Use a espátula para levantar o painel frontal ao longo da borda direita, seguindo o método descrito nos passos anteriores.
-
Continue o procedimento por todo o perímetro do painel frontal até que ele esteja levemente levantado do painel traseiro.
-
-
-
Levante o painel frontal para fora da carcaça traseira, tomando cuidado com o cabo que ainda o prende perto do canto superior esquerdo do Touch.
-
-
-
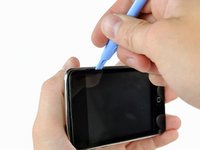
Use a ponta chata de uma espátula (ou uma Ferramenta de abertura) para levantar com muito cuidado o conector do cabo da tela tátil da placa lógica superior.
-
-










Para a remontagem de seu dispositivo, siga estas instruções na ordem inversa.
Cancelar: não concluí este guia.
97 outras pessoas executaram este guia.
Um agradecimento especial a esses tradutores:
100%

Sandra Hiller está nos ajudando a consertar o mundo! Quer contribuir?
Comece a traduzir ›

6Comentários do guia
When prying up - make sure that you lift the black plastic frame. I got trouble because on side I managed to lift the glass of the plastic frame on one side, and lifted the plastic frame out of the clips on the other sides, making it very hard to get the panel out. When I at last succeeded it was because the plastic frame broke in the lower right corner – when I had lifted the panel off the right side of the plastic frame was still attached (it needed to break at the top too before I could lift of the panel completely).
will i because to put the panel back on easily?
Patience and a can of compressed air are mandatory. The inside of my iPod Touch was pretty dusty after two years in my pocket. Before putting on the new digitizer, everything needs to be clean.
Also, I used my spudger to pry half the broken frame out of the left gutter (see Michael above). Doing that without damaging the screen was the hardest part.
I'm getting ready to do this and have the old screen partially off to let things dry out. I am, however, unclear on what to pry on to release the ribbon. From past experience with other iPod products, I'm thinking it is a small clamp that needs to be pried up. Is that the case and, if so, is it located where the picture indicates? I think the clamp is under the small grey plastic cover.
I watched the iFixit video & read the steps. I found out that when removing screen...be very careful not to stick pry tool in to deep to lift out frame, it can crack the LCD, which is what I did.
