Essa tradução foi gerada por um programa e ainda não foi revisada por uma pessoa. Falas essa língua? Dá uma olhada.
Introdução
A parte traseira brilhante da estrutura do seu iPod.
O que você precisa
-
-
-
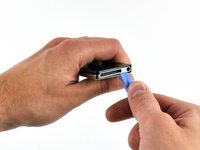
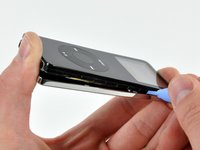
Insira a Ferramenta de abertura grande na fenda entre a caixa frontal e o painel traseiro do iPod, abaixo do conector de dock. Mova a ferramenta para frente e para trás para criar uma abertura. A borda da ferramenta deve estar voltada para o painel traseiro para evitar arranhões acidentais na caixa frontal de alumínio.
-
-
-
-
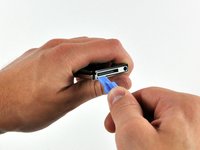
Insira uma pequena Ferramenta de abertura na fenda do lado do botão Hold do iPod, com a borda da ferramenta apontando para o painel traseiro.
-
-
-
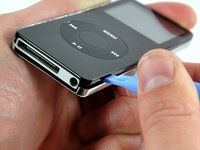
Aumente cuidadosamente a abertura existente pressionando/movendo a Ferramenta de abertura de iPod pequena na fresta próxima a cada uma das duas abas presas à carcaça traseira, empurrando os clipes em direção ao centro do iPod até que ambos estejam liberados.
-
-
-
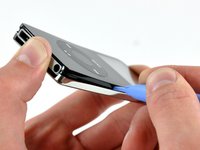
Repita o mesmo procedimento indicado no passo anterior para soltar os cinco clipes ao longo do lado da entrada para fone de ouvido do iPod.
-
-
-
Após garantir que todas as abas estejam soltas, separe as duas metades do iPod.
-
O painel traseiro está agora separado do iPod.
-

 Pergunte ao FixBot





Para a remontagem de seu dispositivo, siga estas instruções na ordem inversa.
Cancelar: não concluí este guia.
19 outras pessoas executaram este guia.
Um agradecimento especial a esses tradutores:
100%

Sandra Hiller está nos ajudando a consertar o mundo! Quer contribuir?
Comece a traduzir ›

