Introdução
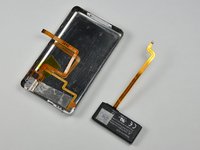
Instructions on how to remove the headphone jack from the 5th Gen iPod Video.
O que você precisa
-
-
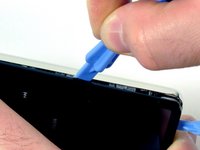
Insert the iPod opening tool into the left side of the iPod, with the edge of the tool pointing towards the metal back.
-
A small guitar pick can be extremely helpful in opening the iPod. Simply insert it and slide the pick around the case to free the clips to streamline the process.
-
Gently enlarge the existing crevice by wiggling the iPod opening tool and moving it to the left.
-
Continue doing so until the entire side of the iPod is loose.
-
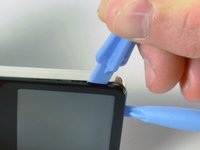
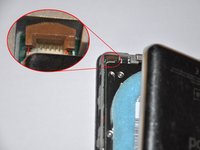
You can then insert an iPod opening tool to the right of the Hold button. Be very careful while inserting the tool, as the display is very fragile.
-
-
-
Gently glide the iPod opening tool on the top of the display, making sure to free the retaining clips.
-
The other sides of the iPod should now easily come loose. If they do not, use iPod opening tools on the right side of the iPod in the same way as on the left side of the iPod.
-
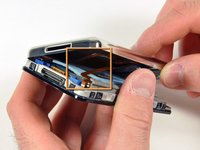
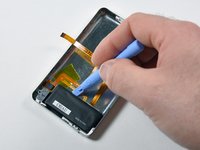
Separate the front of the iPod from the back about an inch (or a couple of centimeters).
-
-
Ferramenta utilizada neste passo:Tweezers$3.99
-
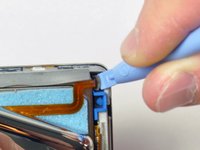
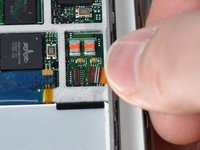
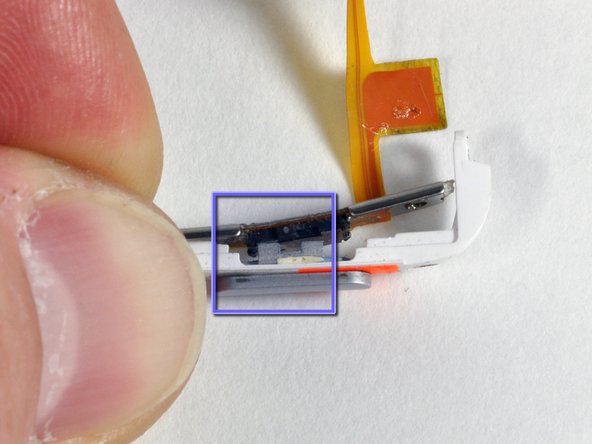
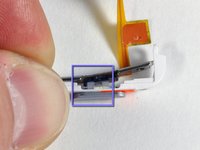
Use angled tweezers or an iPod opening tool to slide up the brown connector latch, holding the orange battery ribbon cable in place. Make sure you pull from both sides of the latch. You only need to lift the brown connector latch up about 1-2mm to free the cable. Do not lift more or remove the latch, or you might pull the white connector with it!
-
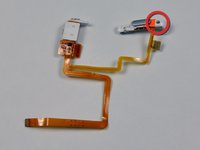
Remove the cable from the connector.
-
-
-
-
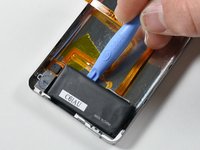
Insert an iPod opening tool in between the metal case and battery at the location illustrated by the picture.
-
Gently wiggle the tool while pushing it further in between the battery and back case. The adhesive holding the battery should give, allowing the battery to be removed from the rear panel.
-


To reassemble your device, follow these instructions in reverse order.
To reassemble your device, follow these instructions in reverse order.
Cancelar: não concluí este guia.
324 outras pessoas executaram este guia.

13 comentários
thanks for guiding me through the process & making the tutorial available .
Very effective guide just be carefull and it should be smooth sailing thank you.
Fantastic instructions. Was able to fix the head phne jack with tools and parts purchased here at iFixit. I have been using this site for years and will continue forever!! I recommend buying the toolkit was invaluable on this job could have not been successful without it. Thanks iFixit you are amazing as well as your contributors.
Putting the iPod back together is much harder than taking it apart! Could definitely have used a magnifying glass, but dad's reading glasses helped.
Reattaching the screws and the ribbons was particularly difficult. I ended up replacing one screw with a piece of insulation tape, because it refused to tighten again. But after finally getting everything back where it should be, it was magical to turn it on and watch it light up. It's also fantastic having sound come out both ears, and a working Hold button :) Thanks!
great fix, just two comments: the screwdriver is not easy to use at first and the ipod opener tool (blue plastic) is quite fragile. Otherwise, my ipod is just like new now!!!