Esta versão pode conter edições incorretas. Mude para o último instantâneo verificado.
O que você precisa
-
Este passo não foi traduzido. Ajude a traduzi-lo
-
Insert a SIM eject tool into the hole in the SIM tray.
-
Press to eject the SIM tray.
-
-
-
Remova os dois parafusos Pentalobe de 3,4 mm dispostos em ambos os lados do conector Lightning.
-
-
-
Puxe a pega azul para trás para destravar os braços do Anti-Clamp.
-
Deslize os braços pela borda esquerda ou direita do seu iPhone.
-
Posicione as ventosas próximo à borda inferior do iPhone, diretamente acima do botão home - uma pela dianteira e a outra pela traseira.
-
Aperte as ventosas uma contra a outra para aplicar sucção na área desejada.
-
-
Este passo não foi traduzido. Ajude a traduzi-lo
-
If you don't have an Anti-Clamp, follow the next three steps to use a suction handle.
-
Apply mild heat to the lower edge of the iPhone using an iOpener or hair dryer for about a minute.
-
-
-
-
Segure com cuidado o conjunto do display e eleve-o para abrir o telefone, usando os clipes na parte superior do painel dianteiro como uma dobradiça.
-
Abra o display a um ângulo de cerca de 90º e apoie-o em algo que o sustente enquanto você está trabalhando no telefone.
-
Engate uma faixa de elástico para fixar seguramente o display enquanto você trabalha. Isso previne uma tensão indevida nos cabos do display.
-
-
-
Remova os seguintes parafusos Phillips que seguram o suporte do conector da bateria à placa lógica:
-
Um parafuso de 2,9 mm
-
Um parafuso de 2,3 mm
-
-
-
Remova os seguintes parafusos Phillips:
-
Três parafusos de 1,3 mm
-
Um parafuso de 1,6 mm
-
Um parafuso de 3,0 mm
-
-
Este passo não foi traduzido. Ajude a traduzi-lo
-
Use the point of a spudger to pry up and disconnect the antenna cable from the bottom of the logic board.
-
-
Este passo não foi traduzido. Ajude a traduzi-lo
-
Use the point of a spudger to pry up and disconnect the Lightning connector cable from the logic board.
-
-
Este passo não foi traduzido. Ajude a traduzi-lo
-
Remove the three Phillips screws securing the Lightning connector bracket:
-
Two 3.5 mm screws
-
One 2.7 mm screw
-
Remove the bracket.
-
-
Este passo não foi traduzido. Ajude a traduzi-lo
-
Use the point of a spudger to pry up and disconnect the antenna cable from the Lightning connector assembly.
-
-
Este passo não foi traduzido. Ajude a traduzi-lo
-
Use the point of a spudger to pry up and disconnect the antenna cable from the top of the logic board.
-
-
Este passo não foi traduzido. Ajude a traduzi-lo
-
Carefully lift the antenna cable and de-route it from the edge of the phone. Use the point of a spudger to help lift the cable free it from the retaining clips.
-
-
Este passo não foi traduzido. Ajude a traduzi-lo
-
Remove the six Phillips screws securing the speaker to the rear case:
-
One 2.5 mm screw
-
Two 2.7 mm screws
-
One 1.5 mm screw
-
One 1.7 mm screw
-
One 2.6 mm screw securing the speaker to the bottom edge of the rear case.
-
-
Este passo não foi traduzido. Ajude a traduzi-lo
-
Insert the flat end of a spudger between the long edge of the speaker module and the case wall.
-
Pry gently to loosen the speaker module.
-
Once the module is loose, lift and remove the speaker module and the attached antenna cable from the phone.
-
-
Este passo não foi traduzido. Ajude a traduzi-lo
-
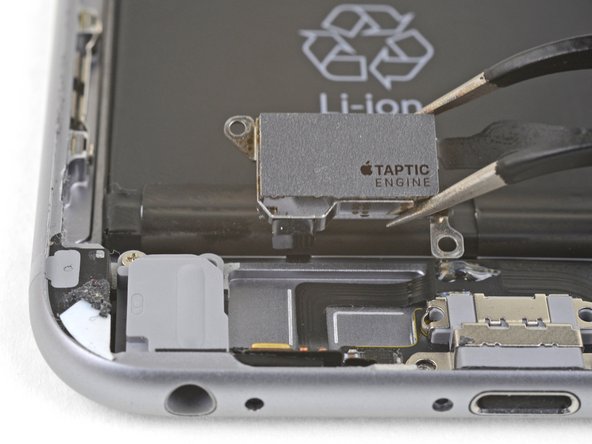
Use the point of a spudger to disconnect the Taptic Engine flex cable from the lower flex cable.
-
-
Este passo não foi traduzido. Ajude a traduzi-lo
-
Remove the two Phillips screws securing the Taptic Engine to the rear case:
-
One 3.1 mm screw
-
One 2.1 mm screw
-
Remove the Taptic Engine.
-
-
Este passo não foi traduzido. Ajude a traduzi-lo
-
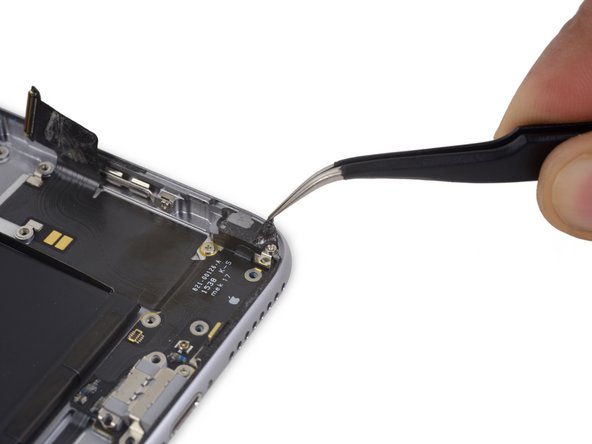
Peel back the tape over the screw securing the Lightning connector flex cable to the lip of the phone.
-
-
Este passo não foi traduzido. Ajude a traduzi-lo
-
Remove the following five Phillips screws:
-
One 2.9 mm screw
-
One 1.9 mm screw
-
One 1.5 mm screw
-
One 1.6 mm screw
-
One 1.3 mm screw set in the bottom edge of the rear case
-
-
Este passo não foi traduzido. Ajude a traduzi-lo
-
Prepare an iOpener and lay it across the bottom of the phone to soften the adhesive holding the Lightning connector flex cable in place.
-
Wait about a minute for the adhesive to soften before removing the iOpener and continuing.
-
-
Este passo não foi traduzido. Ajude a traduzi-lo
-
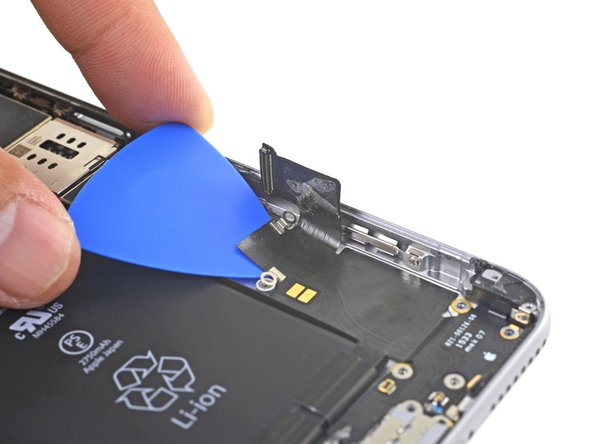
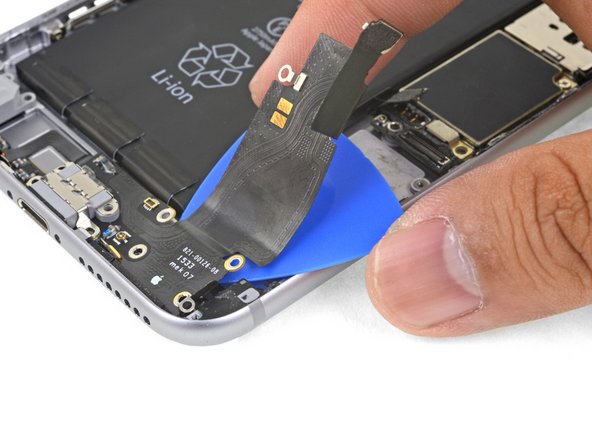
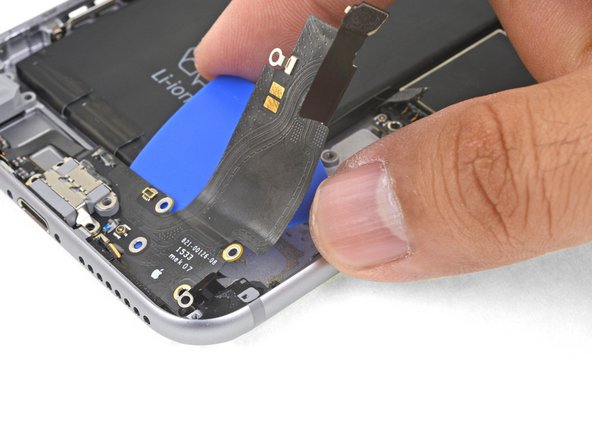
Insert an opening pick under the Lightning connector flex cable and slowly slice through the adhesive holding the cable to the rear case.
-
-
Este passo não foi traduzido. Ajude a traduzi-lo
-
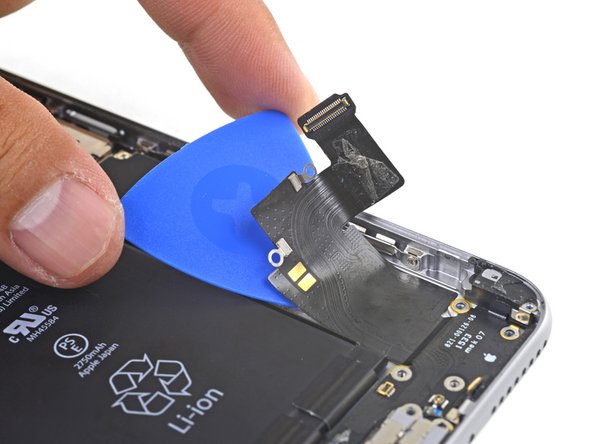
Continue sliding the opening pick underneath the flex cable.
-
-
Este passo não foi traduzido. Ajude a traduzi-lo
-
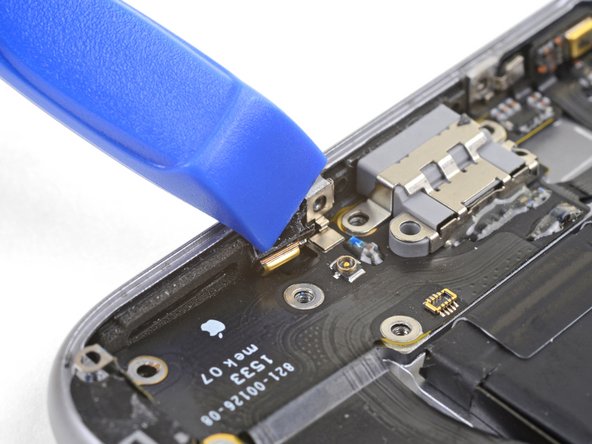
Use an opening pick to pry the left microphone off the edge of the rear case.
-
-
Este passo não foi traduzido. Ajude a traduzi-lo
-
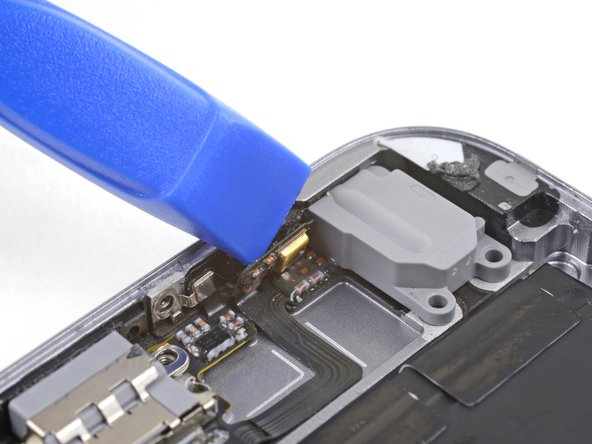
Insert the point of a spudger into the headphone jack and wiggle it slightly to loosen the headphone jack from the bottom edge of the case.
-


Cancelar: não concluí este guia.
163 outras pessoas executaram este guia.


24 comentários
Hardest thing I have every done!! But well worth it. Now I know I need to go up on my labor price!!! :-) Thanks a ton from South Carolina!!
I just completed this repair, replacing the Headphone Jack/Lightening port, battery and iSight camera all at the same time. I removed everything as it explained in the guide, but can totally see how not removing the logic board would save time and isn't 100% necessary. I imagine that peeling the upper portion of the headphone/lighting port is slightly easier with the logic board removed, and you don't have to worry about that antenna cable. If I did it again, I would probably still remove the logic board.
you would have to be crazy to remove the board. just flip the speaker up on its back and rest against logic board. 20 mins should complete this . i cant stress enough that board or camera does not need removed . PERIOD
I completed this and it starts charging, but the home button stop working. It still sense my finger print, but it does not respond when i click on it.
Any help?