Introdução
This guide will show you how to replace your iPad Wi-Fi's front panel.
O que você precisa
Vídeo de Apresentação
-
-
If your display glass is cracked, keep further breakage contained and prevent bodily harm during your repair by taping the glass.
-
Lay overlapping strips of clear packing tape over the iPad's display until the whole face is covered.
-
Do your best to follow the rest of the guide as described. However, once the glass is broken, it will likely continue to crack as you work, and you may need to use a metal prying tool to scoop the glass out.
-
-
-
There are 14 metal clips holding the display assembly in place, shown at left. As you pry in the following steps, do your best to pry around these clips and not slice through them with your opening tool.
A clearer explanation of the orientation is needed here. The bar code is at the top left of the iPad when you are looking at the screen.
-
-
-
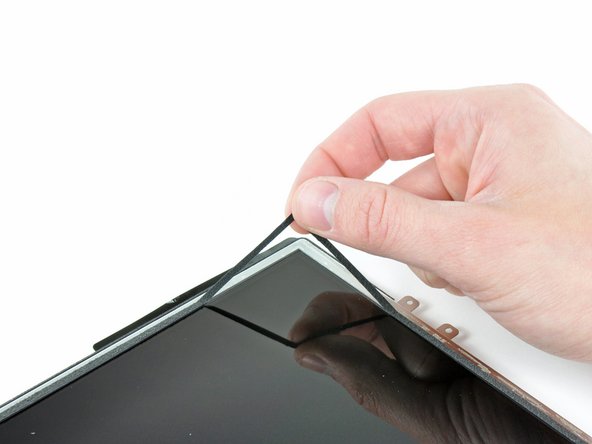
Insert a metal spudger between the top edge of the display assembly and the rear panel assembly.
-
Rotate the spudger away from you to release the tabs along the top edge of the display.
-
Insert a second metal spudger between the top edge of the display assembly and the rear panel assembly to keep the tabs from snapping back into place.
-
-
-
With one spudger, work your way along the right edge of the iPad.
-
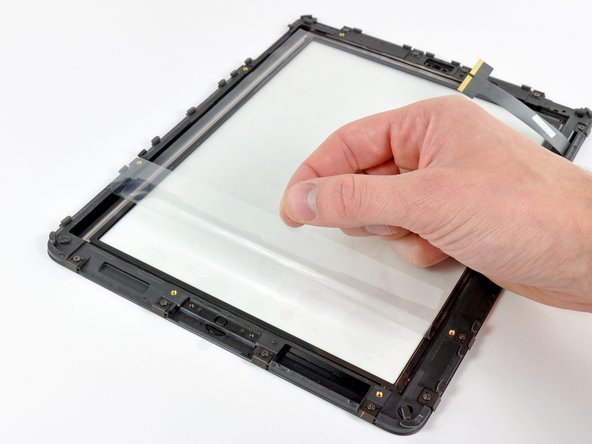
The front panel is held to the aluminum back by metal clips on the top, bottom, and left sides. The right side has plastic tabs which slide into recesses in the backplate.
-
Once the clips are released, lift the left side of the front panel up and slide it to the left to clear the tabs from the aluminum backplate.
Its seems easier to undo the clips on the left and bottom by levering them with an iPad tool and pusing the clips in from the edge with another tool when i can visually see them. One the right side, bottom and most of the left side is done there isnt much need to do the top as it will slide off if moved about a centimeter
-
-
-
In the following steps, you will disconnect the three cables attaching the display assembly to the logic board. The cables are for the following components:
-
Digitizer
-
Ambient Light Sensor
-
Display Data Cable
It would be easier to detach the Display Data Cable at its connector on the far right in the picture, since there doesnt seem to be much play to undo the suggested one.
-
-
-
Use the edge of a plastic opening tool to flip up the retaining flaps holding the digitizer ribbon cables in their sockets on the logic board.
-
Pull the digitizer ribbon cables straight out of their sockets.
Adding this comment in its proper place:
After flipping up the metal retainer, pull it sideways.
Do not pull it up vertically.
-
-
-
-
Disconnect the display data cable from the main board by flipping up the metal retainer by its black plastic pull tab.
-
Pull the cable connector away from its socket.
IMHO, unhooking data display cable from the other end is preferable to the above location, since the cable itself is sealed or taped onto the assembly.
-
-
-
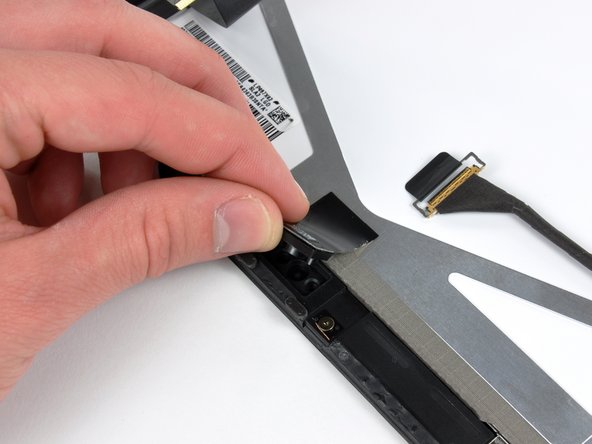
Use the edge of a plastic opening tool to carefully pry the ambient light sensor board off the adhesive securing it to the display frame.
-
Once you've gained enough clearance, peel the ambient light sensor off the LCD.
Step 7 after flipping up the metal retainer, pull it sideways.
Do not pull it up vertically.
I added your comment in the proper place at Step 7
-
-
-
While holding the digitizer cable down, carefully peel back the piece of tape connecting the digitizer cable to the display frame.
-
-
-
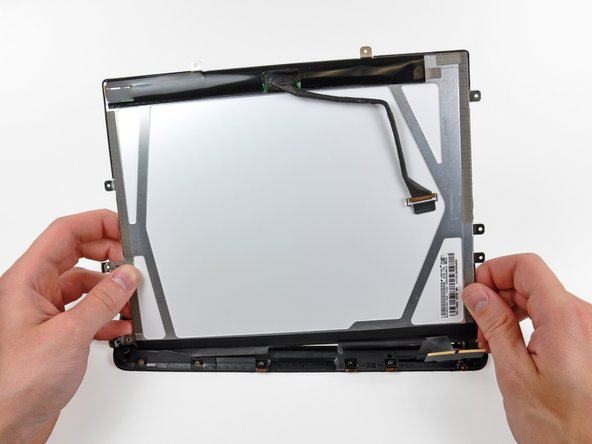
Lift the LCD from its free end, and remove it from the display frame.
-
Carefully peel the adhesive securing the long side of the LCD to the display frame, then remove the LCD.
-
-
-
If it is still stuck to the front panel, remove the strip of EMI tape near the ambient light sensor socket.
-
-
-
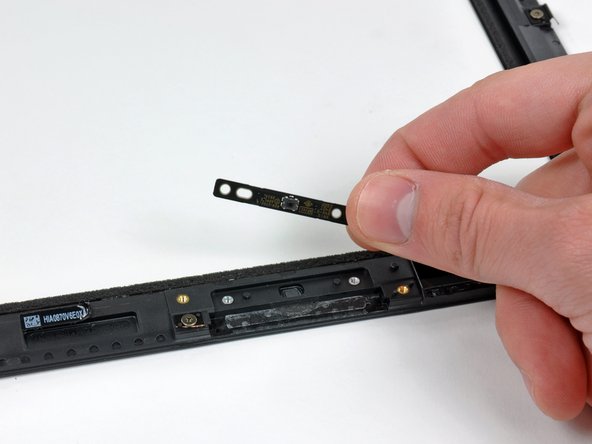
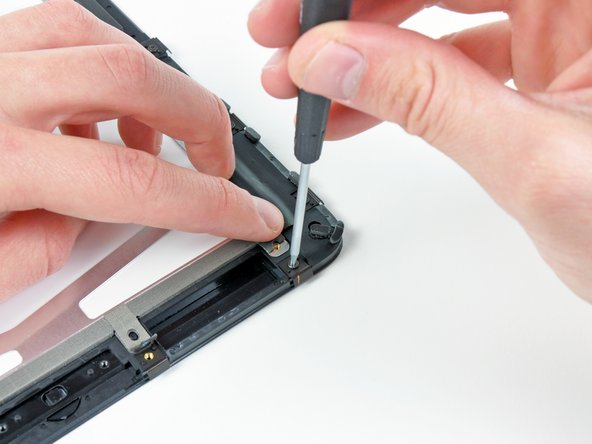
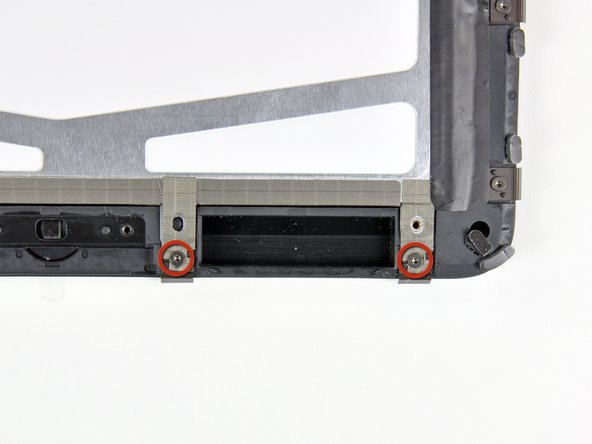
Remove the two T5 Torx screws securing the home button switch to the plastic display frame.
-
Remove the home button switch board from the front panel assembly.
-


Continue the installation by following the guide from Step 12 in reverse.
Continue the installation by following the guide from Step 12 in reverse.
Cancelar: não concluí este guia.
44 outras pessoas executaram este guia.

Um comentário
LCD cable is easily trapped under lcd on reassembly without due care causing colour differences on snapping into place
1) Are you recommending to cover the display with clear packing tape even if it is intact (not cracked)?
2) If so,will the tape take the display’s oleophobic coating with it when removed?
Mitch Stary - Responder
Hola necesito comprar
Alsone Michel - Responder
Hola, ¿no estoy seguro si te refieres a las gafas de protección o a la pantalla? Te dejo los dos enlaces aquí:
iPad LCD Panel
Safety Glasses
Sandra Hiller -