Introdução
O iMac G3 usa uma unidade de disco óptico com carregamento por bandeja. Ela utiliza uma unidade de disco óptico PATA. Este guia mostrará como trocar a unidade de disco óptico do seu computador.
O que você precisa
-
-
-
O iMac G3. Este era um excelente computador para a época e possuía muitos recursos.
 Pergunte ao FixBot
-
-
-
Comece virando o iMac de cabeça para baixo. Pode ajudar colocá-lo sobre uma toalha para não danificar a tela ou riscar a parte frontal.
-
-
-
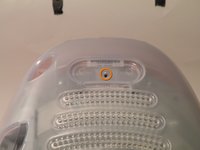
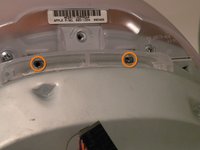
Remova este parafuso Phillips.
-
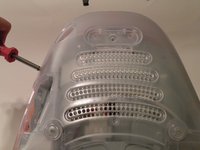
Usando uma chave de fenda, percorra as bordas da tampa inferior até que ela se solte.
-
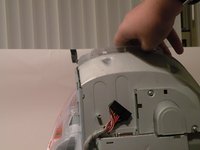
Em seguida, levante a tampa inferior para fora e coloque-a de lado.
-
-
-
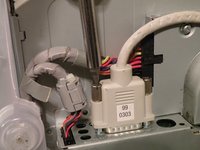
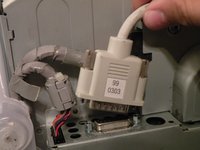
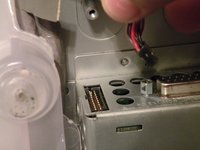
Agora, remova o conector de vídeo DB-15 da placa lógica.
-
Pode ser útil usar uma chave Phillips para remover os parafusos de aperto manual.
-
-
-
-
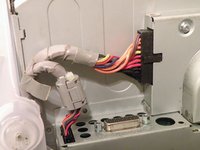
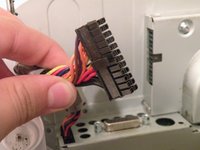
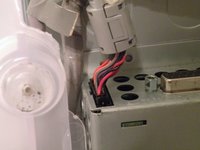
Remova o cabo de alimentação do conjunto da placa lógica.
-
-
-
Remova o conector do painel dianteiro. (Talvez você também precise remover um parafuso adicional que prende o conector do painel dianteiro ao conjunto da placa lógica).
-
-
-
Agora, remova estes parafusos Phillips.
-
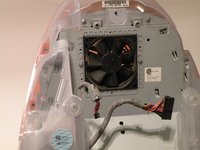
Agora, segure o conjunto da placa lógica pela peça de plástico e levante-a para fora.
-
-
-
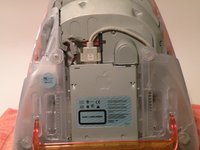
O conjunto da placa lógica. Este é o coração do computador, ele contém a placa-mãe, CPU, memória RAM, V-RAM, bateria da PRAM, o disco rígido e a unidade de disco óptico.
-
-
-
-
-
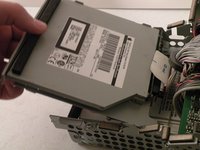
Agora, vamos remover a unidade de disco óptico!
-
-
-
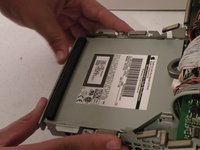
A unidade de disco óptico está localizada próxima à parte frontal do conjunto.
-
-
-
Para remover a unidade, empurre-a, levante-a e, em seguida, puxe-a para frente.
-
Ao puxar a unidade para frente, desconecte o cabo plano e coloque-o de lado.
-
-
-
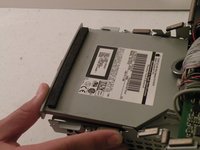
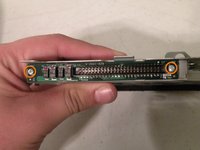
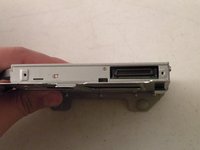
Remova os dois parafusos Phillips #00.
-
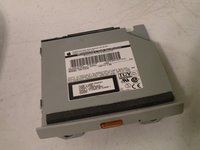
Em seguida, remova a placa. Isso revelará que se trata de uma unidade PATA padrão.
-
Parabéns, a unidade está livre! Você pode usar qualquer unidade PATA com carregamento por bandeja no iMac G3, o que significa que você pode instalar um gravador de CD (CDRW) para gravar CDs no OS9 ou no X (se estiver usando o OSX, instale esse gravador de DVD), mas, é claro, apenas as unidades originais combinarão com o excelente visual do iMac.
-
-


Para a remontagem de seu dispositivo, siga estas instruções na ordem inversa.
Cancelar: não concluí este guia.
15 outras pessoas executaram este guia.
Um agradecimento especial a esses tradutores:
100%

Translation Bot está nos ajudando a consertar o mundo! Quer contribuir?
Comece a traduzir ›

Equipe

1Comentário do guia
Awesome writeup! Thank you!! Though I've got my doubts I'm going to be able to find a replacement drive in good condition :/