Ir para o conteúdo principal

iHome IH11 Main Motherboard Replacement

O que você precisa

  1. iHome IH11 Main Motherboard Replacement, Outer Case: passo 1, imagem 1 %32
    • Unscrew the two 9.0 mm screws with a Phillips #1 screwdriver.

    • Remove the translucent bottom case.

  2. iHome IH11 Main Motherboard Replacement: passo 2, imagem 1 %32 iHome IH11 Main Motherboard Replacement: passo 2, imagem 2 %32
    • Remove the two Phillips #1 9.0mm screws on the back of the iHome.

    • Repeat the previous step for the two 9.0mm screws on the bottom.

    • Carefully slide the back cover off. There are wires connected to the back cover.

  3. iHome IH11 Main Motherboard Replacement: passo 3, imagem 1 %32
    • Remove the aluminum bracket by loosening the two nuts and removing the 8.0 mm bolts.

    • Pull the bracket out.

  4. iHome IH11 Main Motherboard Replacement: passo 4, imagem 1 %32 iHome IH11 Main Motherboard Replacement: passo 4, imagem 2 %32
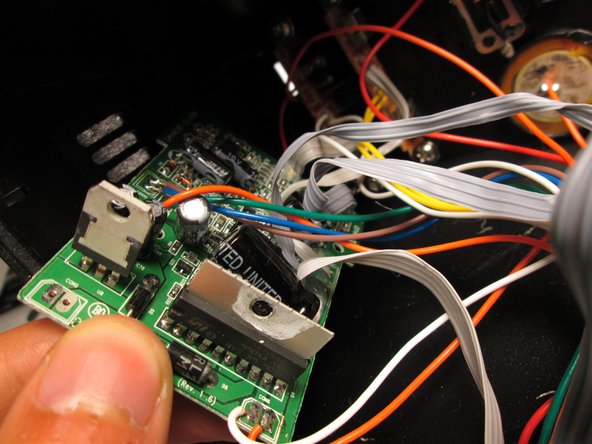
    • Remove the two 12.0mm screws that hold the motherboard with a Phillips #1 screwdriver.

    • Slide the motherboard gently out.

  5. iHome IH11 Main Motherboard Replacement: passo 5, imagem 1 %32
    • Solder each wire to corresponding input on the motherboard.

Conclusão

To reassemble your device, follow these instructions in reverse order.

Uma outra pessoa concluiu este guia.

Equipe

Cal Poly, Team 14-9, Maness Spring 2013 Membro de Cal Poly, Team 14-9, Maness Spring 2013

CPSU-MANESS-S13S14G9

Membros da 5

Autoria de 5 guias

0 comentários

Adicione um comentário

Exibir estatísticas:

Últimas 24 horas: 0

Últimos 7 dias: 0

Últimos 30 dias: 1

Duração total: 369