Ir para o conteúdo principal

iHip Fold-up Portable Speaker Replacement

O que você precisa

  1. iHip Fold-up Portable Speaker Replacement, Removing the battery case cover: passo 1, imagem 1 %32
    • Use your fingers to slide the battery case cover off in the direction of the arrows.

  2. iHip Fold-up Portable Speaker Replacement, Cleaning the battery case: passo 2, imagem 1 %32 iHip Fold-up Portable Speaker Replacement, Cleaning the battery case: passo 2, imagem 2 %32 iHip Fold-up Portable Speaker Replacement, Cleaning the battery case: passo 2, imagem 3 %32
    • Remove the four AAA batteries. Be sure to check your nearest battery recycling point!

    • Use the detailing brush and a paper towel to remove any corrosion left by previous batteries.

  3. iHip Fold-up Portable Speaker Replacement, Removing the screws: passo 3, imagem 1 %32 iHip Fold-up Portable Speaker Replacement, Removing the screws: passo 3, imagem 2 %32
    • Unscrew the four outer 1.0 mm screws with a Phillips-Head screwdriver.

    • Screws will be magnetized in position and will require the use of tweezers to be removed.

    • Push down gently on the battery case cover and slide it in the direction the arrows indicate. Remove the batteries.

    • Unscrew the 0.6 mm screw located in the center of the battery case.

    • Keep the 1.0 mm and 0.6 mm screws separate from each other for reassembly.

  4. iHip Fold-up Portable Speaker Replacement, Removing the back cover: passo 4, imagem 1 %32 iHip Fold-up Portable Speaker Replacement, Removing the back cover: passo 4, imagem 2 %32
    • Remove the back cover carefully; there are many wires that connect it to the device.

  5. iHip Fold-up Portable Speaker Replacement, Locating Speakers: passo 5, imagem 1 %32
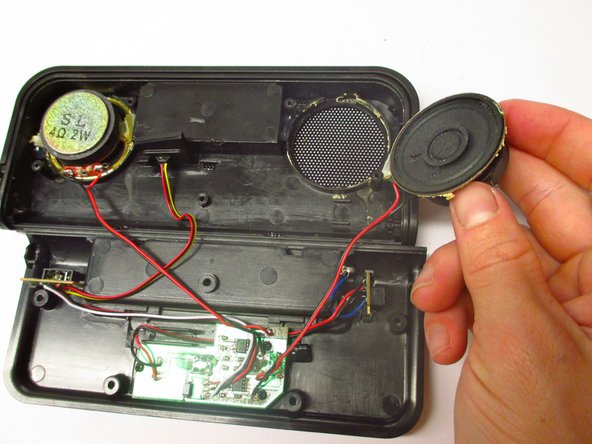
    • Locate the two individual speakers on either side of the front cover.

  6. iHip Fold-up Portable Speaker Replacement, Removing Individual Speakers: passo 6, imagem 1 %32 iHip Fold-up Portable Speaker Replacement, Removing Individual Speakers: passo 6, imagem 2 %32 iHip Fold-up Portable Speaker Replacement, Removing Individual Speakers: passo 6, imagem 3 %32
    • Use a plastic opening tool to scrape off the glue around the speakers.

    • Gently pull the speaker up to detach it from the front cover.

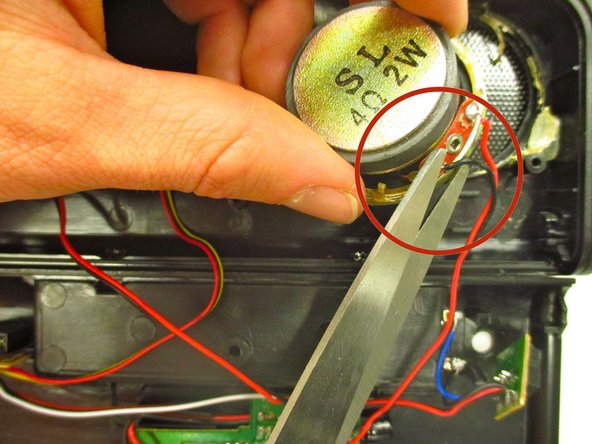
    • Desolder the black and red wires from the speaker unit.

    • Use a hot glue gun to secure the new speaker. Solder the black and red speaker wires back in place.

Conclusão

To reassemble your device, follow these instructions in reverse order.

Lisa

Membro desde: 10/13/14

207 Reputação

Autoria de 2 guias

Equipe

Clemson, Team 3-4, Benson Fall 2014 Membro de Clemson, Team 3-4, Benson Fall 2014

CLEM-BENSON-F14S3G4

Membros da 5

Autoria de 8 guias

0 comentários

Adicione um comentário

Exibir estatísticas:

Últimas 24 horas: 0

Últimos 7 dias: 0

Últimos 30 dias: 2

Duração total: 698