Introdução
If the battery of your Xiaomi Redmi Note 13 Pro Plus 5G (Models 23090RA98C, 23090RA98G, 23090RA98I) is draining quickly, a damaged battery might be the cause.
Battery health degrades over the years, as a result of frequent charge cycles, which leads to shortened battery capacity. If the battery of your Redmi Note 13 Pro Plus 5G is significantly damaged, you might want to replace it.
Quickly draining, overheating, or low battery health are common signs of a damaged battery. Not sure what is causing your battery to drain quickly? Check out our troubleshooting page for more information before deciding to replace it.
In this guide, we will guide you through the removal of the battery of the Redmi Note 13 Pro Plus 5G. You will need to use an iOpener to remove the phone's back panel by melting the adhesive that keeps it shut.
Warning: If your battery is swollen, refer to this page. You will most likely need to consult a repair professional. Swollen batteries are fire hazards and have a high chance of catching on fire. Do not try to replace it yourself if you are not a professional.
Disconnect the device from all external power sources before disassembling.
O que você precisa
-
-
Heat the iOpener up, then place it on every edge of the phone so the glue underneath the back panel melts.
-
-
-
Place the suction handle on the back panel of the phone.
-
While lifting the suction handle, insert the opening tool in the space created by the pulling. Try to widen the space between the back panel and the rest of the phone.
-
When that space is wide enough, insert at least two opening picks.
-
-
-
-
Drag the opening picks along the borders of the back panel to lift it up.
-
The back panel should pop out. Remove it.
-
-
-
Remove the seven 5.2 mm black motherboard cover screws using a JIS #000 screwdriver.
-
Remove the three 4.4 mm grey motherboard-cover screws using a JIS #000 screwdriver.
-
Using the picks, remove the motherboard cover. The black strip covering the battery should be attached to the motherboard cover and removed at the same time.
-
Lift up the two ribbons holding the battery.
-
-
-
Remove the eight 5.3 mm black ringer-cover screws using a JIS #000 screwdriver.
-
Remove the 4.5 mm grey ringer-screw using a JIS #000 screwdriver.
-
Using the opening tool, carefully remove the ringer-cover and the blue wire attached to it.
-
Disconnect the blue wire by unclipping the metal head of the wire.
-
-
-
Lift up the two press connectors above the battery using an opening tool.
-
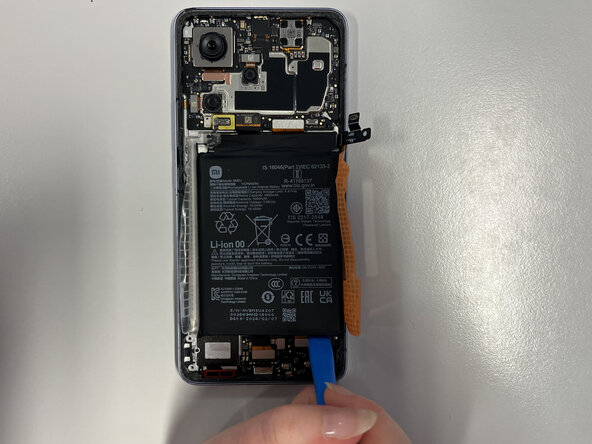
Peel off the stickers on either side of the battery.
-
Pull on the "A" orange sticker to prop up the battery.
-
-
-
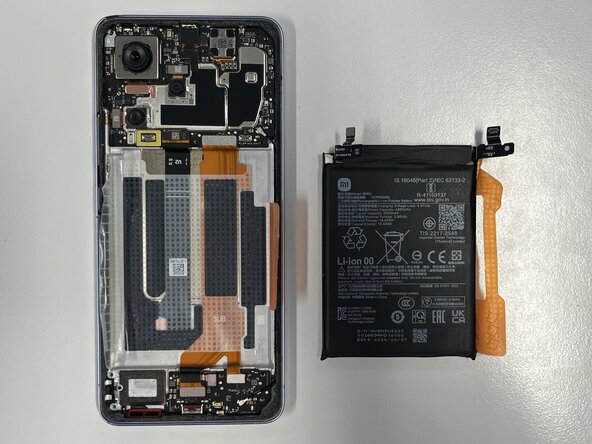
Remove the battery.
-
Peel the sticker by pulling on the "B" orange sticker.
-



 Pergunte ao FixBot






Thanks for following this guide, we hope it helped! To reassemble your device, you can follow these instructions in reverse order.

Equipe

Université Paris Cité, Team 5-5, Grohan Winter 2026 Membro de Université Paris Cité, Team 5-5, Grohan Winter 2026
UPARIS-GROHAN-W26S5G5
4 Membros
Autoria de 5 guias
