Introdução
So you've confirmed your Xbox One S cannot connect to any Wi-Fi sources, but other devices can. Follow these steps to replace the Wi-Fi card.
O que você precisa
-
-
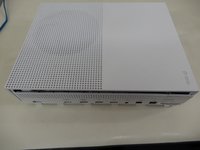
Flip the Xbox One S so that the bottom of the case is facing upward.
 Pergunte ao FixBot
-
-
-
Begin by working at the case on the rear where the warranty sticker is located. Insert the plastic opening tool into the gap between the bottom of the case and the grated top side. Then find the clips in between that hold the case in place. Use the opening tool to pop the clips out. The best method is to pry the black case away from the bottom.
-
Use the opening tool to pop the clips out. The best method is to pry the black case away from the bottom.
-
-
-
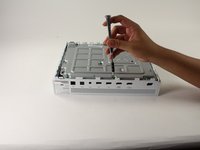
Once all of the clips are opened, remove the bottom part of the case.
-
-
-
-
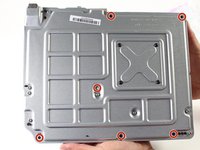
Use a T10 Torx screwdriver to remove the six green 50 mm long screws from the metal case labeled F1 through F6.
-
-
-
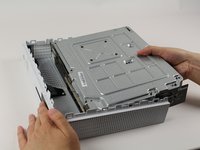
Gently separate the interior case from the white exterior case using the appropriate method.
-
Pry the white plastic sides outwards at the rear to separate from the plastic I/O shield.
-
-
-
Search the sides of the interior case for the Wi-Fi card. It should be across from the hard drive.
-
-
-
Remove the black T8 screws with orange circles around them (there should be 3 of them).
-
After removing the screws, gently detach the Wi-Fi card.
-


To reassemble your device, follow these instructions in reverse order.
Cancelar: não concluí este guia.
22 outras pessoas executaram este guia.
Equipe

Cal Poly, Team S22-G3, Livingston Spring 2017 Membro de Cal Poly, Team S22-G3, Livingston Spring 2017
CPSU-LIVINGSTON-S17S22G3
4 Membros
Autoria de 59 guias
5Comentários do guia
The T10 is too small for the WiFi card what should I use
T8 Torx Bit Screwdriver
How long are the 15 mm screws supposed to be?
15 mm long hense the name
?
So I have replaced the Wi-Fi card from the Wi-Fi I bought from ifixit and my console cannot still connect to the Wi-Fi but my other devices can any help?