Ir para o conteúdo principal
Participe da comunidade de reparos - Criar conta

Xbox One Elite Controller (Model 1698) Disassembly

O que você precisa

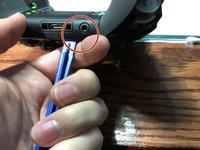
  1. Xbox One Elite Controller (Model 1698) Disassembly, Show me the Screws!: passo 1, imagem 1 %32 Xbox One Elite Controller (Model 1698) Disassembly, Show me the Screws!: passo 1, imagem 2 %32
    • You can remove the side panels with a pry tool.

    • You don't need to remove the rubber. The rubber on this controller was already bad.

    Pergunte ao FixBot
  2. Xbox One Elite Controller (Model 1698) Disassembly, Removing the back panel screws: passo 2, imagem 1 %32
    • Remove the 5 Torx Security Bit (TR9) screws.

    Pergunte ao FixBot
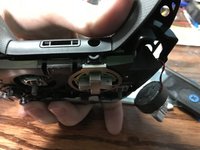
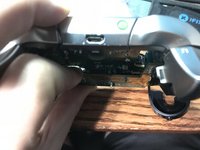
  3. Xbox One Elite Controller (Model 1698) Disassembly, Popping that back panel off: passo 3, imagem 1 %32 Xbox One Elite Controller (Model 1698) Disassembly, Popping that back panel off: passo 3, imagem 2 %32 Xbox One Elite Controller (Model 1698) Disassembly, Popping that back panel off: passo 3, imagem 3 %32
    • Pry the panel next to the 3.5mm port.

    • Be careful to not rip the ribbon shown in the next step.

    Pergunte ao FixBot
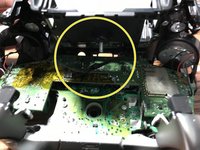
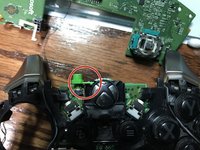
  4. Xbox One Elite Controller (Model 1698) Disassembly, Warning Carefully remove the ribbon: passo 4, imagem 1 %32 Xbox One Elite Controller (Model 1698) Disassembly, Warning Carefully remove the ribbon: passo 4, imagem 2 %32
    • Be careful to not rip the ribbon cable.

    • You can pop the connector up to remove the ribbon easily.

    • Ribbon Cable

    Pergunte ao FixBot
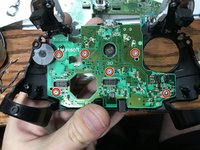
  5. Xbox One Elite Controller (Model 1698) Disassembly, Screws on controller motherboard: passo 5, imagem 1 %32
    • Remove the 2 Torx (T6) screws.

    Pergunte ao FixBot
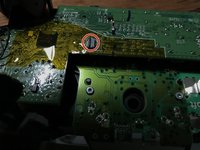
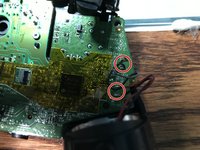
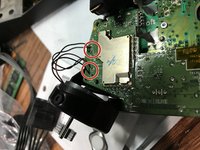
  6. Xbox One Elite Controller (Model 1698) Disassembly, Desolder wires from motherboard: passo 6, imagem 1 %32 Xbox One Elite Controller (Model 1698) Disassembly, Desolder wires from motherboard: passo 6, imagem 2 %32
    • Desolder the 4 wires on each side, these control the vibrations and the RT LT.

    Pergunte ao FixBot
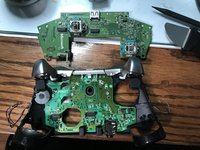
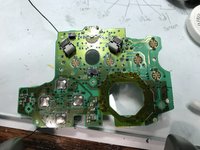
  7. Xbox One Elite Controller (Model 1698) Disassembly, Remove the motherboard: passo 7, imagem 1 %32 Xbox One Elite Controller (Model 1698) Disassembly, Remove the motherboard: passo 7, imagem 2 %32
    • Pull up from the "top" side of the controller on the daughterboard.

    Pergunte ao FixBot
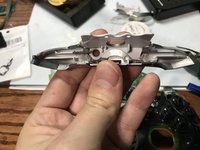
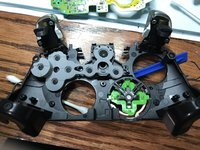
  8. Xbox One Elite Controller (Model 1698) Disassembly, Remove the Home Button Cover: passo 8, imagem 1 %32 Xbox One Elite Controller (Model 1698) Disassembly, Remove the Home Button Cover: passo 8, imagem 2 %32 Xbox One Elite Controller (Model 1698) Disassembly, Remove the Home Button Cover: passo 8, imagem 3 %32
    • Be Careful to not lose the sync button.

    • Pry the middle section up from the home button side.

    • This will also remove the LB and RB which is a single part.

    Pergunte ao FixBot
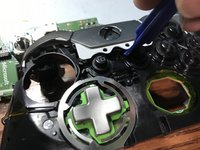
  9. Xbox One Elite Controller (Model 1698) Disassembly, Remove the controller daughterboard: passo 9, imagem 1 %32 Xbox One Elite Controller (Model 1698) Disassembly, Remove the controller daughterboard: passo 9, imagem 2 %32
    • Unscrew the 6 Torx (T6) screws.

    Pergunte ao FixBot
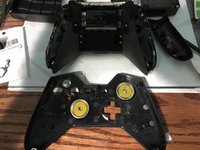
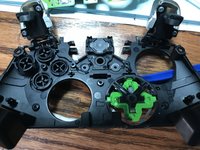
  10. Xbox One Elite Controller (Model 1698) Disassembly, Xbox One Elite Controller (Model 1698) Disassembly: passo 10, imagem 1 %32 Xbox One Elite Controller (Model 1698) Disassembly, Xbox One Elite Controller (Model 1698) Disassembly: passo 10, imagem 2 %32
    • Now you can remove the buttons themselves.

    Pergunte ao FixBot
Conclusão

To reassemble your device, follow these instructions in reverse order.

45 outras pessoas executaram este guia.

EasyAsABC123

Membro desde: 01/22/10

2.557 Reputação

Autoria de 5 guias

14Comentários do guia

Is there any way I could just do step 8, removing the Home cover? I simply need to fix my USB port so i dont really wanna take it completely apart just for that.

jones_8515 - Responder Compartilhar
Desoldering the rumble motors isn't necessary, nor is removing the first motherboard. Once you get that back panel off, you're golden.

J'Anthony Joseph - Responder Compartilhar

Ya hi i opened my controller and right away i don’t see ether bolt in both handles. 4 i believe to top two bottom.

Suggestions please.

Craig Amyotte - Responder Compartilhar

I found using a TQ5 for the 2 motherboard screws worked the best on my controller not a T6

Mat - Responder Compartilhar

Thanks for the info

EasyAsABC123 - Responder Compartilhar

Comentar

Visualizações:

Últimas 24 horas: 8

Últimos 7 dias: 70

Últimos 30 dias: 354

Ao todo: 104,528