Introdução
Fry your beloved Valhalla motherboard? Use this guide to replace it, and get back on Xbox Live today.
O que você precisa
-
-
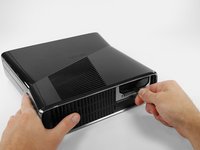
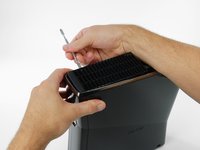
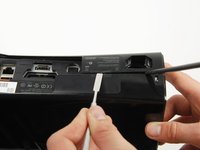
Push the latch holding down the hard drive cover to the left.
-
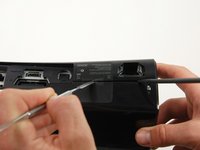
Pull the hard drive cover away from the console.
-
-
-
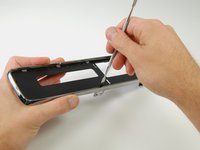
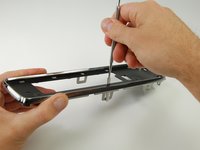
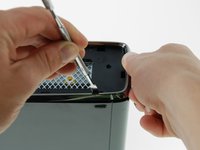
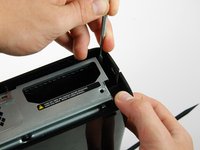
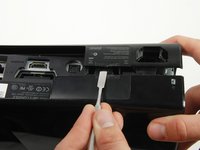
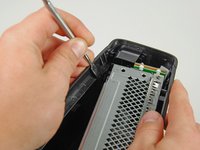
Insert a metal spudger through the left middle slit of the bottom bezel, and between the bottom edge of the clip and the left case.
-
Simultaneously pull the bottom bezel up and rotate the spudger away from the console to free the clip.
-
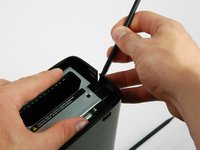
In a similar fashion, free the clip at the front of the bottom bezel's left edge.
-
-
-
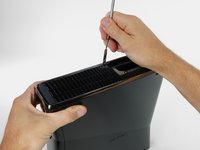
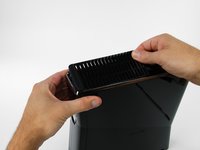
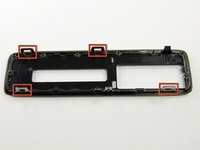
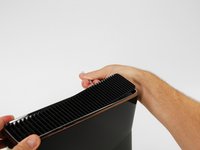
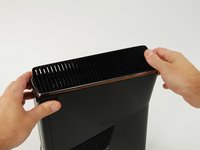
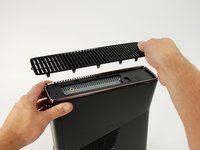
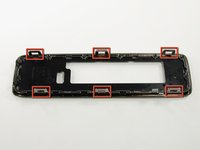
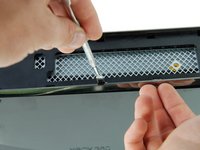
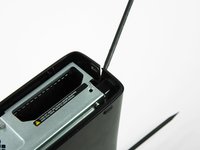
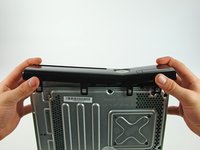
In the following steps, you will remove the top vent, secured to the top panel by the thirteen clips shown.
-
-
-
Orient the console so that the words "XBOX 360" on the sides are right-side up, and the faceplate is facing to the left.
-
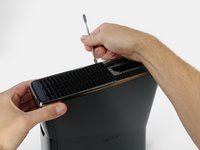
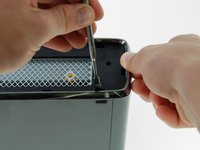
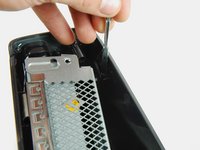
Insert a metal spudger between the top vent and the top bezel near the rear of the Xbox.
-
Rotate the spudger away from the console, prying the edge of the fan vent up until the two plastic clips come free.
-
-
-
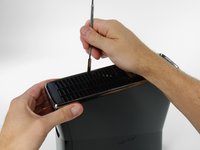
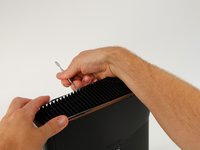
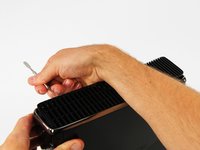
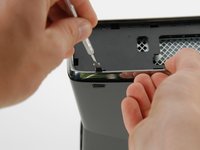
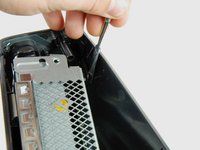
Insert a metal spudger between the fan vent and top bezel along the left side of the console.
-
In the same manner described above, begin prying the left side of the top vent away from the top bezel.
-
Continue prying along the left side of the device, freeing all the clips on that side.
-
-
-
-
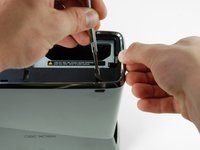
Rotate the console so that the rear of the Xbox 360 S is facing to the right, and the right case is facing you.
-
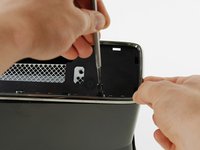
Insert a metal spudger through the rear-most slit on the right edge of the top bezel and between the bottom edge of the clip and the right case.
-
While lifting up on the top bezel with your fingers, rotate the spudger away from the console to free the clip.
-
-
-
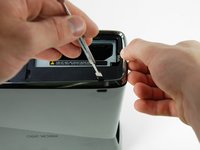
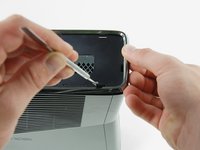
Release the clip near the front right corner of the top edge securing the right case to the faceplate.
-
-
-
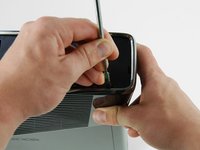
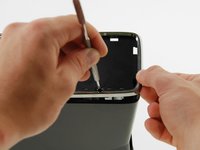
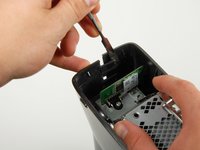
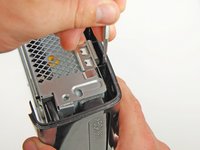
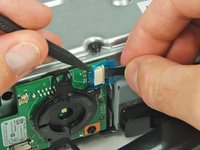
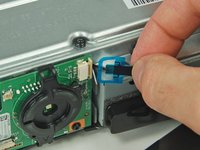
Using a spudger or fingernail, lift the clear blue tab away from the connector.
-
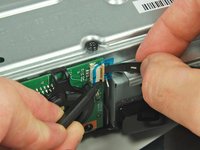
Slide the locking tab on the power switch board cable connector toward the top of the console.
-
Pull the power switch cable straight out of the connector.
-
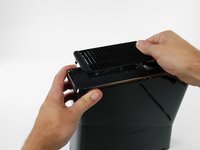
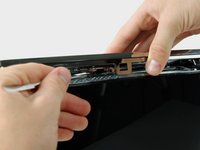
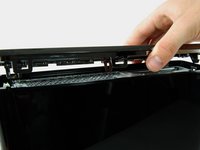
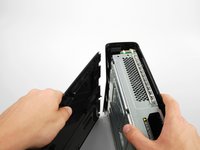
The faceplate is now free of the rest of the console.
-
-
-
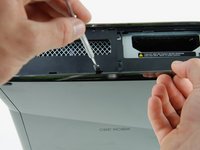
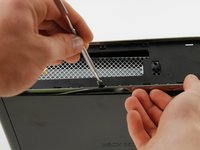
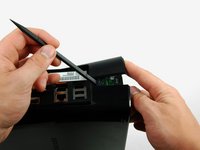
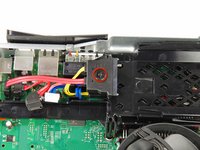
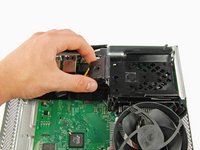
Remove the two 5.6 mm T8 Torx screws securing the RF module to the metal case.
-
-
-
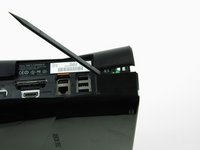
Remove the single T10 Torx screw holding in the wireless card.
-
Pull the Wi-Fi Board out of the console.
-
-
-
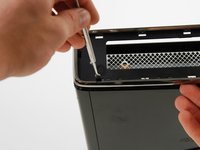
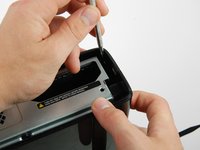
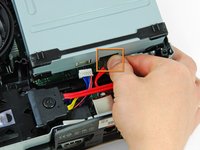
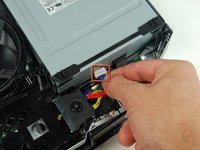
Disconnect the optical drive data cable from the back of the optical drive.
-
Disconnect the power cable from the back of the optical drive.
-
-
-
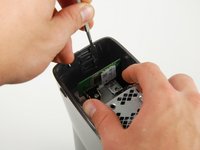
Remove the single 11.3 mm gold T10 Torx screw from the hole marked "G."
-
-
-
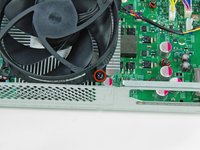
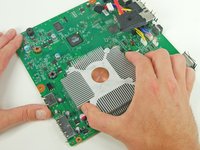
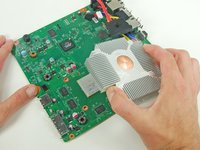
There are a total of 10 screws holding the logic board assembly to the metal case:
-
Five 11.3 mm silver T10 Torx screws, in the holes marked "M", "N", "P", "R", and "T".
-
Four 5.6 mm black T9 Torx screws in the holes marked "D", "E", "J", and "K".
-
A single 11.3 mm gold T10 Torx screw in the hole marked "A".
-
-
Ferramenta utilizada neste passo:Flathead 1.5 mm Screwdriver$5.49
-
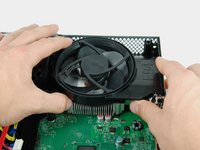
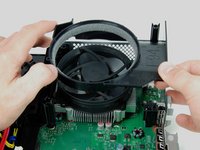
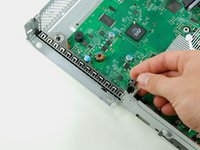
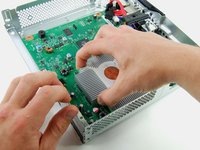
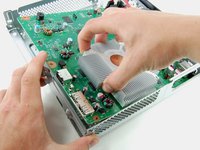
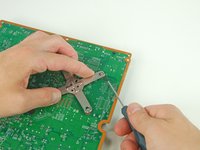
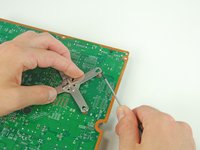
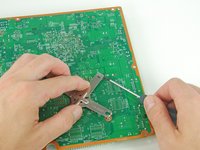
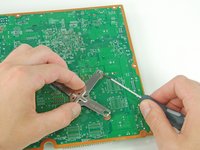
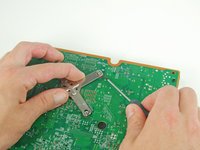
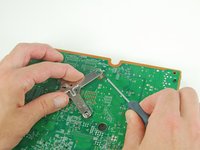
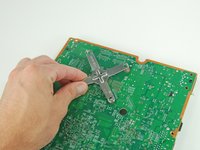
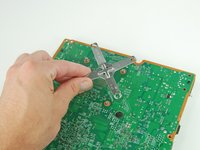
Starting at the front left corner of the x-clamp, insert a 1.5 mm flathead screwdriver between the heat sink's peg and the x-clamp's hook.
-


To reassemble your device, follow these instructions in reverse order.
To reassemble your device, follow these instructions in reverse order.
Cancelar: não concluí este guia.
121 outras pessoas executaram este guia.

9 comentários
This guide wouldn't even work. DVD drives are linked to the motherboard. If someone were to follow this the end result would be an Xbox console that could only play DVDS games would show up as DVDs because of key mismatch.
What you mean “could only play DVDS games would show up as DVDs because of key mismatch “?
Whats the difference you mean about DVDS and DVDs?
Yes, but this is a good guide for those that are installing new thermal paste on their boards and/or wanna gut their system for a thorough cleaning.
just wanted to say thank you although i only needed up to step 43 as i'm have issues with the dvd drive it seems it only wants to read if the drive case is open my my thought is the slider servo is about done for. the dvd was a bit of a bear to figure out for a few minutes but remove the foam then use a p42 driver on the screws underside then the top slides off the back and honestly i left the bottom on.i found step 29 to be a bit of a pain and almost decided to break that bugger of a clip off for future work but didn't, and to me it seemed that removing the screws in step 40 made steps 32 through 34 easier, i don't know take it for what it's worth also i found i could also skip step 35 and leave the front plate and the rf module connected which made working the unit while open/disassembled easier if you need to remove the rf module then you can move the front plate off to the side enough and remove the screws holding it, and beside i hate working with ribbon cable. all in all nice guide though THUMBS UP!
Thanks mate, got me to where I needed to get to… that other tosser can !#^& off tho, id like to see him take the time and effort to produce a detailed instructional like this.