Introdução
The wireless or "WIFI" card receives signals from a wireless router or other wireless device and translates the signal so that the computer user can access the Internet any time they are in range of a Wi-Fi hotspot or wireless network. WIFI cards are "plug and play" components which means that they can be removed and replaced easily. The tricky part is getting to them inside the computer. The replacement WIFI card should be left in the package until it is ready to be installed as any foreign material that gets on or in the WIFI card may affect the performance of the component. If you are unable to connect to the internet unless your computer is physically connected to the router then replacing your WIFI card as described in this guide should fix this issue.
O que você precisa
-
-
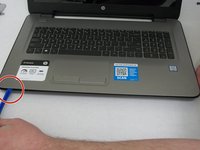
With the laptop upside down, remove the battery by hand and the twelve 7.0 mm screws that are holding the back case to the front. Use a JIS #0 screwdriver to remove the screws.
-
-
-
-
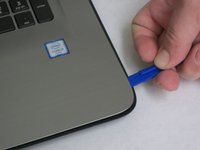
Flip the computer over and use a plastic opening tool to wedge between the back and front cases.
-
Trace the perimeter of the laptop. Make sure to keep the tool inserted between the front and back cases. You will hear popping sounds as the back case becomes disengaged from the front plate.
-
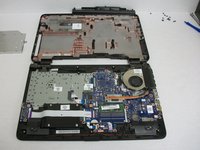
Flip the laptop over and lift the back case off. Now you have access to all of the internal hardware.
-
-
-
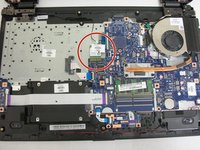
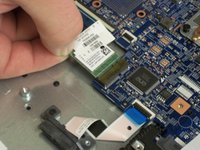
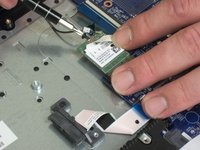
Locate the wireless card in the center of the computer and attached to the motherboard.
-
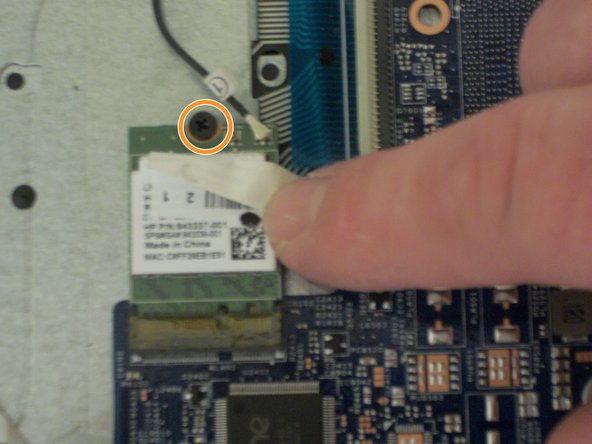
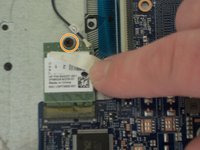
Locate the 4.0 mm hidden screw holding the wireless card and gently remove it.
-


To reassemble your device, follow these instructions in reverse order.
Cancelar: não concluí este guia.
2 outras pessoas executaram este guia.
Equipe

Washington State, Team S1-G1, Lobnitz Spring 2018 Membro de Washington State, Team S1-G1, Lobnitz Spring 2018
WSU-LOBNITZ-S18S1G1
5 Membros
Autoria de 5 guias