Ir para o conteúdo principal
Participe da comunidade de reparos - Criar conta

Verizon Ellipsis Jetpack MHS800L Screen Replacement

O que você precisa

  1. Verizon Ellipsis Jetpack MHS800L Screen Replacement, Plastic Case: passo 1, imagem 1 %32 Verizon Ellipsis Jetpack MHS800L Screen Replacement, Plastic Case: passo 1, imagem 2 %32 Verizon Ellipsis Jetpack MHS800L Screen Replacement, Plastic Case: passo 1, imagem 3 %32
    • Remove the SIM card, that is located on top of the Jetpack.

    Pergunte ao FixBot

    Comentar

  2. Verizon Ellipsis Jetpack MHS800L Screen Replacement: passo 2, imagem 1 %32 Verizon Ellipsis Jetpack MHS800L Screen Replacement: passo 2, imagem 2 %32 Verizon Ellipsis Jetpack MHS800L Screen Replacement: passo 2, imagem 3 %32
    Ferramenta utilizada neste passo:
    Phillips #00 Screwdriver
    $5.49
    • With the device on its back and the label facing you, remove the rubber screw cover on the top left corner of the device.

    • Under the rubber circle, remove the 1.25 mm screw using a Phillips #00 Screwdriver.

    • You may need to peel back a piece of double sided tape covering the screw hole.

    Pergunte ao FixBot

    Comentar

  3. Verizon Ellipsis Jetpack MHS800L Screen Replacement: passo 3, imagem 1 %32
    • Remove three 1.25 mm screws.

    Pergunte ao FixBot

    Comentar

  4. Verizon Ellipsis Jetpack MHS800L Screen Replacement: passo 4, imagem 1 %32
    Ferramenta utilizada neste passo:
    iFixit Opening Picks (Set of 6)
    $4.95
    Pergunte ao FixBot

    Comentar

  5. Verizon Ellipsis Jetpack MHS800L Screen Replacement: passo 5, imagem 1 %32
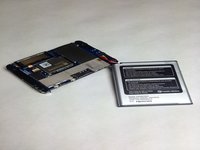
    • Once the cover is off, this is what your device will look like.

    Pergunte ao FixBot

    Comentar

  6. Verizon Ellipsis Jetpack MHS800L Screen Replacement, Battery: passo 6, imagem 1 %32 Verizon Ellipsis Jetpack MHS800L Screen Replacement, Battery: passo 6, imagem 2 %32
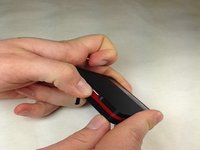
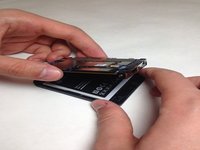
    • Once you have the case off of your device gently pull your battery away from the device.

    • Do not attempt to completely remove the battery, as it is still attached to the motherboard by wires.

    Pergunte ao FixBot

    Comentar

  7. Verizon Ellipsis Jetpack MHS800L Screen Replacement: passo 7, imagem 1 %32 Verizon Ellipsis Jetpack MHS800L Screen Replacement: passo 7, imagem 2 %32
    Ferramenta utilizada neste passo:
    Tweezers
    $4.99
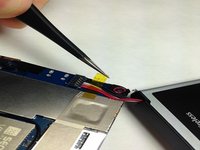
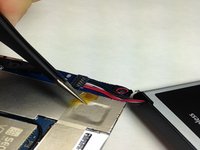
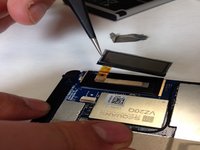
    • With a pair of Tweezers remove the yellow tape covering the battery wires.

    Pergunte ao FixBot

    Comentar

  8. Verizon Ellipsis Jetpack MHS800L Screen Replacement: passo 8, imagem 1 %32
    Ferramenta utilizada neste passo:
    Tweezers
    $4.99
    • After removing the tape you may use the Tweezers to remove the wiring harness from the circuit board.

    • Do not squeeze the wires to hard you may damage them and cause a short.

    Pergunte ao FixBot

    Comentar

  9. Verizon Ellipsis Jetpack MHS800L Screen Replacement: passo 9, imagem 1 %32
    • You may now replace the battery in your Verizon Ellipsis Jetpack MHS800L.

    Pergunte ao FixBot

    Comentar

  10. Verizon Ellipsis Jetpack MHS800L Screen Replacement, Screen: passo 10, imagem 1 %32 Verizon Ellipsis Jetpack MHS800L Screen Replacement, Screen: passo 10, imagem 2 %32 Verizon Ellipsis Jetpack MHS800L Screen Replacement, Screen: passo 10, imagem 3 %32
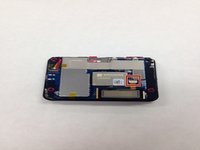
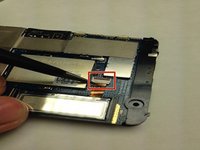
    • Locate the LCD screen cable and unlatch the harness connection form the circuit board.

    Pergunte ao FixBot

    Comentar

  11. Verizon Ellipsis Jetpack MHS800L Screen Replacement: passo 11, imagem 1 %32 Verizon Ellipsis Jetpack MHS800L Screen Replacement: passo 11, imagem 2 %32
    Ferramenta utilizada neste passo:
    Tweezers
    $4.99
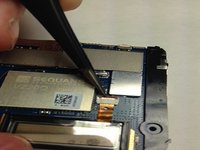
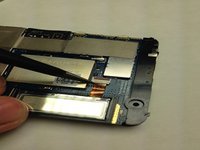
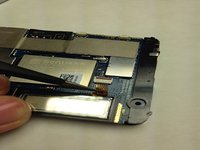
    • Using the Tweezers gently coax the display data cable out of circuit board connector.

    • Do not squeeze the display data cable to hard you may damage it and cause a short.

    Pergunte ao FixBot

    Comentar

  12. Verizon Ellipsis Jetpack MHS800L Screen Replacement: passo 12, imagem 1 %32 Verizon Ellipsis Jetpack MHS800L Screen Replacement: passo 12, imagem 2 %32
    Ferramenta utilizada neste passo:
    Tweezers
    $4.99
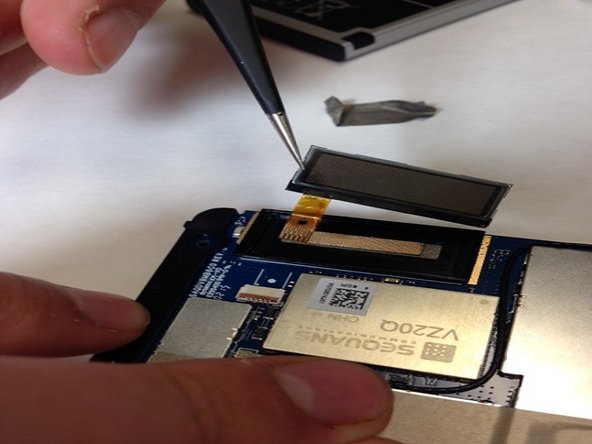
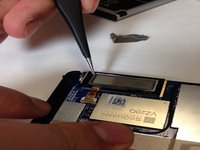
    • Gently insert the Tweezers underneath the LCD screen and lift the LCD screen off of the circuit board.

    Pergunte ao FixBot

    Comentar

Conclusão

To reassemble your device, follow these instructions in reverse order.

Cancelar: não concluí este guia.

Uma outra pessoa concluiu este guia.

Equipe

IUPUI, Team 3-3, Baechle Spring 2016 Membro de IUPUI, Team 3-3, Baechle Spring 2016

IUPUI-BAECHLE-S16S3G3

4 Membros

Autoria de 6 guias

0Comentários do guia

Comentar

Visualizações:

Últimas 24 horas: 0

Últimos 7 dias: 3

Últimos 30 dias: 29

Ao todo: 2,488