Esta versão pode conter edições incorretas. Mude para o último instantâneo verificado.
O que você precisa
-
Este passo não foi traduzido. Ajude a traduzi-lo
-
Remove the 9.9 mm screw covering the batteries with a PH1 driver head.
-
-
Este passo não foi traduzido. Ajude a traduzi-lo
-
Use a plastic opening tool to pry the batteries out of their holding.
-
-
Este passo não foi traduzido. Ajude a traduzi-lo
-
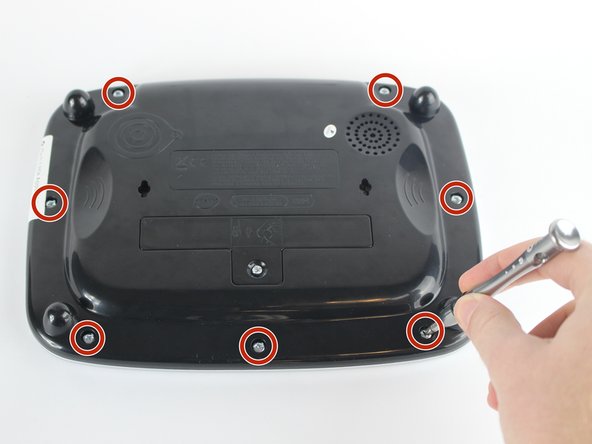
Position the VTech Little Apps Tablet face-down on a flat surface so that you can clearly see the back of the device.
-
Remove all seven 9.6 mm screws located around the perimeter of the back cover with a PH1 driver head.
-
-
Este passo não foi traduzido. Ajude a traduzi-lo
-
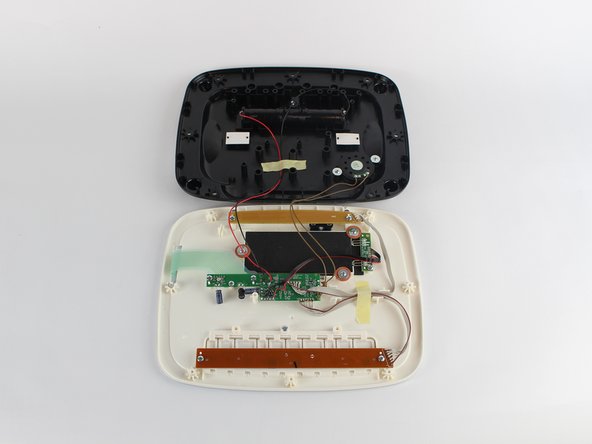
Gently remove the back cover then flip it 180 degrees so that the back cover of the device is now face-down.
-
-
-
Este passo não foi traduzido. Ajude a traduzi-lo
-
Unscrew the two 7.3 mm screws using a PH0 driver head.
-
Gently lift the beige circuit board and set aside.
-
-
Este passo não foi traduzido. Ajude a traduzi-lo
-
Unscrew three 7.3 mm panhead screws with the PH0 driver.
-
Remove the red-brown washer after removing the screws.
-
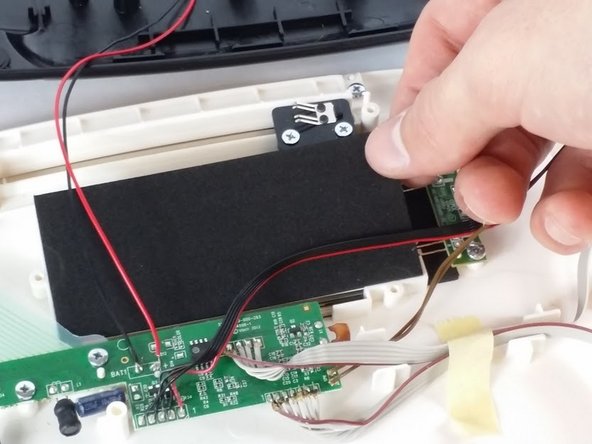
Remove the black foam insert and set aside.
-
-
Este passo não foi traduzido. Ajude a traduzi-lo
-
Unscrew the 7.3 mm screw fastening the LED circuit board to the device shell with a PH0 driver head.
-
-
Este passo não foi traduzido. Ajude a traduzi-lo
-
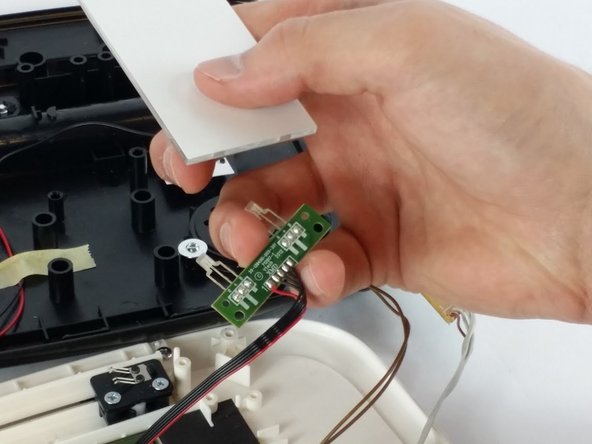
Gently lift both LED circuit board and the white glass light refractor panel away from the device.
-
Separate the LED circuit board and light refractor panel by gently pulling apart. Place the light panel to the side.
-
-
Este passo não foi traduzido. Ajude a traduzi-lo
-
Carefully desolder the LED leads (labeled "R", "+" and "B" on the circuit board) to disconnect the LED from the circuit board.
-
Replace the LED and solder the new connection to the LED circuit board.
-
-
Este passo não foi traduzido. Ajude a traduzi-lo
-
Remove the three 7.3mm screws securing motherboard to the device shell.
-
-
Este passo não foi traduzido. Ajude a traduzi-lo
-
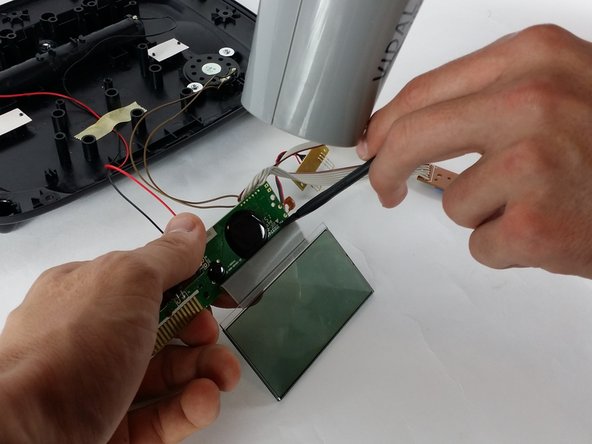
Carefully lift both the screen and motherboard, to access to the ribbon cable underneath.
-
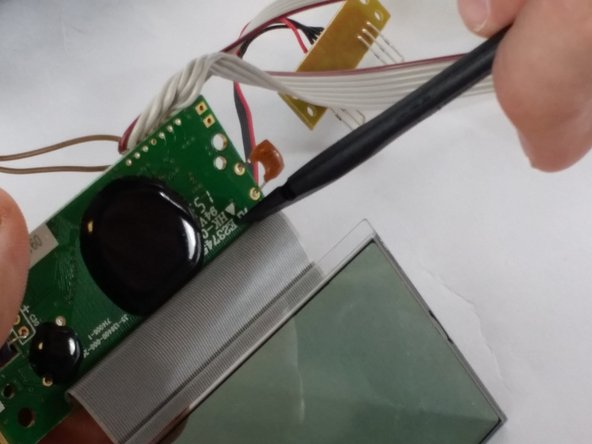
Use a heat gun (or hair dryer) to apply low heat to the ribbon cable attachment on the motherboard.
-
Carefully use a nylon spudger to separate the ribbon cable from the motherboard and remove the screen.
-


