Ir para o conteúdo principal
Participe da comunidade de reparos - Criar conta

VTech Kidizoom Action Cam Lens Replacement

O que você precisa

  1. VTech Kidizoom Action Cam Lens Replacement, Display Assembly: passo 1, imagem 1 %32
    • Make sure that the master power switch is set to the (O) position.

    Pergunte ao FixBot

    Comentar

  2. VTech Kidizoom Action Cam Lens Replacement: passo 2, imagem 1 %32
    • Using a plastic opening tool, gently pry off the circular plating over the camera lens.

    • The circular plating is held by a mild adhesive. It will not be necessary to replace this adhesive during the reassembly process.

    Pergunte ao FixBot

    Comentar

  3. VTech Kidizoom Action Cam Lens Replacement: passo 3, imagem 1 %32
    Ferramenta utilizada neste passo:
    Magnetic Project Mat
    $19.95
    • Use a #0 screwdriver to remove the two 2.5mm Phillips head screws located on the second layer of plating.

    • Remove the second layer of plating previously held down by the screws by gripping it with your fingers and pulling upward.

    • As there will be many screws being removed from the device, we recommend using a magnetic device such as the iFixit Magnetic Project Mat.

    Pergunte ao FixBot

    Comentar

  4. VTech Kidizoom Action Cam Lens Replacement: passo 4, imagem 1 %32
    • Pry off the transparent plating and paper design using a plastic opening tool.

    Pergunte ao FixBot

    Comentar

  5. VTech Kidizoom Action Cam Lens Replacement: passo 5, imagem 1 %32
    • Unscrew the (4) 2.5mm Phillips head screws from the third layer of plating using a #0 screwdriver.

    Pergunte ao FixBot

    Comentar

  6. VTech Kidizoom Action Cam Lens Replacement: passo 6, imagem 1 %32
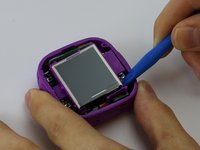
    • Turn the camera around and gently remove the plating that surrounds the LCD screen by grasping it with your fingers and pulling away from the device.

    Pergunte ao FixBot

    Comentar

  7. VTech Kidizoom Action Cam Lens Replacement: passo 7, imagem 1 %32 VTech Kidizoom Action Cam Lens Replacement: passo 7, imagem 2 %32 VTech Kidizoom Action Cam Lens Replacement: passo 7, imagem 3 %32
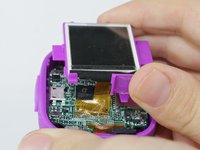
    • Use the plastic opening tool to lift the LCD screen, including the purple casing and set it aside, revealing the motherboard and connector ribbon.

    • Exercise caution while performing this step, as any excessive pulling may tear the connector ribbon from the motherboard.

    Pergunte ao FixBot

    Comentar

  8. VTech Kidizoom Action Cam Lens Replacement, Lens: passo 8, imagem 1 %32
    • Use the plastic opening tool to pry the lens from it's holder.

    • This can be the final step before reassembling, but doing this before removing the ribbon makes the process easier.

    Pergunte ao FixBot

    Comentar

  9. VTech Kidizoom Action Cam Lens Replacement: passo 9, imagem 1 %32 VTech Kidizoom Action Cam Lens Replacement: passo 9, imagem 2 %32
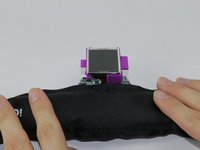
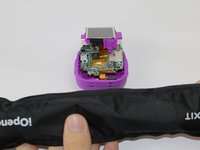
    • Heat the iOpener tool, then press the iOpener tool onto the connectors to heat the glue on the connector ribbon.

    • If the iOpener tool is not available, use a hair dryer to heat the glue on the connector ribbon and then use a Q-tip dabbed in Isopropyl alcohol to dab the heated glue.

    Pergunte ao FixBot

    Comentar

  10. VTech Kidizoom Action Cam Lens Replacement: passo 10, imagem 1 %32
    • Gently peel the connector ribbon being held down by the heated glue until it is completely removed.

    • Be cautious of very hot glue when peeling the connector ribbon off of the motherboard

    • When connecting the new camera lense, press the new connector ribbon to the original ribbon's position.

    Pergunte ao FixBot

    Comentar

Conclusão

To reassemble your device, follow these instructions in reverse order.

Cancelar: não concluí este guia.

Uma outra pessoa concluiu este guia.

Equipe

USF Tampa, Team 3-5, Sullivan Spring 2016 Membro de USF Tampa, Team 3-5, Sullivan Spring 2016

USFT-SULLIVAN-S16S3G5

3 Membros

Autoria de 6 guias

0Comentários do guia

Comentar

Visualizações:

Últimas 24 horas: 2

Últimos 7 dias: 14

Últimos 30 dias: 54

Ao todo: 1,487