Ir para o conteúdo principal

Tivax MiTraveler 10Q-8 USB Charging Port Replacement

O que você precisa

  1. Tivax MiTraveler 10Q-8 USB Charging Port Replacement, Rear Case: passo 1, imagem 1 %32 Tivax MiTraveler 10Q-8 USB Charging Port Replacement, Rear Case: passo 1, imagem 2 %32
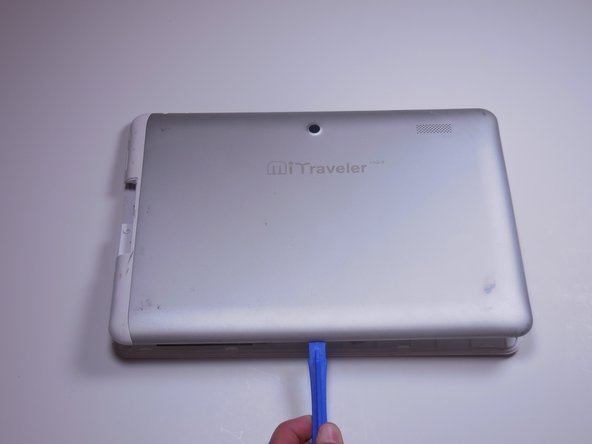
    • With the device face down, slide the charging port cover off on the left side of device.

  2. Tivax MiTraveler 10Q-8 USB Charging Port Replacement: passo 2, imagem 1 %32 Tivax MiTraveler 10Q-8 USB Charging Port Replacement: passo 2, imagem 2 %32
    • Remove the 2.9 mm screw from the charging port using a Phillips #000 screwdriver.

  3. Tivax MiTraveler 10Q-8 USB Charging Port Replacement: passo 3, imagem 1 %32
    • To pry the back plate off, use the plastic opening tool between the back plate and front plate; start at the headphone jack.

    • Make sure the lip of the plastic opening tool is face up.

  4. Tivax MiTraveler 10Q-8 USB Charging Port Replacement: passo 4, imagem 1 %32 Tivax MiTraveler 10Q-8 USB Charging Port Replacement: passo 4, imagem 2 %32
    • Move around the device with the plastic opening tool, pushing down to release the back plate from clips.

    • You will hear popping sounds when you work around the device.

  5. Tivax MiTraveler 10Q-8 USB Charging Port Replacement: passo 5, imagem 1 %32 Tivax MiTraveler 10Q-8 USB Charging Port Replacement: passo 5, imagem 2 %32
    • Once you’ve moved around the whole device with the plastic opening tool, the back plate will completely release from the rest of the device.

  6. Tivax MiTraveler 10Q-8 USB Charging Port Replacement, Battery: passo 6, imagem 1 %32
    • The battery rests flat on the inside surface of the tablet. It is a rectangular shape and has blue and yellow tape.

  7. Tivax MiTraveler 10Q-8 USB Charging Port Replacement: passo 7, imagem 1 %32
    • Two wires, one red and one black, which run from the motherboard to the battery, need to be desoldered from the motherboard.

    • Review how to solder here.

  8. Tivax MiTraveler 10Q-8 USB Charging Port Replacement: passo 8, imagem 1 %32 Tivax MiTraveler 10Q-8 USB Charging Port Replacement: passo 8, imagem 2 %32
    • Work the soldering gun on the red wire where it is connected to the motherboard. It should release from the motherboard.

    • Work the soldering gun on the black wire where it is connected to the motherboard. It will release from the motherboard.

  9. Tivax MiTraveler 10Q-8 USB Charging Port Replacement: passo 9, imagem 1 %32 Tivax MiTraveler 10Q-8 USB Charging Port Replacement: passo 9, imagem 2 %32 Tivax MiTraveler 10Q-8 USB Charging Port Replacement: passo 9, imagem 3 %32
    • Once both wires have been desoldered, remove the battery from the device.

  10. Tivax MiTraveler 10Q-8 USB Charging Port Replacement, USB Charging Port: passo 10, imagem 1 %32 Tivax MiTraveler 10Q-8 USB Charging Port Replacement, USB Charging Port: passo 10, imagem 2 %32
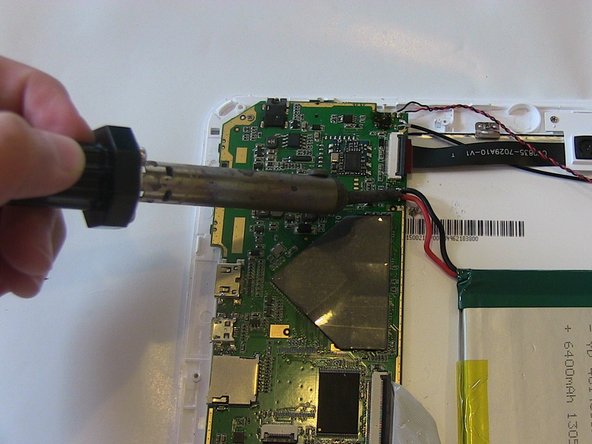
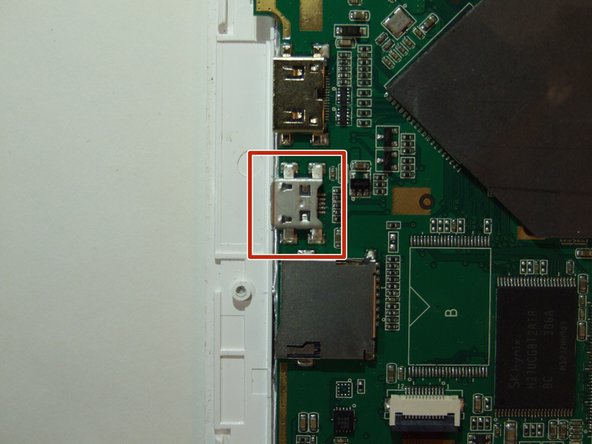
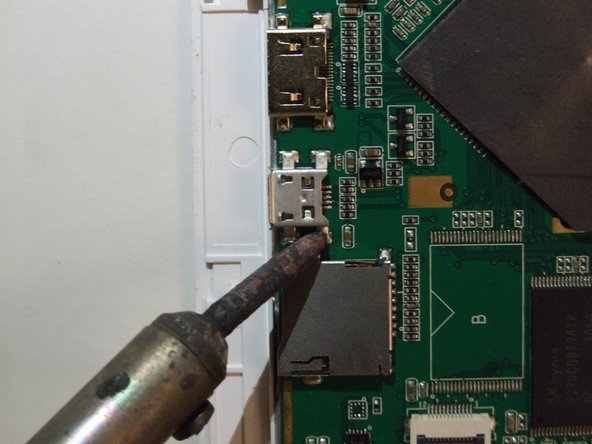
    • With the device facing down, the USB charging port can be located on the left side of the device directly on the motherboard. The mini HDMI port will be above the charging port and the micro SD port will be below, with the charging port in the middle of the two.

    • Make sure all power is extinguished by following the steps to remove the battery.

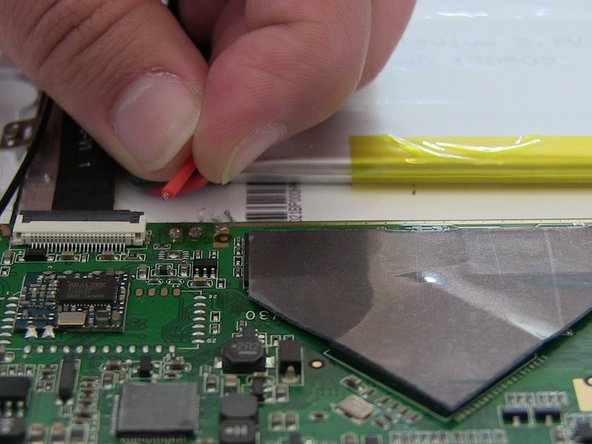
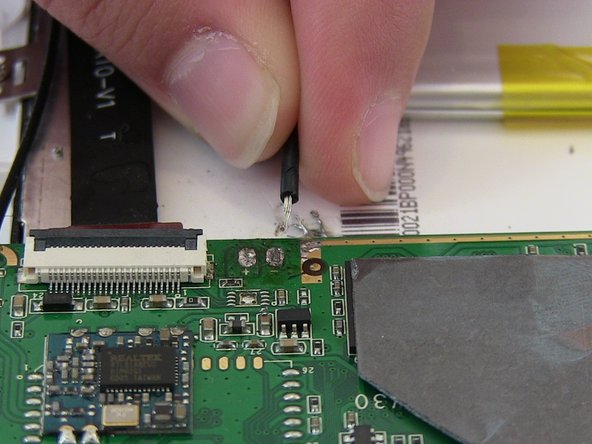
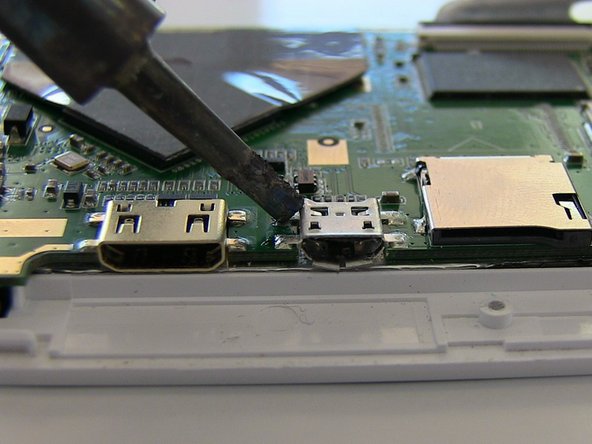
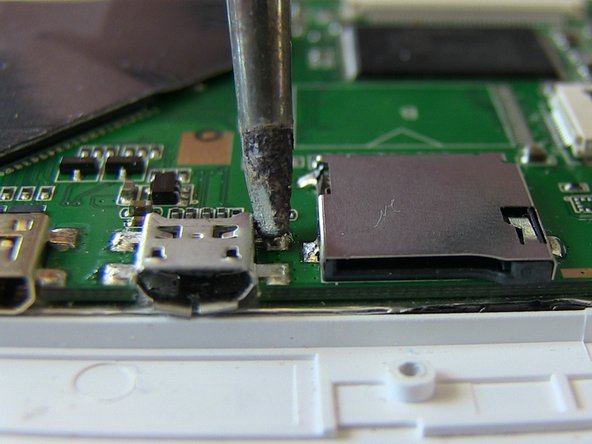
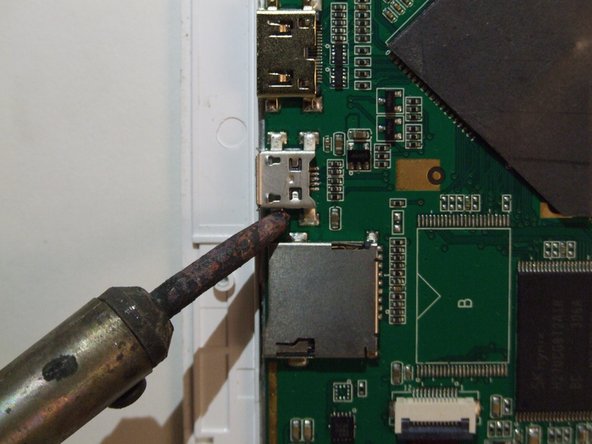
    • The charging port will be soldered down at all four corners; each prong will need to be soldered off.

    • Review How to Solder Here

  11. Tivax MiTraveler 10Q-8 USB Charging Port Replacement: passo 11, imagem 1 %32 Tivax MiTraveler 10Q-8 USB Charging Port Replacement: passo 11, imagem 2 %32 Tivax MiTraveler 10Q-8 USB Charging Port Replacement: passo 11, imagem 3 %32
    • Work the iron on one prong at a time that is soldered to the motherboard. The USB port will release from the motherboard.

  12. Tivax MiTraveler 10Q-8 USB Charging Port Replacement: passo 12, imagem 1 %32 Tivax MiTraveler 10Q-8 USB Charging Port Replacement: passo 12, imagem 2 %32 Tivax MiTraveler 10Q-8 USB Charging Port Replacement: passo 12, imagem 3 %32
    • Repeat steps 2-5 for the soldering of the other 3 prongs.

    • Once all four prongs have been soldered off the USB charging port will remove from the device.

Conclusão

To reassemble your device, follow these instructions in reverse order.

2 outras pessoas executaram este guia.

Conor Langenbahn

Membro desde: 03/11/15

228 Reputação

Autoria de 2 guias

Equipe

Colorado Springs, Team 4-3, Panko Spring 2015 Membro de Colorado Springs, Team 4-3, Panko Spring 2015

UCCS-PANKO-S15S4G3

Membros da 3

Autoria de 10 guias

Um comentário

You forgot to desolder the leads on the board first, if you don't, the lands on the board can be lifted off and you lose contact to the charge circuit.

da ha - Responder

Adicione um comentário

Exibir estatísticas:

Últimas 24 horas: 0

Últimos 7 dias: 1

Últimos 30 dias: 3

Duração total: 373