Ir para o conteúdo principal

Tagital T7X Motherboard Replacement

O que você precisa

  1. Tagital T7X Motherboard Replacement, Case: passo 1, imagem 1 %32 Tagital T7X Motherboard Replacement, Case: passo 1, imagem 2 %32 Tagital T7X Motherboard Replacement, Case: passo 1, imagem 3 %32
    • Place the Tagital T7X on a sturdy surface.

    • Insert the plastic opening tool into the crack and pry open the tablet. Move the tool along the edge, while continuing to pry up the casing.

  2. Tagital T7X Motherboard Replacement, Speaker: passo 2, imagem 1 %32 Tagital T7X Motherboard Replacement, Speaker: passo 2, imagem 2 %32 Tagital T7X Motherboard Replacement, Speaker: passo 2, imagem 3 %32
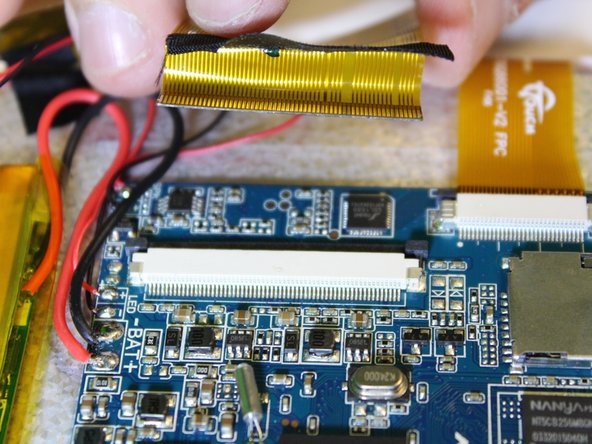
    • Remove the ribbon cable on the top left corner of the mother board.

    • Gently lift the black tape up to see the ribbon cable socket.

  3. Tagital T7X Motherboard Replacement: passo 3, imagem 1 %32 Tagital T7X Motherboard Replacement: passo 3, imagem 2 %32 Tagital T7X Motherboard Replacement: passo 3, imagem 3 %32
    • Push both side buttons away from the socket by using a spudger.

  4. Tagital T7X Motherboard Replacement: passo 4, imagem 1 %32 Tagital T7X Motherboard Replacement: passo 4, imagem 2 %32
    • Gently pull the ribbon cable away from the socket.

    • Don't be afraid to use some force for this step.

  5. Tagital T7X Motherboard Replacement: passo 5, imagem 1 %32 Tagital T7X Motherboard Replacement: passo 5, imagem 2 %32
    • The soldering iron can destroy components on the motherboard. Only touch the soldering iron to the solder already on the board.

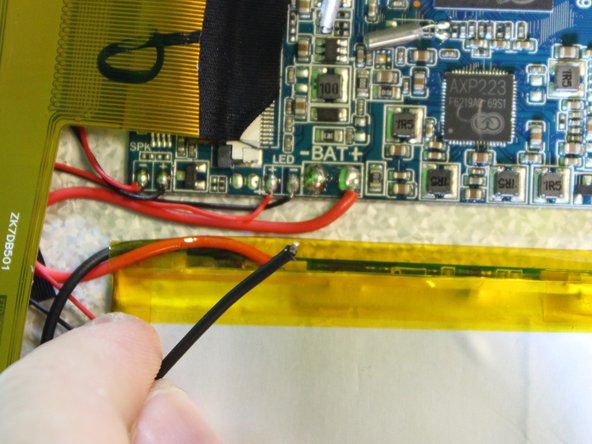
    • Touch the tip of the soldering iron to the solder connecting the positive (red) wire.

    • Pull back on the wire with the iron in place, removing it from the hot solder.

    • Repeat this step for the negative wire.

    • The solder will be melted almost instantly. There is no need to hold the iron on the solder for than a second or two. Visit IFixit's soldering guide for more info.

  6. Tagital T7X Motherboard Replacement: passo 6, imagem 1 %32 Tagital T7X Motherboard Replacement: passo 6, imagem 2 %32
    • Remove the speaker from the motherboard.

  7. Tagital T7X Motherboard Replacement, Battery: passo 7, imagem 1 %32 Tagital T7X Motherboard Replacement, Battery: passo 7, imagem 2 %32
    • Follow the attached wires to the positive and negative connections.

  8. Tagital T7X Motherboard Replacement: passo 8, imagem 1 %32 Tagital T7X Motherboard Replacement: passo 8, imagem 2 %32 Tagital T7X Motherboard Replacement: passo 8, imagem 3 %32
    • The soldering iron can destroy components on the motherboard. Only touch the soldering iron to the solder already on the board.

    • Touch the tip of the soldering iron to the solder connecting the negative wire.

    • Pull back on the wire with the iron in place, removing it from the hot solder.

    • The solder will be melted almost instantly. There is no need to hold the iron on the solder for more than a second or two. Visit iFixit's soldering guide for more info.

    • Repeat this step for the positive wire.

  9. Tagital T7X Motherboard Replacement: passo 9, imagem 1 %32 Tagital T7X Motherboard Replacement: passo 9, imagem 2 %32 Tagital T7X Motherboard Replacement: passo 9, imagem 3 %32
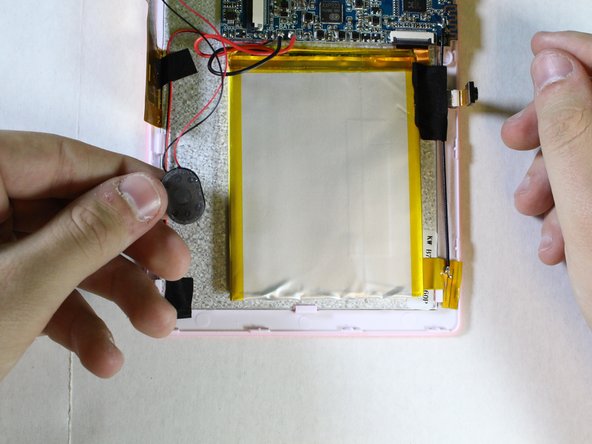
    • Use the nylon spudger to pry the battery from the back of the screen. Work your way around the edges, similar to opening the casing.

    • The adhesive used to hold the battery down is very strong. Don't be afraid to use some force.

  10. Tagital T7X Motherboard Replacement, Motherboard: passo 10, imagem 1 %32 Tagital T7X Motherboard Replacement, Motherboard: passo 10, imagem 2 %32
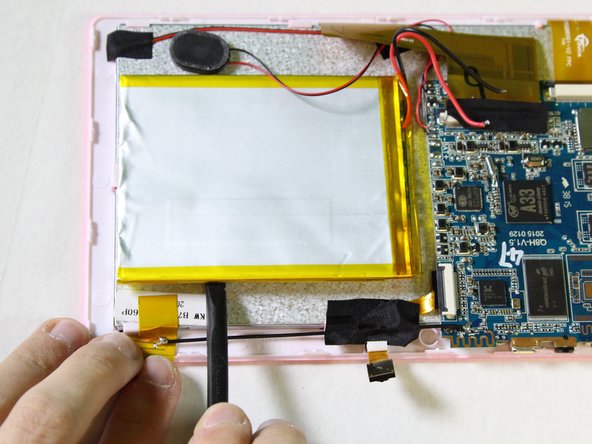
    • Next we will disconnect the digitizer ribbon cable from the motherboard.

    • Using the black spudger, gently push the tabs on each side of the socket to free the ribbon cable.

  11. Tagital T7X Motherboard Replacement: passo 11, imagem 1 %32 Tagital T7X Motherboard Replacement: passo 11, imagem 2 %32
    • Gently pull on the ribbon cable, separating it from the socket.

  12. Tagital T7X Motherboard Replacement: passo 12, imagem 1 %32 Tagital T7X Motherboard Replacement: passo 12, imagem 2 %32 Tagital T7X Motherboard Replacement: passo 12, imagem 3 %32
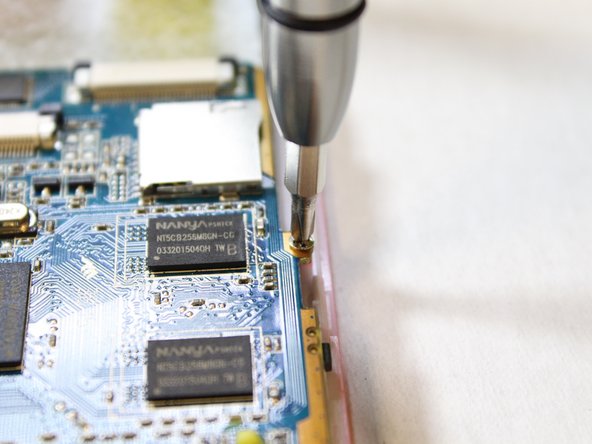
    • Next, we will unscrew the three PH#0 screws anchoring the motherboard into the case.

    • You will need the Phillips Screw #0 to remove the screws of the motherboard.

    • Using the screwdriver, with the PH#0 attachment, carefully unscrew the screws of the motherboard in order to remove it from the device.

Conclusão

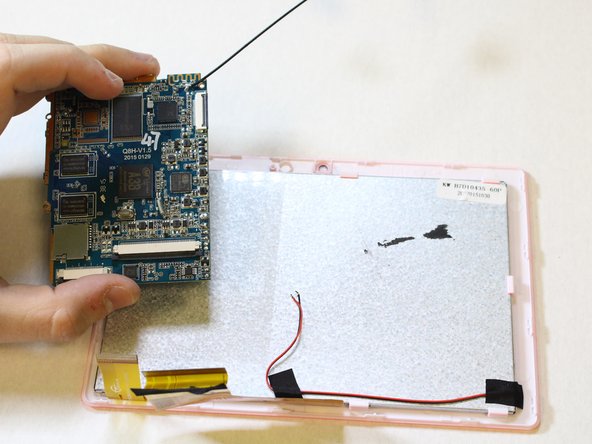
To reassemble your device, follow these instruction in reverse order.

2 outras pessoas executaram este guia.

Nikki Falato

Membro desde: 02/10/16

254 Reputação

Autoria de 1 guia

Equipe

USF Tampa, Team 2-1, Sullivan Spring 2016 Membro de USF Tampa, Team 2-1, Sullivan Spring 2016

USFT-SULLIVAN-S16S2G1

Membros da 4

Autoria de 12 guias

0 comentários

Adicione um comentário

Exibir estatísticas:

Últimas 24 horas: 0

Últimos 7 dias: 0

Últimos 30 dias: 1

Duração total: 385