Ir para o conteúdo principal
Participe da comunidade de reparos - Criar conta

Sony Xperia XZ2 Battery Replacement

O que você precisa

  1. Sony Xperia XZ2 Battery Replacement, LCD Screen: passo 1, imagem 1 %32 Sony Xperia XZ2 Battery Replacement, LCD Screen: passo 1, imagem 2 %32 Sony Xperia XZ2 Battery Replacement, LCD Screen: passo 1, imagem 3 %32
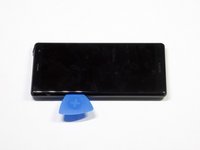
    • Weaken the glue that is keeping the screen in place by heating up the edges of the phone with a hair dryer or heat gun.

    • The phone gets very hot and can hurt the user handling it.

    Pergunte ao FixBot

    Comentar

  2. Sony Xperia XZ2 Battery Replacement: passo 2, imagem 1 %32 Sony Xperia XZ2 Battery Replacement: passo 2, imagem 2 %32 Sony Xperia XZ2 Battery Replacement: passo 2, imagem 3 %32
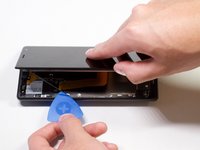
    • Scrape all the glue from the inside edges by inserting opening picks into the bottom edge of the phone and working your way around the edges.

    • If the glue hardens and becomes difficult to move the plastic around the edges, reheat the phone.

    Pergunte ao FixBot

    Comentar

  3. Sony Xperia XZ2 Battery Replacement: passo 3, imagem 1 %32 Sony Xperia XZ2 Battery Replacement: passo 3, imagem 2 %32
    • Pry open the phone by inserting an opening pick under one of the edges and removing the screen.

    • The screen is still attached by a connector, so do not pull the pieces apart.

    Pergunte ao FixBot

    Comentar

  4. Sony Xperia XZ2 Battery Replacement: passo 4, imagem 1 %32
    Ferramenta utilizada neste passo:
    Tweezers
    $3.99
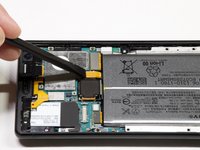
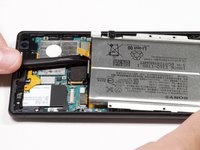
    • Remove the bracket covering the connector by grabbing one side of the bracket with angled tweezers and gently pulling it off.

    Pergunte ao FixBot

    Comentar

  5. Sony Xperia XZ2 Battery Replacement: passo 5, imagem 1 %32
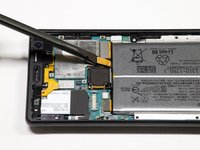
    • Gently remove the connector by using a spudger to pop it off.

    Pergunte ao FixBot

    Comentar

  6. Sony Xperia XZ2 Battery Replacement, Battery: passo 6, imagem 1 %32
    • Take out the twelve 3.5mm screws using the Phillips #00 screwdriver.

    • Remove the one 3 mm Phillips #00 screws.

    • Remove the two 1mm Phillips #00 screws.

    • Fifteen screws should be removed in total in this step. (Not all the screws are visible in the picture.)

    Pergunte ao FixBot

    Comentar

  7. Sony Xperia XZ2 Battery Replacement: passo 7, imagem 1 %32
    • Lift the metal screen shield out of the phone.

    Pergunte ao FixBot

    Comentar

  8. Sony Xperia XZ2 Battery Replacement: passo 8, imagem 1 %32 Sony Xperia XZ2 Battery Replacement: passo 8, imagem 2 %32 Sony Xperia XZ2 Battery Replacement: passo 8, imagem 3 %32
    • Use the spudger to pry up the battery flex connector to pop the battery out.

    Pergunte ao FixBot

    Comentar

  9. Sony Xperia XZ2 Battery Replacement: passo 9, imagem 1 %32
    • Lift the battery out of the phone.

    Pergunte ao FixBot

    Comentar

Conclusão

To reassemble your device, follow these instructions in reverse order.

Cancelar: não concluí este guia.

6 outras pessoas executaram este guia.

Arti Jain

Membro desde: 01/24/19

261 Reputação

Autoria de 1 guia

Equipe

Cal Poly, Team S19-G5, White Winter 2019 Membro de Cal Poly, Team S19-G5, White Winter 2019

CPSU-WHITE-W19S19G5

4 Membros

Autoria de 12 guias

1Comentário do guia

لقد كان العمل على هذا الهاتف مريحا جدا و جميل

Mouad Driouch - Responder Compartilhar

Comentar

Visualizações:

Últimas 24 horas: 17

Últimos 7 dias: 99

Últimos 30 dias: 363

Ao todo: 32,897