Introdução
If your Sony Walkman D-E356CK has issues within the device, then the disk reader will have to be removed once you've taken off the back panel. Use this guide to remove the disk reader of the Sony Walkman D-E356CK. The only tools you will need for this guide are a prying tool and a Philips head screwdriver.
O que você precisa
-
-
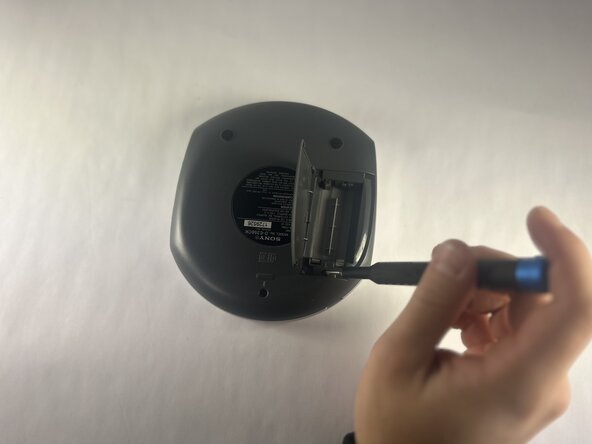
Open the battery compartment.
-
Remove the AA batteries from within the compartment.
 Pergunte ao FixBot
-
-
-
Press the button located in the bottom left corner of the device labeled "open."
-
Remove the three 11 mm-long Phillips screws.
-
-
-
Open the battery compartment.
-
Remove the two 11 mm-long Phillips screws on the back side of the Walkman.
-
-
-
-
Insert an opening tool into the seam between the back panel and chassis.
-
Pry around the perimeter until the back panel releases.
-
Remove the back panel.
-
-
-
Gently lift the motherboard to reveal the backside of the motherboard.
-
Disconnect the two JST connectors.
-
-
-
Lift the latch that secures the ribbon cable.
-
Disconnect the ribbon cable.
-
-
-
Remove the disk motor housing from front panel and flip it over.
-
Remove the 5mm screws from the disk motor.
-
-
-
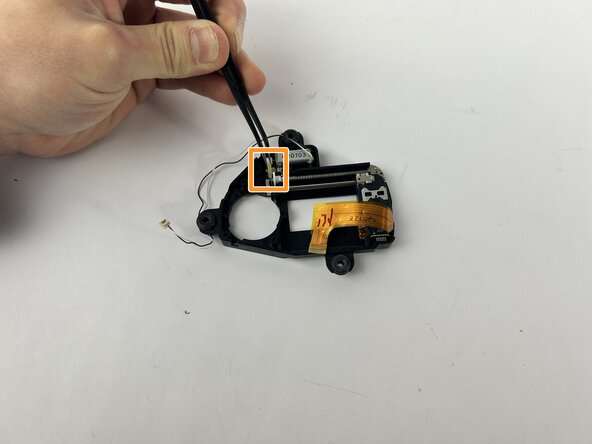
Carefully take out the clear plastic piece found in the image.
-
Use the tweezers to carefully remove the clear yellow gear.
-






To reassemble your device, follow the above steps in reverse order.
Take your e-waste to an R2 or e-Stewards certified recycler.
Repair didn’t go as planned? Try some basic troubleshooting or ask our Answers community for help.

Equipe

UMass Dartmouth, Team 1-1, Botvin Fall 2025 Membro de UMass Dartmouth, Team 1-1, Botvin Fall 2025
UMASSD-BOTVIN-F25S1G1
4 Membros
Autoria de 5 guias
