Introdução
The optical drive needs to be replaced when it stops reading discs. This is a guide to replace the optical drive of a Sony Vaio VPCEG37FM.
O que você precisa
-
-
-
Slide the release upwards and lift out the battery to remove.
-
Once battery is removed, long press the Power button for 30-60s and discharge any remaining power inside of the computer.
-
Put on the ESD bracelet, making sure the metal circle is touching your skin. Remove the alligator clip from the other end of the bracelet and insert the jack into the ground plug of an active electrical outlet. (the round hole). Do not move forward until you are grounded.
-
-
-
-
-
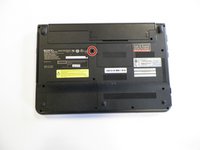
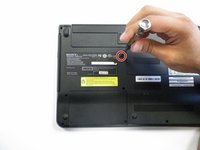
Using the Phillips #1 screwdriver, unscrew the 6.5 mm screw.
-
-

 Pergunte ao FixBot





To reassemble your device, follow these instructions in reverse order.

Equipe

University of North Texas, Team S3-G4, Thompson Fall 2017 Membro de University of North Texas, Team S3-G4, Thompson Fall 2017
UNT-THOMPSON-F17S3G4
4 Membros
Autoria de 28 guias
