Esta versão pode conter edições incorretas. Mude para o último instantâneo verificado.
O que você precisa
-
Este passo não foi traduzido. Ajude a traduzi-lo
-
Using a #1 Phillips screwdriver, remove the two 5mm screws as directed.
-
Slide off the back cover.
-
-
Este passo não foi traduzido. Ajude a traduzi-lo
-
Remove the four 3mm screws using the Phillips #1 screwdriver.
-
-
Este passo não foi traduzido. Ajude a traduzi-lo
-
Lift out the hard drive and unplug the orange ribbon wire.
-
-
-
Este passo não foi traduzido. Ajude a traduzi-lo
-
To loosen the keyboard, remove the twenty 5mm screws using the Phillips #1 screwdriver.
-
-
Este passo não foi traduzido. Ajude a traduzi-lo
-
Flip the device over and open it up.
-
Using a plastic opening tool and opening picks, pry off the keyboard from the bottom cover. Start from one of the corners of the device and work your way around.
-
-
Este passo não foi traduzido. Ajude a traduzi-lo
-
Remove the keyboard from the bottom cover and place it down as demonstrated.
-
Carefully pull the plastic tab and remove the ribbon wire.
-
-
Este passo não foi traduzido. Ajude a traduzi-lo
-
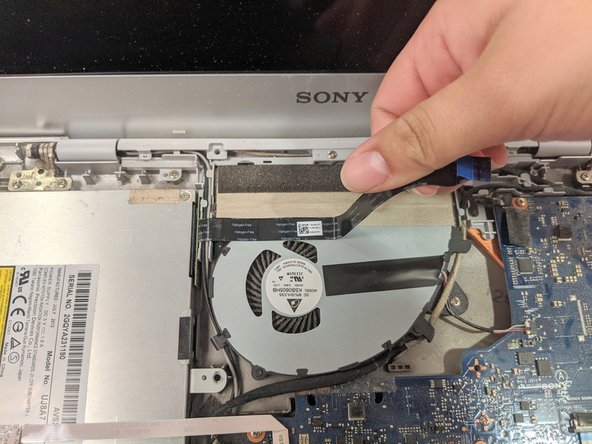
Slightly pull up the black tape covering the disk drive's ribbon wire.
-
Pull up the blue plastic strip attached to the ribbon wire and remove the ribbon wire from the port.
-
Detach the ribbon wire from the fan so the disk reader can be removed.
-
-
Este passo não foi traduzido. Ajude a traduzi-lo
-
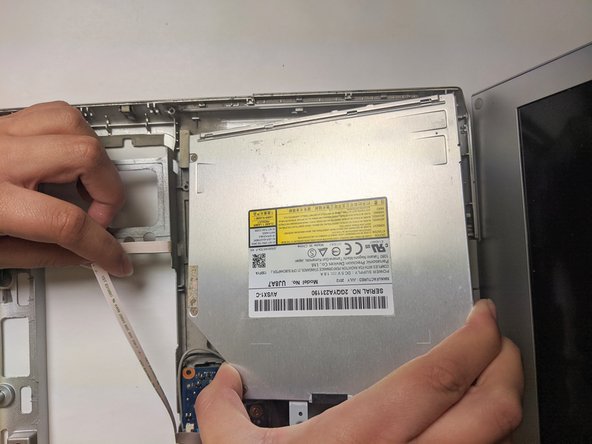
Remove the two 3mm screws using the Phillips #1 screwdriver.
-
-
Este passo não foi traduzido. Ajude a traduzi-lo
-
Take out the black plastic covering.
-
Remove the disk reader.
-


Equipe

Embry-Riddle Aeronautical University, Team S1-G2, Cromer Twal Spring 2020 Membro de Embry-Riddle Aeronautical University, Team S1-G2, Cromer Twal Spring 2020
ERAU-CROMER TWAL-S20S1G2
Membros da 3
Autoria de 10 guias