Ir para o conteúdo principal
Sony Cyber-shot DSC-HX80 LCD Screen Replacement

Sony Cyber-shot DSC-HX80 LCD Screen Replacement

Gordon Jones

Gordon Jones e 4 outros colaboradores

Última atualização em September 28, 2024

25 minutos
Difícil

Introdução

Ir para o passo 1

In the event of a damaged LCD screen, the only option may be for you to replace it. The following guide will take you step by step through the process.

O que você precisa

Ferramentas

  • Spudger
    Spudger
  • iFixit Opening Tool
    iFixit Opening Tool
  • Phillips #000 Screwdriver
    Phillips #000 Screwdriver

Exibir mais…

  1. Sony Cyber-shot DSC-HX80 LCD Screen Replacement, LCD Screen: passo 1, imagem 1 %32
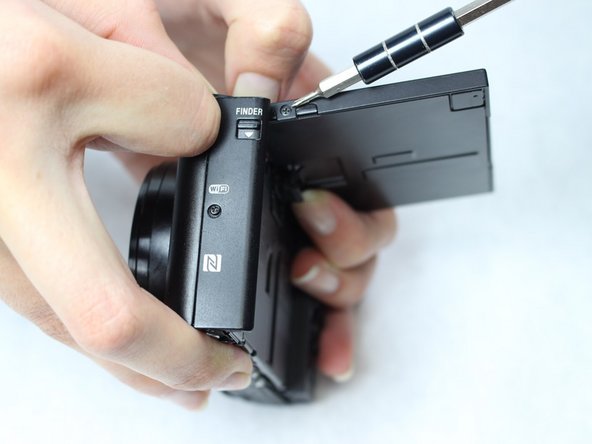
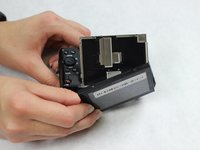
    • Before disassembling any part of the camera, turn off the power by pressing down on the ON/OFF button. The ON/OFF button is located on top of the camera.

  2. Sony Cyber-shot DSC-HX80 LCD Screen Replacement: passo 2, imagem 1 %32
    • Open the compartment located at the bottom of the camera. Slide the LOCK/OPEN switch to the OPEN side. Locate the small blue tab on the side. Pull it in direction away from battery. Remove the battery and set it aside.

  3. Sony Cyber-shot DSC-HX80 LCD Screen Replacement: passo 3, imagem 1 %32 Sony Cyber-shot DSC-HX80 LCD Screen Replacement: passo 3, imagem 2 %32
    • Flip LCD screen upwards.

    • Use the PH000 Phillips head screwdriver to remove the two 0.3 mm Phillips black screws located on the sides of the LCD screen. Place screws on magnetic mat or plastic bag.

  4. Sony Cyber-shot DSC-HX80 LCD Screen Replacement: passo 4, imagem 1 %32 Sony Cyber-shot DSC-HX80 LCD Screen Replacement: passo 4, imagem 2 %32
    • Use the PH000 Phillips head screwdriver to remove the two additional 0.3 mm black Phillips screws located on the top edge of the LCD screen. Place screws on magnetic mat or plastic bag.

  5. Sony Cyber-shot DSC-HX80 LCD Screen Replacement: passo 5, imagem 1 %32 Sony Cyber-shot DSC-HX80 LCD Screen Replacement: passo 5, imagem 2 %32 Sony Cyber-shot DSC-HX80 LCD Screen Replacement: passo 5, imagem 3 %32
    • Use a nylon spudger to gently remove the damaged LCD screen off the camera.

    • Replace LCD screen with new one.

Conclusão

To reassemble your device, follow these instructions in reverse order.

4 outras pessoas executaram este guia.

Gordon Jones

Membro desde: 10/02/18

1.081 Reputação

Autoria de 5 guias

Equipe

7Comentários do guia

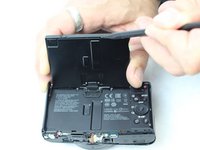
You should note that there is a small rectangular magnet (perhaps 8mm long and 2mm across) that has to be placed at the top of the LCD directly under the flash switch. Otherwise the LCD image will be upside down.

Dale Bjerning - Responder

Hello could you show a picture of where exactly under the flash has to be the magnetite tangle. Thanks.

Wolfina -

Anyone know where I can find the cable from the screen to the camera?

Thorusofer Dragon Knight - Responder

same question here! i repalced the lcd thinking that was the problem but the lcd is still black. the viewfinder works fine so i think i need to replace the cable that goes from the camera to the screen. any info?

Facundo V -

where can i find the screen other then threw sony

ninjadawn25 - Responder

Comentar

Visualizações:

Últimas 24 horas: 4

Últimos 7 dias: 11

Últimos 30 dias: 73

Ao todo: 4,004