Ir para o conteúdo principal
Participe da comunidade de reparos - Criar conta

Sony CDX-GT540UI CD Drive Replacement

O que você precisa

    1. Sony CDX-GT540UI CD Drive Replacement, Front Panel: passo 1, imagem 1 %32
      • Locate face-plate eject button.

      Pergunte ao FixBot
      Comentar

    2. Sony CDX-GT540UI CD Drive Replacement: passo 2, imagem 1 %32 Sony CDX-GT540UI CD Drive Replacement: passo 2, imagem 2 %32
      • Press the eject button.

      • Remove the face-plate.

      Pergunte ao FixBot
      Comentar

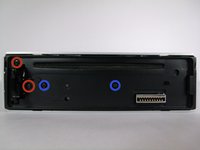
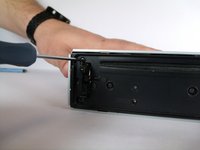
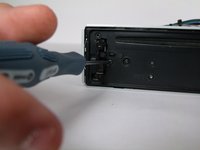
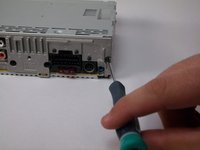
    3. Sony CDX-GT540UI CD Drive Replacement: passo 3, imagem 1 %32 Sony CDX-GT540UI CD Drive Replacement: passo 3, imagem 2 %32 Sony CDX-GT540UI CD Drive Replacement: passo 3, imagem 3 %32
      • Remove two 4.9mm Phillips #00screws on the front of the device.

      • Remove two 7.5mm Phillips #00screws on the front of the device.

      • When the screws are removed, the eject lever may fall into the device. Make sure the device is held horizontal and level.

      Pergunte ao FixBot

      Comentar

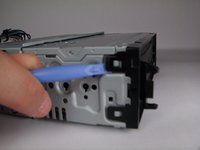
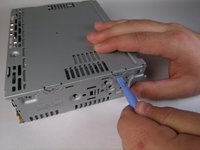
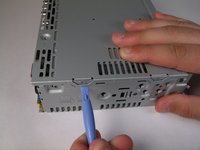
    4. Sony CDX-GT540UI CD Drive Replacement: passo 4, imagem 1 %32 Sony CDX-GT540UI CD Drive Replacement: passo 4, imagem 2 %32
      • Rotate device 90 degrees to either side.

      • Use the plastic opening tool to pry open the top and bottom tab respectively.

      • Repeat on opposite side.

      Pergunte ao FixBot

      Comentar

    5. Sony CDX-GT540UI CD Drive Replacement: passo 5, imagem 1 %32
      • Remove front panel.

      Pergunte ao FixBot

      Comentar

    1. Sony CDX-GT540UI CD Drive Replacement, Back Panel: passo 6, imagem 1 %32
      • Locate back panel.

      Pergunte ao FixBot

      Comentar

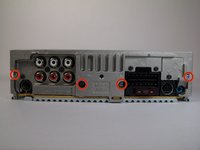
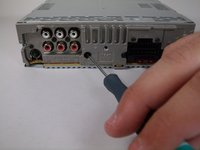
    2. Sony CDX-GT540UI CD Drive Replacement: passo 7, imagem 1 %32 Sony CDX-GT540UI CD Drive Replacement: passo 7, imagem 2 %32 Sony CDX-GT540UI CD Drive Replacement: passo 7, imagem 3 %32
      • Remove four 11.5mm Phillips #00 (silver) screws from back panel.

      Pergunte ao FixBot

      Comentar

    3. Sony CDX-GT540UI CD Drive Replacement: passo 8, imagem 1 %32
      • Remove four 9.5mm Phillips #00 (black) screws from back panel.

      • Remove two 7.5mm Phillips #00 (black) screws from back panel.

      Pergunte ao FixBot
      Comentar

    4. Sony CDX-GT540UI CD Drive Replacement: passo 9, imagem 1 %32
      • Remove back panel.

      • On the back panel there will be thermal (white) paste. Do not touch.

      Pergunte ao FixBot
      Comentar

    1. Sony CDX-GT540UI CD Drive Replacement, CD Drive: passo 10, imagem 1 %32
      • Remove one 9.5mm Phillips #00 screw.

      • Rotate device 180 degrees and repeat step.

      Pergunte ao FixBot

      Comentar

    2. Sony CDX-GT540UI CD Drive Replacement: passo 11, imagem 1 %32 Sony CDX-GT540UI CD Drive Replacement: passo 11, imagem 2 %32
      • Using plastic opening tool, detach the tabs. There are two on either side.

      • You will need to apply a decent amount of force to detach.

      Pergunte ao FixBot

      Comentar

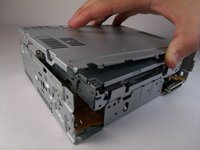
    3. Sony CDX-GT540UI CD Drive Replacement: passo 12, imagem 1 %32 Sony CDX-GT540UI CD Drive Replacement: passo 12, imagem 2 %32
      • Remove top panel.

      Pergunte ao FixBot
      Comentar

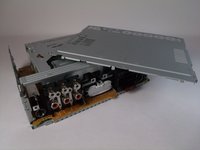
    4. Sony CDX-GT540UI CD Drive Replacement: passo 13, imagem 1 %32
      • Pull up CD drive slightly.

      Pergunte ao FixBot
      Comentar

    5. Sony CDX-GT540UI CD Drive Replacement: passo 14, imagem 1 %32
      • Disconnect motherboard connection.

      Pergunte ao FixBot

      Comentar

    6. Sony CDX-GT540UI CD Drive Replacement: passo 15, imagem 1 %32
      • Remove CD drive.

      Pergunte ao FixBot

      Comentar

Conclusão

To reassemble your device, follow these instructions in reverse order.

Cancelar: não concluí este guia.

2 outras pessoas executaram este guia.

Odelkys Marquez

Membro desde: 09/22/14

1.139 Reputação

Autoria de 7 guias

Equipe

USF Tampa, Team 10-2, Brown Fall 2014 Membro de USF Tampa, Team 10-2, Brown Fall 2014

USFT-BROWN-F14S10G2

3 Membros

Autoria de 7 guias

1Comentário do guia

This guide is listed as "difficult" yet only requires the use of a screwdriver and some prying tools. It would seem more appropriate to list it as "moderate" at most. I believe the motherboard guide has the same issue.

Also, you say PH#00 in the description of steps, but in the "tools" listing at the beginning of the guide, you said that a PH#0 was needed. These are not the same.

Dale Pearson - Responder Compartilhar

Comentar

Visualizações:

Últimas 24 horas: 0

Últimos 7 dias: 4

Últimos 30 dias: 24

Ao todo: 1,135