Ir para o conteúdo principal
Participe da comunidade de reparos - Criar conta

Sony Alpha A3000 Motherboard Replacement

O que você precisa

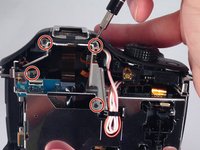
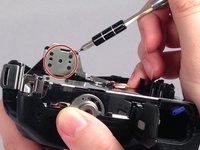
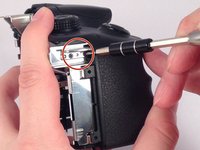
    1. Sony Alpha A3000 Motherboard Replacement, Rear Case: passo 1, imagem 1 %32 Sony Alpha A3000 Motherboard Replacement, Rear Case: passo 1, imagem 2 %32 Sony Alpha A3000 Motherboard Replacement, Rear Case: passo 1, imagem 3 %32
      • Remove the seven highlighted screws shown here.

      • Screws are teeny tiny, don't lose them!

      Pergunte ao FixBot

      Comentar

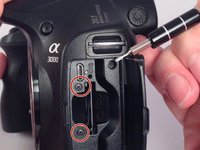
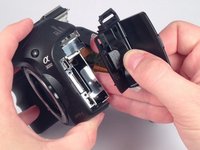
    2. Sony Alpha A3000 Motherboard Replacement: passo 2, imagem 1 %32 Sony Alpha A3000 Motherboard Replacement: passo 2, imagem 2 %32
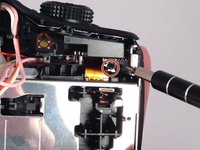
      • Remove this final screw from the memory card compartment.

      • Remove the chassis by pulling the back cover away from the camera.

      • Be careful not to damage any of the delicate ribbon cables when removing the chassis.

      Pergunte ao FixBot

      Comentar

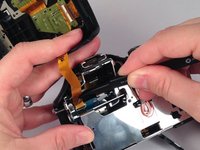
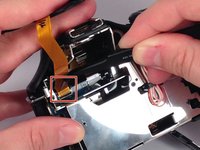
    3. Sony Alpha A3000 Motherboard Replacement: passo 3, imagem 1 %32 Sony Alpha A3000 Motherboard Replacement: passo 3, imagem 2 %32
      • Gently but forcefully lift up on the parallel cable connecting the two halves of the camera.

      Pergunte ao FixBot

      Comentar

    1. Sony Alpha A3000 Motherboard Replacement, Motherboard: passo 4, imagem 1 %32 Sony Alpha A3000 Motherboard Replacement, Motherboard: passo 4, imagem 2 %32
      • After removing the backing from the camera. Remove the two final screws in the memory compartment area.

      • Detach the facing for the memory dock.

      Pergunte ao FixBot

      Comentar

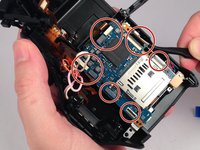
    2. Sony Alpha A3000 Motherboard Replacement: passo 5, imagem 1 %32 Sony Alpha A3000 Motherboard Replacement: passo 5, imagem 2 %32
      • Remove the eight screws securing the mount for the flash device.

      Pergunte ao FixBot
      Comentar

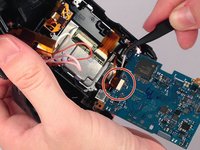
    3. Sony Alpha A3000 Motherboard Replacement: passo 6, imagem 1 %32 Sony Alpha A3000 Motherboard Replacement: passo 6, imagem 2 %32
      • Remove the three remaining screws holding in the protective metal casing.

      Pergunte ao FixBot
      Comentar

    4. Sony Alpha A3000 Motherboard Replacement: passo 7, imagem 1 %32
      • Remove the metal casing.

      Pergunte ao FixBot

      Comentar

    5. Sony Alpha A3000 Motherboard Replacement: passo 8, imagem 1 %32
      • Remove three screws holding down the motherboard .

      Pergunte ao FixBot

      Comentar

    6. Sony Alpha A3000 Motherboard Replacement: passo 9, imagem 1 %32 Sony Alpha A3000 Motherboard Replacement: passo 9, imagem 2 %32
      • Detach the nine serial cables connecting it to the camera body.

      Pergunte ao FixBot

      Comentar

    7. Sony Alpha A3000 Motherboard Replacement: passo 10, imagem 1 %32
      • Finally remove the motherboard from the casing.

      Pergunte ao FixBot

      Comentar

Conclusão

To reassemble your device, follow these instructions in reverse order.

Cancelar: não concluí este guia.

8 outras pessoas executaram este guia.

Equipe

USF Tampa, Team 4-4, Meier Fall 2015 Membro de USF Tampa, Team 4-4, Meier Fall 2015

USFT-MEIER-F15S4G4

4 Membros

Autoria de 10 guias

1Comentário do guia

Then loose the plug all the motherboard?

kongre172 - Responder Compartilhar

Comentar

Visualizações:

Últimas 24 horas: 4

Últimos 7 dias: 11

Últimos 30 dias: 50

Ao todo: 3,218