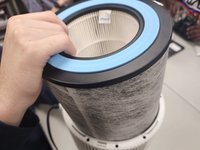
Ir para o conteúdo principal

Shark Clean Sense HP102PET LED Screen Replacements

O que você precisa

  1. Shark Clean Sense HP102PET LED Screen Replacements, Outer White Shell: passo 1, imagem 1 %32 Shark Clean Sense HP102PET LED Screen Replacements, Outer White Shell: passo 1, imagem 2 %32 Shark Clean Sense HP102PET LED Screen Replacements, Outer White Shell: passo 1, imagem 3 %32
    • Turn off and unplug the air purifier before beginning.

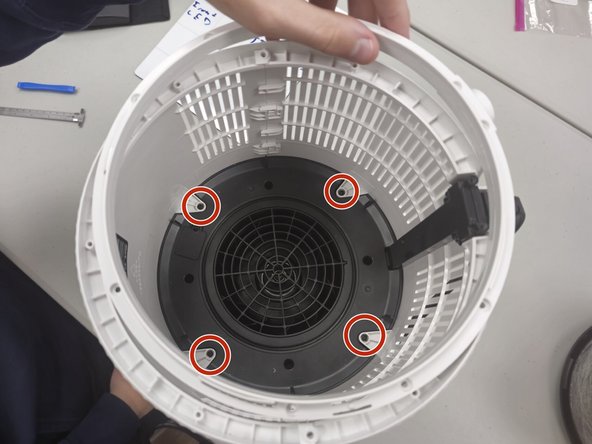
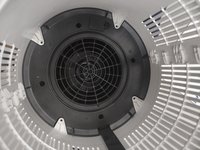
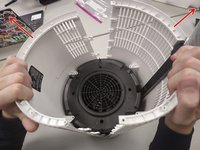
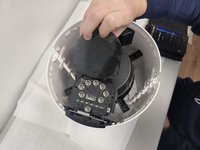
    • Unscrew the one 1.2 cm screw holding the grate at the top with a TR10 Torx screwdriver.

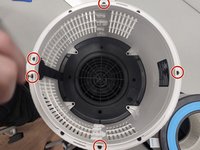
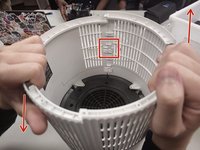
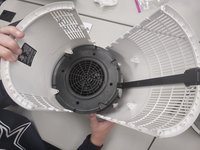
    • Use a prying tool to carefully pry along the outer edges to disengage the inner retaining clips.
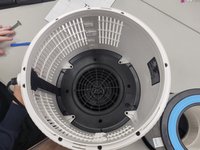
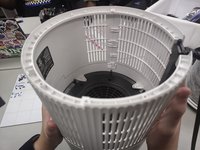
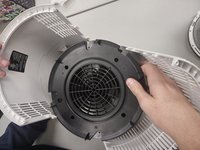
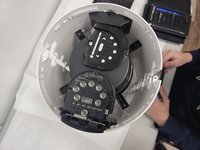
    • These retaining clips can be difficult to disengage, but releasing two clips on the same side should allow you to easily remove the grate.

    • Remove the grate.

  2. Shark Clean Sense HP102PET LED Screen Replacements: passo 2, imagem 1 %32
    • Remove the two 1.2 cm screws with a TR10 Torx screwdriver.

    • Almost all screws are the same length (around 1 cm). The main difference is the bit that's used to remove them.

  3. Shark Clean Sense HP102PET LED Screen Replacements: passo 3, imagem 1 %32
    • Use a Phillips #1 screwdriver to remove the four 1 cm.

    • This will make the fan holder slightly loose, but this will not be a problem until you open the case completely.

  4. Shark Clean Sense HP102PET LED Screen Replacements: passo 4, imagem 1 %32 Shark Clean Sense HP102PET LED Screen Replacements: passo 4, imagem 2 %32 Shark Clean Sense HP102PET LED Screen Replacements: passo 4, imagem 3 %32
    • Flip the device over and unscrew the bottom by turning it clockwise.

    • Remove the filter.

  5. Shark Clean Sense HP102PET LED Screen Replacements: passo 5, imagem 1 %32 Shark Clean Sense HP102PET LED Screen Replacements: passo 5, imagem 2 %32
    • Remove the five 1 cm a Phillips screwdriver.

    • Unscrew the four 1.2 cm screws with a TR10 Torx screwdriver.

    • The ring will not be hard to remove, but be careful on reassembly. Make sure that the power connector is properly seated when putting the ring back on.

  6. Shark Clean Sense HP102PET LED Screen Replacements: passo 6, imagem 1 %32 Shark Clean Sense HP102PET LED Screen Replacements: passo 6, imagem 2 %32
    • Remove the four 1 cm screws that secure the fan housing.

  7. Shark Clean Sense HP102PET LED Screen Replacements: passo 7, imagem 1 %32 Shark Clean Sense HP102PET LED Screen Replacements: passo 7, imagem 2 %32 Shark Clean Sense HP102PET LED Screen Replacements: passo 7, imagem 3 %32
    • Make sure that you are pulling up on the side that allows, as pictured in the red box.

    • Gently slide the cases up and down, or hold one and gently pull up on the opposite side (Down on the left, up on the right for this picture).

    • The whole case will start to separate and the black disc will come loose. This is normal.

  8. Shark Clean Sense HP102PET LED Screen Replacements: passo 8, imagem 1 %32 Shark Clean Sense HP102PET LED Screen Replacements: passo 8, imagem 2 %32 Shark Clean Sense HP102PET LED Screen Replacements: passo 8, imagem 3 %32
    • Gently open the case outwards as there are fragile electronics inside.

    • Remove the fan housing.

  9. Shark Clean Sense HP102PET LED Screen Replacements, Led Screens: passo 9, imagem 1 %32 Shark Clean Sense HP102PET LED Screen Replacements, Led Screens: passo 9, imagem 2 %32 Shark Clean Sense HP102PET LED Screen Replacements, Led Screens: passo 9, imagem 3 %32
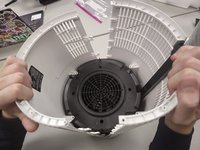
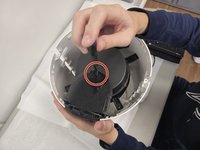
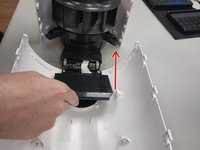
    • Remove the single Phillips screw on top of the device.

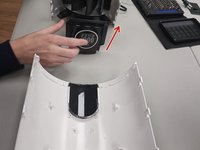
    • Lift up the plastic cover after removing the screw to replace the screen.

  10. Shark Clean Sense HP102PET LED Screen Replacements: passo 10, imagem 1 %32
    • Remove all four 1 cm Phillips screws.

    • The hand in frame is hiding one of the screws; it's opposite of the back right screw.

  11. Shark Clean Sense HP102PET LED Screen Replacements: passo 11, imagem 1 %32 Shark Clean Sense HP102PET LED Screen Replacements: passo 11, imagem 2 %32
    • Grip and remove the LED panel.

Conclusão

To reassemble your device, follow the above steps in reverse order.
Take your e-waste to an R2 or e-Stewards certified recycler.
Repair didn’t go as planned? Try some basic troubleshooting or ask our Answers community for help.

0 comentários

Adicione um comentário

Exibir estatísticas:

Últimas 24 horas: 0

Últimos 7 dias: 0

Últimos 30 dias: 1

Duração total: 41