Ir para o conteúdo principal
Participe da comunidade de reparos - Criar conta

Sansa e260R Memory Board Replacement

O que você precisa

  1. Sansa e260R Memory Board Replacement, Rear Case: passo 1, imagem 1 %32
    • Before disassembling the device, make sure it is powered off.

    • Remove the four 1.5mm screws on the back of the device.

    Pergunte ao FixBot
  2. Sansa e260R Memory Board Replacement: passo 2, imagem 1 %32
    • Using a plastic opening tool, lift the metal backing from the front of the device.

    Pergunte ao FixBot
  3. Sansa e260R Memory Board Replacement: passo 3, imagem 1 %32
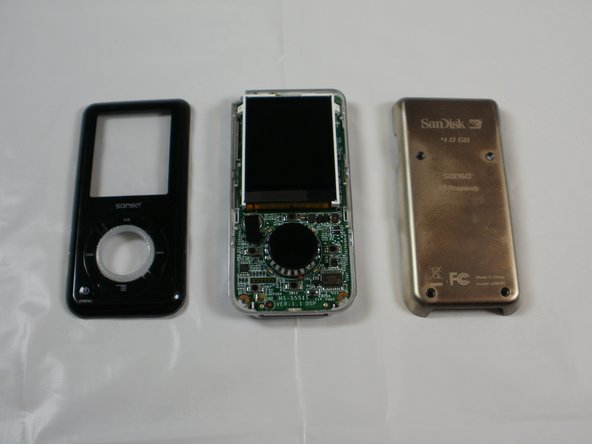
    • Pull the rear panel off of the Sansa e260R.

    Pergunte ao FixBot
  4. Sansa e260R Memory Board Replacement, Battery: passo 4, imagem 1 %32
    • Grip the bottom of the battery with your thumb and forefinger and pull it away from the device.

    Pergunte ao FixBot
  5. Sansa e260R Memory Board Replacement, Front Panel: passo 5, imagem 1 %32
    • Remove the four 1.5mm screws on the inner casing of the device.

    • These screws are very small and hard to extract from the casing. It may be helpful to use a magnetic screwdriver.

    Pergunte ao FixBot
  6. Sansa e260R Memory Board Replacement: passo 6, imagem 1 %32
    • Flip the device so that the front is facing you.

    • Slide a plastic opening tool between the plastic front cover and the metal back cover of the device.

    Pergunte ao FixBot
  7. Sansa e260R Memory Board Replacement: passo 7, imagem 1 %32 Sansa e260R Memory Board Replacement: passo 7, imagem 2 %32
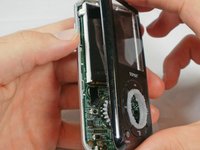
    • Pull the front cover away from the rest of the device.

    Pergunte ao FixBot
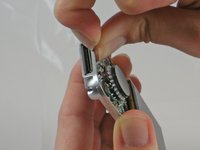
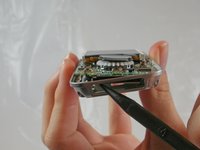
  8. Sansa e260R Memory Board Replacement, Memory Board: passo 8, imagem 1 %32 Sansa e260R Memory Board Replacement, Memory Board: passo 8, imagem 2 %32
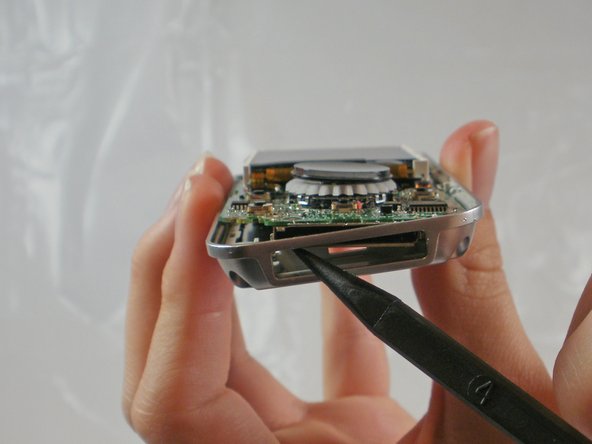
    • Near the charging port, pull the case away from the motherboard to create clearance to remove the motherboard.

    • Use the spudger to push the motherboard in and pop the metal edge of the charging port up and inside the plastic case.

    Pergunte ao FixBot
  9. Sansa e260R Memory Board Replacement: passo 9, imagem 1 %32
    • Pull the bottom of the motherboard up and then out.

    Pergunte ao FixBot
  10. Sansa e260R Memory Board Replacement: passo 10, imagem 1 %32
    • On the back of the motherboard, there is a rectangle of rubber.

    • Peel the rectangle off slowly.

    Pergunte ao FixBot
  11. Sansa e260R Memory Board Replacement: passo 11, imagem 1 %32
    • Under the rubber rectangle, there is a strip of black tape.

    • Peel the tape off about halfway so that it is no longer attached to the memory board.

    Pergunte ao FixBot
  12. Sansa e260R Memory Board Replacement: passo 12, imagem 1 %32
    • Carefully peel the memory board away from the rest of the motherboard

    Pergunte ao FixBot
Conclusão

To reassemble your device, follow these instructions in reverse order.

6 outras pessoas executaram este guia.

JenniferW

Membro desde: 01/31/12

194 Reputação

Autoria de 2 guias

Equipe

Cal Poly, Team 8-15, Maness Winter 2012 Membro de Cal Poly, Team 8-15, Maness Winter 2012

CPSU-MANESS-W12S8G15

5 Membros

Autoria de 5 guias

1Comentário do guia

thanks a million for this. i accidentally erased the boot partition, bought another one on eBay with a defective audio channel and switched the memory board: eureka! i’m happy listening to my tunes again!

Admin User - Responder Compartilhar

Comentar

Visualizações:

Últimas 24 horas: 2

Últimos 7 dias: 14

Últimos 30 dias: 80

Ao todo: 3,008