Introdução
The buttons on the back panel are the main controls for features such as adjusting the exposure value, saving selected picture options, selecting a focus point manually, or deleting files. If these buttons are not responsive, damaged, or missing, this guide will help you replace them.
Please note that all green strips shown in the photos are just green tape. They are not necessarily significant for the replacement of the buttons.
O que você precisa
-
-
-
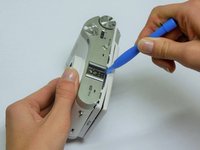
Using a Phillips #00 precision screwdriver, remove the seven 4mm screws (5 on the bottom of the device and 1 on each of the two sides) holding the back panel to the camera.
 Pergunte ao FixBot
-
-
-
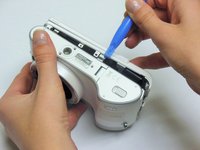
Using a Phillips #00 precision screwdriver, remove the last 4 mm screw located inside the input ports' compartment.
-
-
-
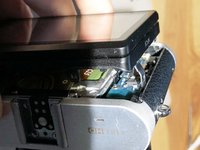
Place a plastic opening tool into the gap between the back panel and camera body, from both the top and the bottom of camera. Carefully pry open the camera and separate the back panel.
-
-
-
Ferramenta utilizada neste passo:Tweezers$4.99
-
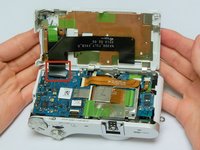
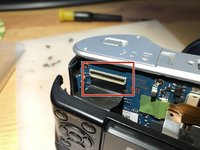
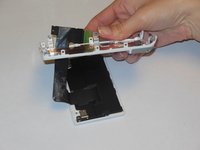
Using tweezers or your fingers, pull the display's black ribbon from the motherboard. This frees the back panel altogether.
-
-
-
-
Ferramenta utilizada neste passo:Tweezers$4.99
-
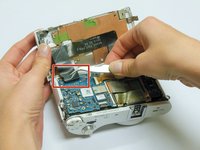
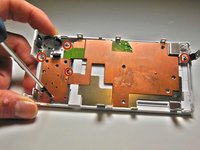
Using a Phillips #00 precision screwdriver, remove the four 1mm screws that are holding the black supports to the panel.
-
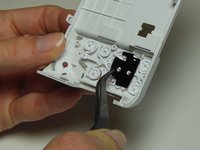
Remove the little ribbon tab from the contact pad using tweezers or your fingers, then peel off the black ribbon from the metallic panel.
-
Feed the ribbon through the slot on the back panel to free the LCD Screen. You need to bend the ribbon to get the small tabs through it.
-
-
-
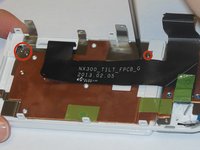
Using a Phillips #00 precision screwdriver, remove the five 3mm screws.
-
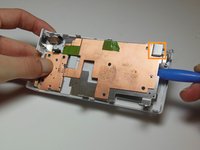
Using a plastic opening tool, slowly lift up the entire metal piece from the back of the camera.
-
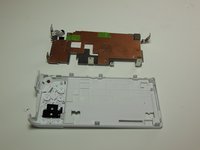
There are two small magnetic blocks housed underneath the metallic plate. These are for securing the swivel screen in place while it is closed.
-
-
-
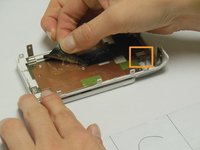
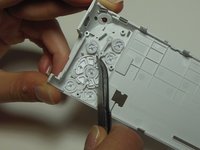
Once you remove the metallic panel, peel off the black pad from the buttons using tweezers.
-
Using tweezers, remove any button you need to by pulling on the plastic strips near the connection point to the back panel.
-
-


To reassemble your device, follow these instructions in reverse order.
Cancelar: não concluí este guia.
Uma outra pessoa concluiu este guia.

Equipe

USF Tampa, Team 9-6, Blackwell Winter 2015 Membro de USF Tampa, Team 9-6, Blackwell Winter 2015
USFT-BLACKWELL-W15S9G6
4 Membros
Autoria de 12 guias