Introdução
This guide will probably only be required in the event the front glass is removed (following the guide found here Samsung Galaxy S III Broken Front Glass Replacement) and the LCD display is cracked.
Alternatively if you want to glue the LCD display to the replacement glass using clear glue you may find it easier to do this with the display removed.
This is not to be attempted by the faint of heart and whilst you won't damage the phone you may damage the display, as such I would only recommend this in the event the display is damaged and not working.
Use the iOpener instead of the heat gun if you have one to remove the front glass, it makes life easier and massively reduces the risk of damaging the phone due to excess heat.
This guide include the steps for the removal of the front glass however SKIP steps 12-15 (the last steps of the front glass) as these detail actually reattaching the front glass which you won't be doing at this point
O que você precisa
-
-
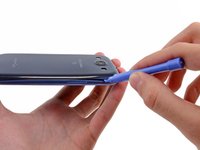
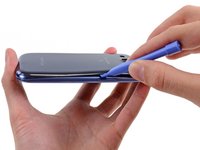
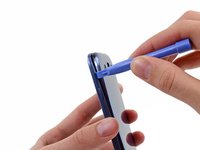
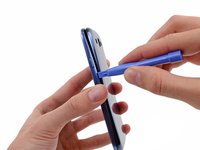
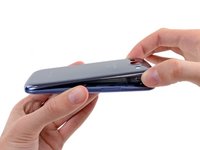
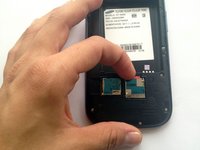
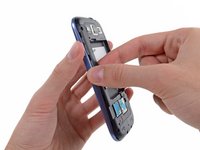
Insert a plastic opening tool or fingernail into the notch in the gap between the rear case and the rest of the phone, located at the top of the device.
-
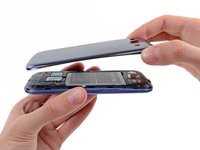
Gently twist the opening tool to disconnect the clips securing the top of the rear case.
-
-
-
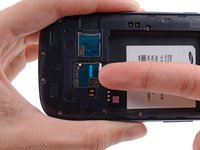
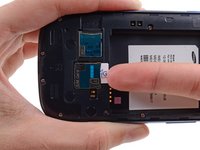
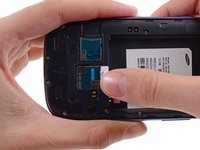
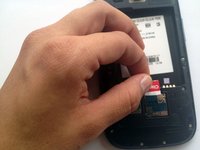
Using your fingernail, push the SIM card slightly deeper into its slot, until you hear a click.
-
After the click, release the card and it will pop out of its slot.
-
-
-
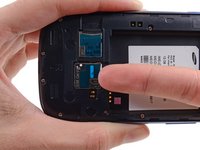
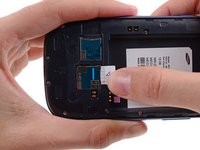
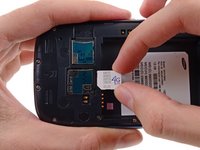
Using your fingernail, push the microSD card slightly deeper into its slot, until you hear a click.
-
After the click, release the card and it will pop out of its slot.
-
-
-
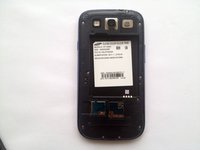
If your phone already has a protective screen applied to it, you are ready to begin.
-
If it doesn't, cut a piece of packaging tape the size of the screen and apply it to the screen. This will help you remove the broken glass later.
-
-
Ferramenta utilizada neste passo:Heat Gun$24.99
-
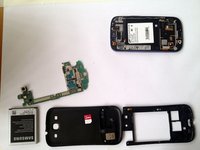
At this point you can already go to the next step, which is using a heat gun. However I felt safer by taking out the motherboard too.
-
If you decide to take out the motherboard follow the Samsung Galaxy S III Motherboard Replacement, it has all the details.
-
-
-
-
Using an infrared thermometer heat the surface to 170-180° F (roughly 70-80° C). This will loosen the glue but not damage the electronics.
-
Hold the gun at about 3 inches from your phone (in this picture it looks like its right on top). With the heat gun set to low, heat up the borders for about 3 to 5 minutes depending on the strength of your heat gun.
-
You must be careful when using the heat gun on this device. If the device is heated up too much then it may melt the digitizer and cause discoloration. If you start to see any discoloration then shut off the gun immediately.
-
If you are working with a hair dryer, it might take up to 1 hour.
-
-
Ferramenta utilizada neste passo:iFixit Opening Picks (Set of 6)$4.99
-
Using a guitar pick or a plastic opening tool, very carefully start to work separating the edges of the glass.
-
Make sure to go from top to bottom.
-
You will need to use the heat gun a number of times as you go down separating the glass. For glasses with lots of damage you will need to go extra carefully as to not damage the LCD with the shattered glass pieces.
-
-
-
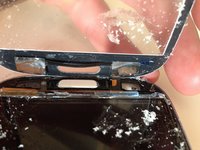
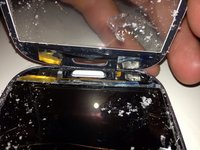
Extra attention is necessary with this step, don't damage the buttons or cable! With a spudger, detach the buttons from the inner side of the glass. This might require a little extra heat. Also, the best strategy is to start in the middle, under the black ribbon that connects the two buttons, and then move sideways to separate each one.
-
*Edit* Thanks to the awesome guy or gal who uploaded the missing pics ^__^
-
-
Ferramenta utilizada neste passo:Tweezers$4.99
-
Take out the broken glass. I was able to take it all in one piece.
-
If your glass is very shattered you will need to pick up the small pieces with tweezers, one by one or stick tape to the glass before you take it out. You can also use screen protectors.
-
-
-
Remove the ten 4.0 mm Phillips screws securing the midframe to the front panel assembly.
-
-
Ferramenta utilizada neste passo:Plastic Cards$2.99
-
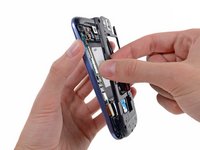
Use one of the picks to lift the display in one of the corners
-
Work the pick along the top lifting the display from the case
-
Slide the plastic card into the top to provide some leverage
-
This will also stop the display from sticking back down to the case while you work down the display
-
-
-
Using a spudger very carefully lift the black lock on the connector
-
Gently pull the cable out of the connector
-
Using a pick very carefully separate the touchscreen cable from the display
-
The chip on the cable at that point is glued to the display but can be easily separated by sliding a pick under it
-
-
-
To reassemble
-
Attach the touchscreen buttons to the new screen (Step 14)
-
Slide the cable through the case
-
Stick the display down to the case (apply pressure to make sure its stuck, but not too much you don't want to break the new screen)
-
Follow steps 1 - 5 in reverse to reassemble from the back
-


To reassemble your device, follow these instructions in reverse order.
To reassemble your device, follow these instructions in reverse order.
Cancelar: não concluí este guia.
64 outras pessoas executaram este guia.