Introdução
Use this guide to replace the front panel assembly.
O que você precisa
Vídeo de Apresentação
-
-
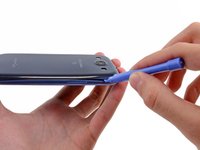
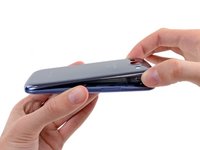
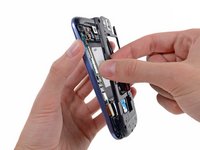
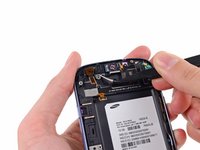
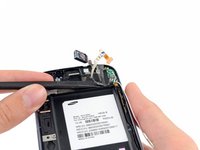
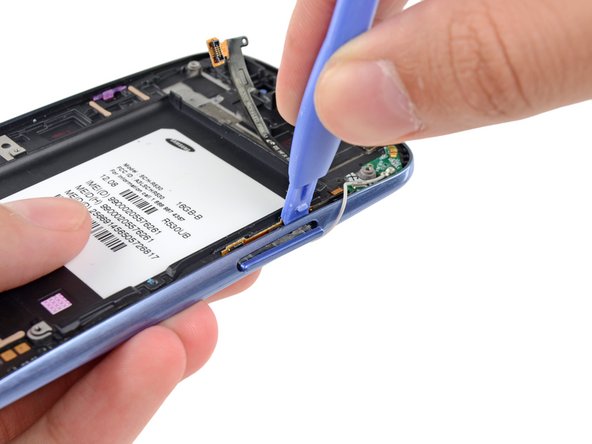
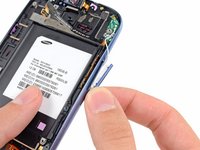
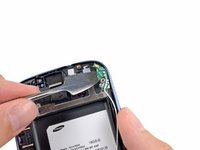
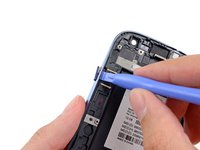
Insert a plastic opening tool or fingernail into the notch in the gap between the rear case and the rest of the phone, located at the top of the device.
-
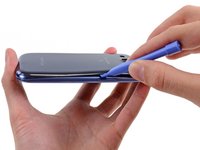
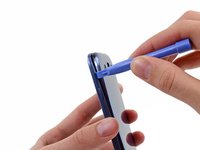
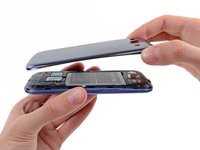
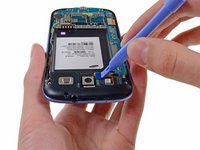
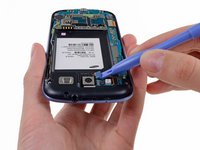
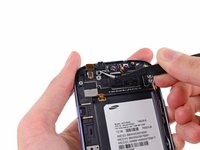
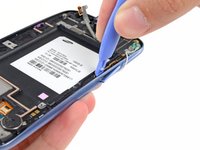
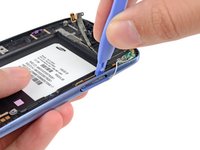
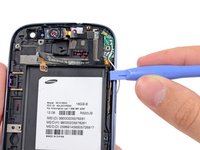
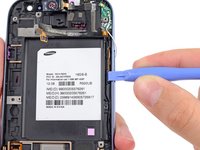
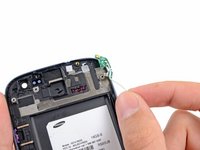
Gently twist the opening tool to disconnect the clips securing the top of the rear case.
-
-
-
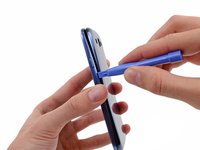
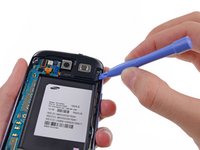
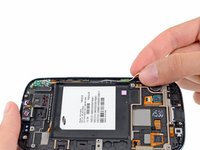
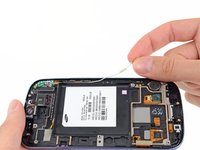
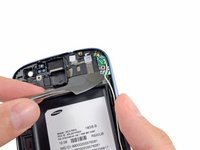
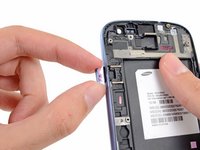
Lift up and remove the rear case from the phone.
-
-
-
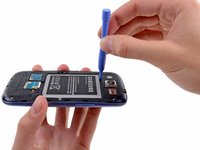
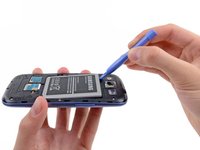
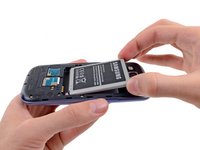
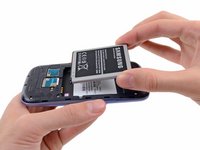
Wedge a plastic opening tool into the small notch above the battery.
-
Pry the battery up out of its recess.
-
-
-
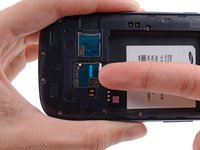
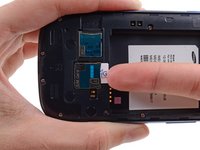
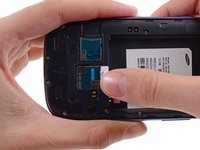
Using your fingernail, push the SIM card slightly deeper into its slot, until you hear a click.
-
After the click, release the card and it will pop out of its slot.
-
-
-
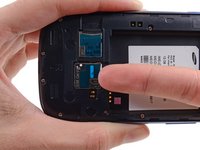
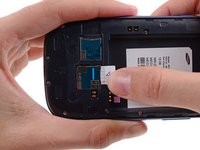
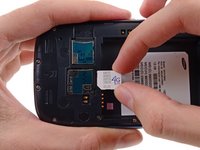
Using your fingernail, push the microSD card slightly deeper into its slot, until you hear a click.
-
After the click, release the card and it will pop out of its slot.
-
-
-
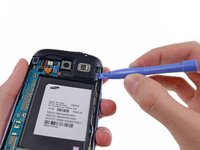
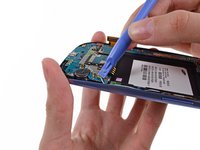
Remove the ten 4.0 mm Phillips screws securing the midframe to the front panel assembly.
What would you use to remove the screws
I used both P#000 and J#00 precision bits to good effect. I tend to prefer the Japanese Standard bits in place of Philips, as the JIS bits seem not to cam out and strip screws as easily.
E West -
-
-
-
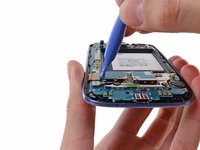
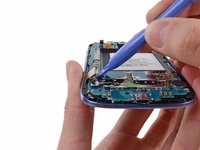
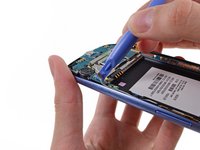
Grasp the left side of the plastic midframe with your thumb and forefinger and lift it away from the phone.
I had to use a guitar-pick to pry that section off of the frame. Start at the front-facing camera edge and run the pick underneath the plastic cover. The catches should release.
READ ME!
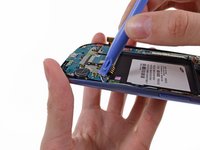
For a guide that takes you step by step on how to remove the SIM and microSD, I'm surprised they didn't mention the top part of this midframe (still attached, in the pictures). This top part of the midframe also needs to be removed before you can take out the motherboard.
You need to disconnect a ribbon not listed in these directions first, then pry that midframe up with the help of a guitar pick. This ribbon is located by the back-camera, next to the digitizer ribbon. This ribbon is connected to the midframe so it is essential you disconnect this before lifting the frame up.
The frame is really snapped in there so don't be afraid to use a little force - for reference, you will use more force to pull this frame off than you did to pull off the back-cover of the phone. Once this piece is off, your phone should look like the picture in step 14.
-
-
-
-
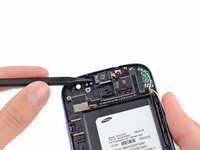
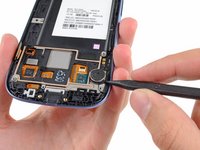
Use a plastic opening tool to pry the rear-facing camera connector up from its socket on the motherboard.
This is not a rear facing camera connector. This is the connector for the lHeadphone Jack/Speaker Assembly
You're right I
-
-
-
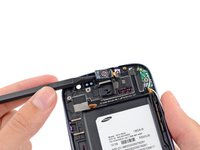
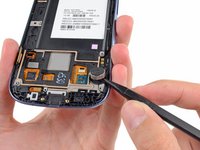
Use a plastic opening tool to pry the front-facing camera connector from its socket on the motherboard.
-
-
-
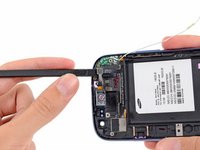
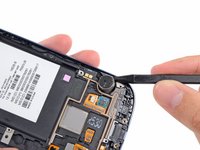
Disconnect the digitizer cable by gently prying its connector up from its socket on the motherboard.
Step 18 says the front digitizer connector, but later calls it the earpiece/buttons/ambient light sensor ribbon cable.
Is the Digitizer connector part of the display connector, or is it elsewhere?
It's the volume and speaker
-
-
-
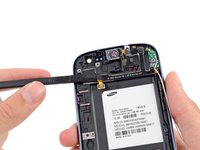
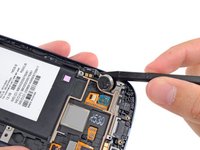
Pry the Wi-Fi antenna cable connector up from its socket on the motherboard.
-
Gently move the cable out of the way of the motherboard.
Be very careful,as it is very easy to break the connector off the motherboard.
Has anyone tried just folding the motherboard back to the left after removing all the screws WITHOUT disconnecting the wi-fi antenna? I'm just a little worried about this one step.
Folding the motherboard back without disconnecting the WiFi antenna worked for me! :)
I broke the WiFi antenna connector bit off motherboard. How do I fix it?
-
-
-
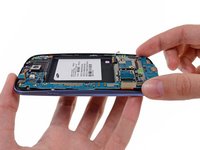
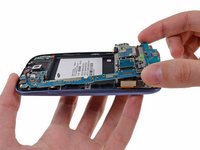
Carefully lift the bottom of the motherboard assembly away from the front panel assembly.
-
Remove the motherboard assembly from the front panel assembly, minding any cables that may snag on it.
If I am not mistaking, there is a screw also on the motherboard needs to be removed before removing motherboard from the assembly
It's covered in Step 21
Amy Losh -
-
-
-
Remove the single 2.0 mm Phillips screw securing the front-facing camera bracket to the front panel.
-
-
-
Peel the antenna cable up from its channel in the front panel assembly.
Replacing only the glass was a terrible idea...
I bought a new screen including the frame and front button.
On this fix i had to transfer the wifi-antenna module, led, the vibrating module, the cable connecting the front speaker and volume control and then the two side buttons. This was kinda hard, so i think this should be included in the guide.
Step 26: Remove the lock and volume control buttons by pushing them out from the inside.
Step 27: Carefully lift the front speaker with the cable glued to the frame. With the volume control button removed it's easier to access the volume control module at the end of this cable.
Step 28: Remove the vibrating module. Be carefull not to break the piece glued to the frame.
Step 29: Remove the flat wifi-antenna module. This is also glued to the frame wich makes it really tricky to lift.
THIS IS A QUESTION to anyone who is good with fixing phones. If i buy this Front Panel Replacement stuff, will this be the fix to a broken screen? i have an issue where i plug the phone into a computer and the phone will charge but the computer cannot see any data (pics, apps, a n y t h i n g) from the phone. will this issue be fixed if i use this method? will my data remain in reach when i use this method? .... thank you
Where do all the little soft rubber parts go? I found 2 but I have 3 left over!
-
-
-
Use a metal spudger to carefully peel the antenna board off the front panel assembly.
-
Lift and remove the antenna board out of the phone.
Same thing happened to me!!! It snapped in half :(
Mines too :( I thought i was carefull enough
Romano -
-


To reassemble your device, follow these instructions in reverse order.
To reassemble your device, follow these instructions in reverse order.
Cancelar: não concluí este guia.
212 outras pessoas executaram este guia.

14 comentários
Thanks. This is the second time I've used this guide.
And how Ill install thenew screen ?
Brilliant Step-By-Step guide. My phone needed new digitizer as just a black screen was showing when turned on, must have happened from a drop. I bought the digitizer screen combo from ebay and used this guide to dress across the components. Worked first time! There are a couple of other spongy or supportive rubber pieces around certain components that were in the original phone so I transferred those also, I guess they are there just to ensure tight connections etc. Absolute lifesaver!
Used this guide to replace my front panel, and was very easy to follow.
I even watched the video, it helped a lot!
The only problem I had with my fix, is that I didn't have the spudger and was unable to remove the vibrator without damaging it. So I am yet to order another to replace it, other than that, everything came out great!!
hi
I'm having trouble finding a Screen Replacement of samsung SGHI747 its Canadian model of samsung s3 so giveme some idea how can i fixit
Wonderful thanks so much!! Working screen now yay!
This phone was a dream to repair! Miss ya, buddy.
Hi I replaced the screen but now the phone is not booting. I also insert a new battery but didn’t turn on. How to troubleshoot the phone ?