Introdução
This guide shows how to replace the camera.
O que você precisa
-
-
Insert a fingernail or plastic opening tool in the gap between the rear case and the base of the phone.
 Pergunte ao FixBot
-
-
-
Slide your fingernail or plastic opening tool along the edge of the rear case.
-
Lift the case gently from the base.
-
-
-
Insert a fingernail or plastic opening tool into the small gap between the battery and the phone base.
-
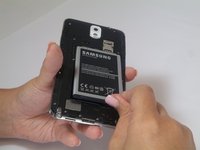
Lift the battery out of its recess.
-
-
-
Place your fingernail in the groove of the stylus pen.
-
Pull the stylus pen away from the phone.
-
-
-
-
Remove the twelve 4mm Phillips #00 screws from the back chassis.
-
-
-
Insert the plastic opening tool into the Stylus Pen placement holder.
-
Lift the plastic opening tool so that the midframe separates from the base.
-
-
Ferramenta utilizada neste passo:Tweezers$4.99
-
Use tweezers to remove both antenna clips.
-
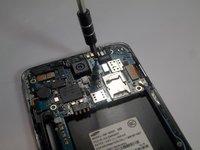
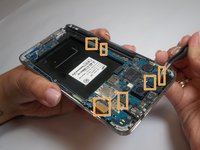
Use a spudger to disconnect six cable connectors.
-
-
-
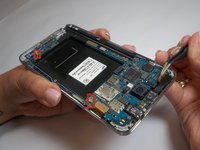
Unclip the camera connecting cable using the plastic opening tool from the motherboard
-
Remove loose camera from base
-


To reassemble your device, follow these instructions in reverse order.
Cancelar: não concluí este guia.
37 outras pessoas executaram este guia.
Equipe

USF Tampa, Team 2-2, Blackwell Fall 2014 Membro de USF Tampa, Team 2-2, Blackwell Fall 2014
USFT-BLACKWELL-F14S2G2
4 Membros
Autoria de 25 guias
3Comentários do guia
Awesome, phone disassembly and fingernail painting at same time :) Thanks for your time to post this!
Hi
Thanks for the nice instructions
Do you know if I can use a Note 4 camera (or any better!) for my Note 3?
Are they different in connections?
Thanks
I shall be very thankfull for this act of kindness