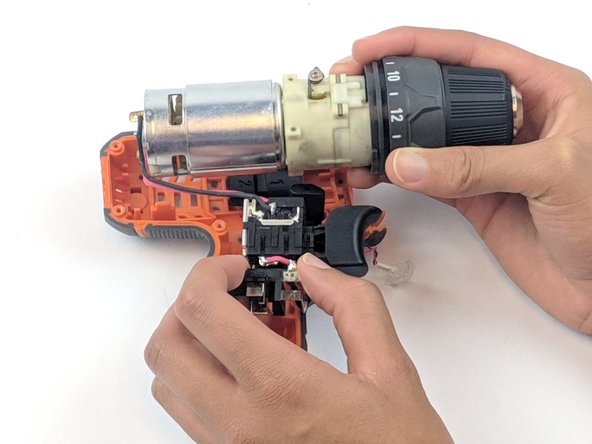
Ir para o conteúdo principal

Ridgid R82005 Trigger Switch Replacement

O que você precisa

  1. Ridgid R82005 Trigger Switch Replacement, Trigger Switch: passo 1, imagem 1 %32
    • Eject the battery from the drill.

    • Unscrew the seven M3x15.3mm screws, with the 2mm hex screwdriver bit, that secures the Housing Assembly.

    • Unscrew the M5x18.5mm screw if belt clip is attached.

  2. Ridgid R82005 Trigger Switch Replacement: passo 2, imagem 1 %32
    • Push the metallic Housing Connecting clip out with flat side of the plastic spudger.

    • Eject battery before attempting this step.

  3. Ridgid R82005 Trigger Switch Replacement: passo 3, imagem 1 %32 Ridgid R82005 Trigger Switch Replacement: passo 3, imagem 2 %32 Ridgid R82005 Trigger Switch Replacement: passo 3, imagem 3 %32
    • Remove the top half of the Housing Assembly.

    • Keep track of where the wires lead from the motor assembly to trigger switch.

    • Remove all internal components.

  4. Ridgid R82005 Trigger Switch Replacement: passo 4, imagem 1 %32 Ridgid R82005 Trigger Switch Replacement: passo 4, imagem 2 %32 Ridgid R82005 Trigger Switch Replacement: passo 4, imagem 3 %32
    • Motor Assembly/Gearbox and Trigger Switch removed from Housing Assembly.

    • Desolder the black wire connected to the motor.

    • Flip Trigger Switch and desolder red wire.

    • To learn how to solder, use our How to Solder and Desolder Connections guide.

Conclusão

To reassemble your device, follow these instructions in reverse order.

2 outras pessoas executaram este guia.

Alex Cominos

Membro desde: 02/14/19

376 Reputação

Autoria de 2 guias

Equipe

USF Tampa, Team S1-G2, Leahy Spring 2019 Membro de USF Tampa, Team S1-G2, Leahy Spring 2019

USFT-LEAHY-S19S1G2

Membros da 4

Autoria de 10 guias

0 comentários

Adicione um comentário

Exibir estatísticas:

Últimas 24 horas: 0

Últimos 7 dias: 0

Últimos 30 dias: 8

Duração total: 398