Introdução
Se o dispositivo não ligar de forma alguma e não responder, siga este guia para realizar a substituição da placa-mãe (PCI) do seu Retroid Pocket 3. Este processo levará aproximadamente 20 a 25 minutos, e as ferramentas necessárias para o projeto estão listadas no guia.
O que você precisa
-
-
Desconecte todos os cabos conectados ao Retroid Pocket 3+.
-
Certifique-se de que o dispositivo esteja com 5 % ou menos de carga, pois uma bateria carregada pode ser perigosa se for perfurada.
 Pergunte ao FixBot
-
-
-
Remova os quatro parafusos de 6 mm da placa traseira do dispositivo com uma chave Torx T5.
-
Use uma ferramenta de abertura de plástico ou espátula para separar cuidadosamente a placa traseira do dispositivo.
-
-
-
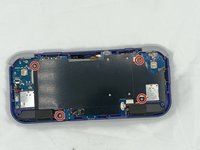
Remova os quatro parafusos de 4,5 mm com uma chave Phillips #00.
-
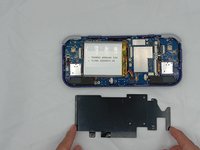
Remova a placa de metal.
-
-
-
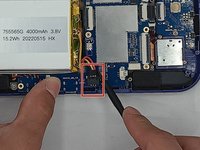
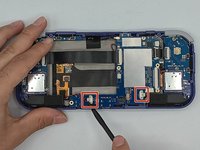
Use uma Ferramenta de abertura de plástico ou espátula para soltar o conector da bateria.
-
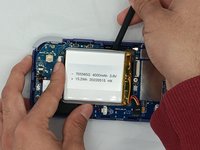
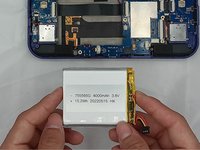
Levante cuidadosamente a bateria da estrutura.
-
Levante e remova a bateria.
-
-
-
-
Remova os três parafusos de 4,5 mm com uma chave Phillips #00 da placa principal.
-
-
-
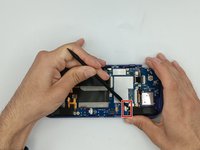
Com uma espátula, coloque a ponta sob o conector da antena e gire para cima para soltar o plugue.
-
-
-
Use uma espátula para desencaixar e remover os dois cabos planos no lado direito.
-
-
-
Use uma espátula para desconectar os dois cabos do alto-falante na parte inferior da placa.
-
-
-
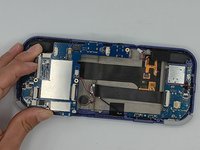
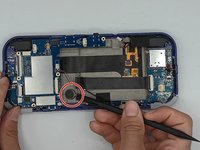
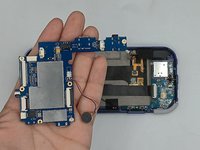
Comece a levantar a placa para ter acesso ao motor de vibração na estrutura metálica.
-
Use uma espátula para soltar cuidadosamente o motor; ele está fixado com fita dupla face.
-
Levante cuidadosamente a placa para fora do dispositivo.
-








Para a remontagem de seu dispositivo, siga estas instruções na ordem inversa.
Cancelar: não concluí este guia.
Uma outra pessoa concluiu este guia.
Um agradecimento especial a esses tradutores:
100%

Translation Bot está nos ajudando a consertar o mundo! Quer contribuir?
Comece a traduzir ›

Equipe

University of North Texas, Team 4-7, Harold Spring 2024 Membro de University of North Texas, Team 4-7, Harold Spring 2024
UNT-HAROLD-S24S4G7
4 Membros
Autoria de 11 guias
