Introdução
If you have NO charge light on the DSL and the battery doesn't charge, the EM10 power supply filter on the motherboard may be faulty.
This guide will allow you to locate, test and replace the filter.
You will find replacement EM10 Filter's on the internet for a few dollars each.
Removing the EM10 and bypassing it may leave the motherboard unprotected against power supply noise. Remove and bypass at own risk!
O que você precisa
-
-
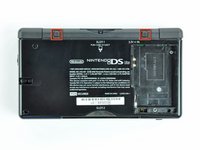
Unscrew the Phillips screw securing the battery cover to the lower case.
-
Pry the battery cover upward with a spudger or fingernail, and lift out of the lower case.
-
-
-
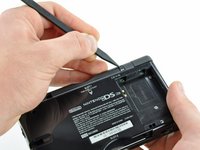
Insert the edge of a spudger in between the lower and upper case near the top right corner of the DS Lite.
-
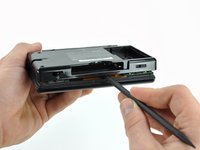
Carefully run the spudger along the right edge of the DS Lite, creating an opening in the process.
-
Continue running the spudger along the backside of the DS Lite until the majority of the lower case has been separated from the upper case.
-
-
-
-
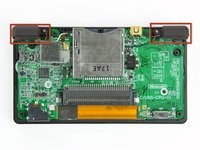
Use the flat edge of a spudger to pry the Wi-Fi antenna connector straight up from its socket on the Wi-Fi board.
-
-
-
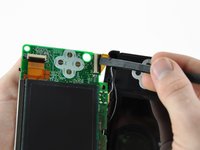
Use the flat edge of a spudger to pry the microphone connector straight up from its socket on the motherboard.
-
-
-
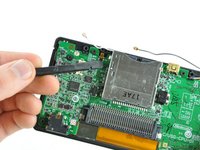
Position the antenna cable with its connector facing up and away from the motherboard using a spudger to hold it down lightly in the gap between chips on the motherboard.
-
Slowly and carefully pull the antenna cable until the cable connector is under the DS Lite game cartridge reader.
-
Continue pulling the cable until the cable connector comes out from under the game cartridge reader on the right side.
-
-
-
Use your fingernail or the flat edge of a spudger to carefully flip up the upper LCD ribbon cable retaining flap.
-
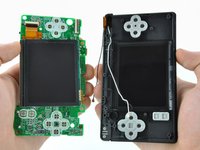
Pull the motherboard away from the DS Lite to separate the upper LCD ribbon cable from its socket on the motherboard.
-
Remove the motherboard from the DS Lite.
-
Now you may open the retaining flap for the lower LCD screen in the same way and separate the lower LCD screen from the motherboard.
-
-
-
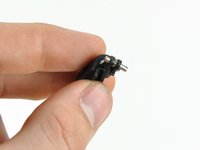
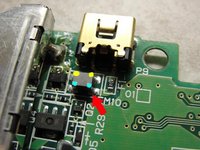
The EM10 charging filter is located next to the power connector on the motherboard.
-
If the filter is missing or obviously broken, move on to STEP 18
-
Use a multimeter to test the EM10 filter - measure the resistance between each of the yellow solder pads, and then between each of the cyan solder pads. If everything is OK you should have close to 0 Ohms between each set of pads. You should NOT have any connection between the cyan pads and yellow pads. If the filter fails either test it needs to be replaced.
-
-
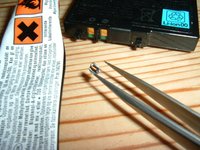
Ferramenta utilizada neste passo:Tweezers$4.99
-
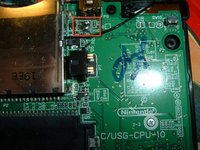
Remove the faulty EM10 filter. Use a soldering iron to melt the solder and gently lift off the filter with tweezers or pliers, being careful not to pull the copper tracks off the motherboard.
-
Solder new EM10 filter into place, ensuring correct orientation. If required, check the new filter with a multimeter to confirm before installing.
-


To reassemble your device, follow these instructions in reverse order.
To reassemble your device, follow these instructions in reverse order.
Cancelar: não concluí este guia.
25 outras pessoas executaram este guia.
16 comentários
you really don't need to remove the wifi board completely, just pop off the cable with a plastic tool or a small flat head even. Getting the cable back under slot one is tricky, and I repair these for a living. Straighten out the cable out first, there are two clear paths back to the other side, parallel to the 2 little twin fuses just at the 7 o'clock of the EM10, and another just above the EM10 itself, again running parallel.
Actually, I have found success by using a conductive pen on Fuse 1 and Fuse 2 and reassembling. Try this before actually taking out a part that belongs there. Watch this video for an easy explanation. It worked for me: https://www.youtube.com/watch?v=502qoZO4...
Why do they even make a filter? Is dumb, also they left it on the bottom where is harder to replace, they should it just had a second smaller battery that would be easy to replace, or something more efficient, more like a strong resistor or something else, also those parts shouldNOT be solder with the board, they should come integrated inside, which is better than javing them solder.
they made it because they didnt know better back then, they also might not of had the tech
Photo140 -
Had a DS Lite with error as described: Console worked fine, but the battery won't charge. No light.
At first i exchanged the battery, then i replaced both fuses F1 and F2, replaced the filter, replaced even the power connector. Still same error.
All not worth the effort :(
Bought a console with broken displays and took mainboard from there. Way less expensive ...