Esta versão pode conter edições incorretas. Mude para o último instantâneo verificado.
O que você precisa
-
Este passo não foi traduzido. Ajude a traduzi-lo
-
Turn the amplifier over onto its side and you will find two Phillips #2 screws holding the main black casing on, on each side of the amplifier. Remove them using the Phillips #2 screwdriver.
-
-
-
Este passo não foi traduzido. Ajude a traduzi-lo
-
Once the main casing is removed, you'll need to remove the back panel. Keep the amplifier on its side and remove the two, Phillips #1 screws holding it on, on both sides of the amplifier.
-
You'll also need to turn the amplifier over, and remove 5 additional, Phillips #1 screws from the back of the amplifier.
-
Leave these screws in, as they aren't required to be removed, in order to take the back panel off.
-
-
Este passo não foi traduzido. Ajude a traduzi-lo
-
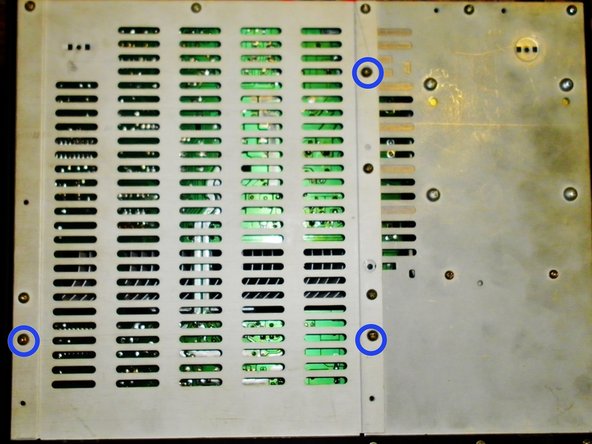
Now, to completely remove the back panel and the left hand back service panel, you'll need to remove 5 Phillips #1 screws.
-
To remove the service panel, you need to remove a further 3, Phillips #1 screws. once you have done this, you can remove the back panel and the service panel.
-
Leave these three screw in as the service panel has larges holes for these three screws and undoing them, undoes the circuit boards stand offs.
-
-
Este passo não foi traduzido. Ajude a traduzi-lo
-
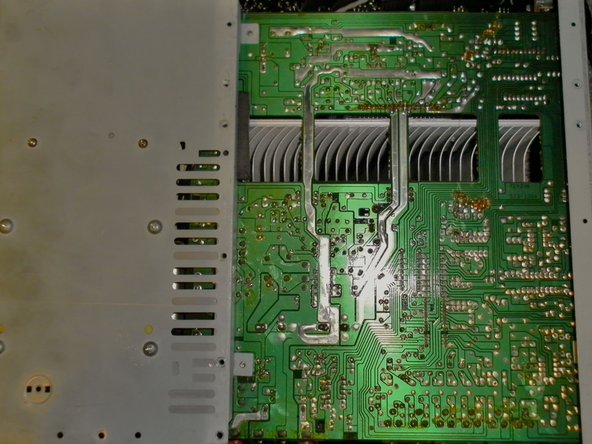
Now to get down to the reflowing. Put the tip of the soldering iron, onto each of the solder joins. When they melt (Aprox. 10 seconds using a 30 Watt soldering iron), add a little extra solder to the molten solder pool.
-
Once you have reflowed the solder joins, reassemble the amplifier and connect the speakers etc, to test if it has worked.
-


Cancelar: não concluí este guia.
8 outras pessoas executaram este guia.

Equipe
